> For the complete documentation index, see [llms.txt](https://onenesss-organization.gitbook.io/jj-xiaoce/llms.txt). Markdown versions of documentation pages are available by appending `.md` to page URLs; this page is available as [Markdown](https://onenesss-organization.gitbook.io/jj-xiaoce/next.js-kai-fa-zhi-nan/42.-shi-zhan-pian-react-notes-guo-ji-hua.md).

# 42. 实战篇 ❘ React Notes ❘ 国际化

### 前言

完成搜索功能后，原 React Notes Demo 的效果已经全部实现，然而这个项目才刚刚开始呢！我们会在这个笔记功能上添加各种需求，帮助大家解决实际开发中会遇到的一些问题。

现在我们的 React Notes 要走向国际化了，国际化最基本的有两件事情要做，一是路由的处理，二是文字的翻译，让我们来看看如何实现吧。

### 技术选项

Next.js 项目实现国际化，有三个目前主流的技术选型：[next-i18next](https://github.com/i18next/next-i18next)、[next-intl](https://github.com/amannn/next-intl)、[next-translate](https://github.com/aralroca/next-translate)，看下它们的 [npm trends](https://npmtrends.com/next-i18next-vs-next-intl-vs-next-translate)：

![image.png](https://p3-juejin.byteimg.com/tos-cn-i-k3u1fbpfcp/916ea891248343069ebe4db04e6bb765~tplv-k3u1fbpfcp-jj-mark:0:0:0:0:q75.image#?w=2704\&h=1542\&s=316065\&e=png\&b=fefefe)

可以看出，目前主要还是在使用 `next-i18next`。如果用的是 Pages Router，一般确实会搭配 `next-i18next`，但 Next.js v13 之后，App Router 带来了全新的开发方式，国际化的实现方式也截然不同了。

在 App Router 下，`next-i18next` 建议不需要再使用 next-i18next，直接使用 [i18next](https://github.com/i18next/i18next) 和 [react-i18next](https://github.com/i18next/react-i18next)。而 `next-intl` 和 `next-translate` 都紧跟 App Router 提出了自己的解决方案。本篇我们会讲解使用 `i18next`、`react-i18next` 和 使用 `next-intl` 两种方式。

### 第一种方式：react-i18next

#### 1. 路由处理

现在让我们参照 [《路由篇 | 国际化》](https://juejin.cn/book/7307859898316881957/section/7308914342949290022)添加路由相关的代码。

在 `app`目录下添加一个名为 `[lng]` 的文件夹，将 `favicon.ico`以外的文件，移动到该文件夹下：

![image.png](https://p3-juejin.byteimg.com/tos-cn-i-k3u1fbpfcp/77941656cbfb4e2cab6496b19857fe1a~tplv-k3u1fbpfcp-jj-mark:0:0:0:0:q75.image#?w=1644\&h=368\&s=114831\&e=png\&b=1d1f21)

在根目录下添加一个 `config.js`文件用于自定义一些全局配置：

```javascript
export const locales = ['zh', 'en']
export const defaultLocale = 'zh'
```

在这个项目中，我们实现中文和英文两种语言，其他语言方法类似。默认是中文。

为了方便导入，我们修改根目录的 `jsconfig.json`设置路径别名：

```json
{
  "compilerOptions": {
    "baseUrl": ".",
    "paths": {
      "@/actions": ["app/[lng]/actions.js"],
      "@/*": ["/*"]
    }
  }
}
```

此时如果要使用 `config.js`中的配置，只用：

```javascript
import { locales, defaultLocale } from '@/config.js'
```

在根目录下添加 `middleware.js`文件：

```javascript
// middleware.js
import { match } from '@formatjs/intl-localematcher'
import Negotiator from 'negotiator'
import { locales, defaultLocale } from '@/config.js'

function getLocale(request) { 
  const headers = { 'accept-language': request.headers.get('accept-language') || '' };
  // 这里不能直接传入 request，有更简单的写法欢迎评论留言
  const languages = new Negotiator({ headers }).languages();

  return match(languages, locales, defaultLocale)
 }
 
export function middleware(request) {
  const { pathname } = request.nextUrl
  // 判断请求路径中是否已存在语言，已存在语言则跳过
  const pathnameHasLocale = locales.some(
    (locale) => pathname.startsWith(`/${locale}/`) || pathname === `/${locale}`
  )
 
  if (pathnameHasLocale) return
 
  // 获取匹配的 locale
  const locale = getLocale(request)
  request.nextUrl.pathname = `/${locale}${pathname}`
  // 重定向，如 /products 重定向到 /en-US/products
  return Response.redirect(request.nextUrl)
}
 
export const config = {
  matcher: ['/((?!api|_next/static|_next/image|favicon.ico).*)'],
}

```

安装相应的库：

```bash
npm i @formatjs/intl-localematcher negotiator
```

因为移动了路径，此时可能会出现报错：

![image.png](https://p3-juejin.byteimg.com/tos-cn-i-k3u1fbpfcp/d35cfe077e8f4c3999885d65c6db012b~tplv-k3u1fbpfcp-jj-mark:0:0:0:0:q75.image#?w=1176\&h=472\&s=121902\&e=png\&b=111111)

因为我们刚才已经顺便配置了 `actions` 的路径别名，修改 `components/NoteEditor.js`的代码为：

```javascript
// 修改前
import { deleteNote, saveNote } from '../app/actions'
// 修改后
import { deleteNote, saveNote } from '@/actions'
```

此时代码已经可以正常运行，访问 `http://localhost:3000/`会重定向到 `http://localhost:3000/zh`：

![image.png](https://p3-juejin.byteimg.com/tos-cn-i-k3u1fbpfcp/93f1464db3474b9895aa07b2eba5dbbb~tplv-k3u1fbpfcp-jj-mark:0:0:0:0:q75.image#?w=2342\&h=1256\&s=185088\&e=png\&b=f5f6f9)

**1.1. 切换不同的语言**

`middleware.js` 中的代码是根据浏览器的首选项设置来判断当前页面所用语言的，所以要测试不同的语言，我们在浏览器中打开 `chrome://settings/languages`，添加语言：

![image.png](https://p3-juejin.byteimg.com/tos-cn-i-k3u1fbpfcp/24fbcb954f3c43b28c1f602e45c9550b~tplv-k3u1fbpfcp-jj-mark:0:0:0:0:q75.image#?w=1420\&h=578\&s=67421\&e=png\&b=27282b)

在顶部的语言即为首选语言，如果要测试英文，就将英文移动到顶部。

**1.2. public 图片的处理**

此时我们发现，所有的图片都加载失败了。以左上角的 React 图标 `logo.svg` 为例，图片的请求地址原本为 `http://localhost:3000/logo.svg`：

![image.png](https://p3-juejin.byteimg.com/tos-cn-i-k3u1fbpfcp/70d74f423c6d4db0a0bdd4552816ee5f~tplv-k3u1fbpfcp-jj-mark:0:0:0:0:q75.image#?w=1560\&h=402\&s=109380\&e=png\&b=2c2c2c)

因为中间件，重定向为 `http://localhost:3000/zh/logo.svg`：

![image.png](https://p3-juejin.byteimg.com/tos-cn-i-k3u1fbpfcp/65c66b476e664f10932b24ab69e55b44~tplv-k3u1fbpfcp-jj-mark:0:0:0:0:q75.image#?w=1544\&h=400\&s=109577\&e=png\&b=2b2b2b)

一种解决方法是在 `public`建立一个 `zh`文件夹，把图片都放到该文件夹下。不过这样每种语言都要建一个文件夹，图片也要重复拷贝一份，这就造成了没必要的重复。

一种解决方法是在中间件中判断，如果是 `public` 下的图片就不重定向，那怎么判断呢？

Next.js 的[官方示例代码](https://github.com/vercel/next.js/blob/canary/examples/app-dir-i18n-routing/middleware.ts)是让我们手动进行判断：

```javascript
export function middleware(request) {
  const { pathname } = request.nextUrl

  if (
    [
      '/manifest.json',
      '/favicon.ico',
      // Your other files in `public`
    ].includes(pathname)
  )
    return

  // ...
}
```

如果每张图片都要在代码中声明一遍，略微有些繁琐，也可以用正则判断来实现：

```javascript
import { match } from '@formatjs/intl-localematcher'
import Negotiator from 'negotiator'
import { NextResponse } from 'next/server'
import { locales, defaultLocale } from '@/config.js'

const publicFile = /\.(.*)$/

function getLocale(request) { 
  const headers = { 'accept-language': request.headers.get('accept-language') || '' };
  // 这里不能直接传入 request，有更简单的写法欢迎评论留言
  const languages = new Negotiator({ headers }).languages();

  return match(languages, locales, defaultLocale)
 }
 
export function middleware(request) {
  const { pathname } = request.nextUrl
  // 判断请求路径中是否已存在语言，已存在语言则跳过
  const pathnameHasLocale = locales.some(
    (locale) => pathname.startsWith(`/${locale}/`) || pathname === `/${locale}`
  )

  if (pathnameHasLocale) return

  // 如果是 public 文件，不重定向
  if (publicFile.test(pathname)) return
 
  // 获取匹配的 locale
  const locale = getLocale(request)
  request.nextUrl.pathname = `/${locale}${pathname}`
  // 重定向，如 /products 重定向到 /en-US/products
  return Response.redirect(request.nextUrl)
}
 
export const config = {
  matcher: ['/((?!api|_next/static|_next/image|favicon.ico).*)'],
}

```

在这段代码中，我们判断如果路径名以 `.xxx`结尾就视为在 `public` 中，因为我们常放在 `public` 下的就是各种图片文件，正好符合这种格式。

那如果个别图片就是需要根据语言自定义呢？比如《疯狂动物城》这部动漫中，电视节目主持人在不同的国家是不同的动物形象，中国是熊猫、澳大利亚是考拉、法国是驼鹿等，有的时候就是需要自定义：

![image.png](https://p9-juejin.byteimg.com/tos-cn-i-k3u1fbpfcp/d5732405e3f94cdb9230e661b06f4cb6~tplv-k3u1fbpfcp-jj-mark:0:0:0:0:q75.image#?w=950\&h=338\&s=485476\&e=png\&b=f2e3dd) 我们可以建立一个特别处理的图片白名单 `excludeFile`：

```javascript
import { match } from '@formatjs/intl-localematcher'
import Negotiator from 'negotiator'
import { NextResponse } from 'next/server'
import { locales, defaultLocale } from '@/config.js'

const publicFile = /\.(.*)$/
const excludeFile = ['logo.svg']

function getLocale(request) { 
  const headers = { 'accept-language': request.headers.get('accept-language') || '' };
  // 这里不能直接传入 request，有更简单的写法欢迎评论留言
  const languages = new Negotiator({ headers }).languages();

  return match(languages, locales, defaultLocale)
 }
 
export function middleware(request) {
  const { pathname } = request.nextUrl
  // 判断请求路径中是否已存在语言，已存在语言则跳过
  const pathnameHasLocale = locales.some(
    (locale) => pathname.startsWith(`/${locale}/`) || pathname === `/${locale}`
  )

  if (pathnameHasLocale) return

  // 如果是 public 文件，不重定向
  if (publicFile.test(pathname) && excludeFile.indexOf(pathname.substr(1)) == -1) return
 
  // 获取匹配的 locale
  const locale = getLocale(request)
  request.nextUrl.pathname = `/${locale}${pathname}`
  // 重定向，如 /products 重定向到 /en-US/products
  return Response.redirect(request.nextUrl)
}
 
export const config = {
  matcher: ['/((?!api|_next/static|_next/image|favicon.ico).*)'],
}

```

在这个例子中，我们将为 `logo.svg` 这张图片根据不同的语言设置不同的图片。

现在在我们 `public` 下建立一个 `en`文件夹和一个 `zh` 文件夹，然后将 `logo.svg` 复制到两个文件夹下，因为是 `svg`，所以我们可以直接编辑代码，替换其中的色值，比如 `zh` 下的 `logo.svg` 代码中的色值为 `#61dafb`（蓝色），`en` 下的 `logo.svg` 代码中的色值为 `#E53935`（红色）。

现在我们访问 `http://localhost:3000`，此时会重定向到 `http://localhost:3000/zh`：

![image.png](https://p3-juejin.byteimg.com/tos-cn-i-k3u1fbpfcp/c1d145d81b4f47f6b03f52e86dff3a87~tplv-k3u1fbpfcp-jj-mark:0:0:0:0:q75.image#?w=678\&h=248\&s=27016\&e=png\&b=fefefe)

现在访问 `http://localhost:3000/en`，结果还是：

![image.png](https://p3-juejin.byteimg.com/tos-cn-i-k3u1fbpfcp/2d8f1298930f44ffb44fd00c32b7ff43~tplv-k3u1fbpfcp-jj-mark:0:0:0:0:q75.image#?w=830\&h=408\&s=44475\&e=png\&b=fefefe)

这是因为中间件中的 `getLocale` 的实现是根据浏览器的首选设置来判断的，当访问 `http://localhost:3000/logo.svg`的时候，此时会自动获取 locale，因为浏览器的首选语言设置还是中文，所以获取的结果还是 `zh`，于是重定向到 `http://localhost:3000/zh/logo.svg`。

只有在语言设置界面，将英语移动到顶部，访问 `http://localhost:3000`，重定向到 `http://localhost:3000/en`，此时才会显示红色的 logo：

![image.png](https://p3-juejin.byteimg.com/tos-cn-i-k3u1fbpfcp/dcfff528b3f847b5bad083a15f1795b1~tplv-k3u1fbpfcp-jj-mark:0:0:0:0:q75.image#?w=694\&h=256\&s=27816\&e=png\&b=fefefe)

**1.3. 默认语言不重定向**

假如产品主要是在国内，少部分在国外，希望中文访问的时候，不发生重定向，该怎么实现呢？我们可以判断一下当是默认语言的时候，重定向改为重写：

```javascript
import { NextResponse } from 'next/server'

export function middleware(request) {
  // ...
  const locale = getLocale(request)
  request.nextUrl.pathname = `/${locale}${pathname}`
  // 默认语言不重定向
  if (locale == defaultLocale) {
    return NextResponse.rewrite(request.nextUrl)
  }
  // 重定向，如 /products 重定向到 /en-US/products
  return Response.redirect(request.nextUrl)
}
```

**1.4. 布局设置默认语言**

目前我们根布局中的 `html` 的 `lang` 设置的还是 `en`，现在我们改为根据动态参数来设置 `lang` 属性：

```javascript
// app/[lng]/layout.js
import './style.css'
import Sidebar from '@/components/Sidebar'

export default async function RootLayout({
  children,
  params: {
    lng
  }
}) {

  return (
    <html lang={lng}>
      <body>
        <div className="container">
          <div className="main">
            <Sidebar />
            <section className="col note-viewer">{children}</section>
          </div>
        </div>
      </body>
    </html>
  )
}

```

除了布局，页面 `page.js` 也可以获取动态参数：

```javascript
// app/[lng]/page.js
export default async function Page({ params: { lng } }) {
  return (
    <div className="note--empty-state">
      <span className="note-text--empty-state">
        Click a {lng} note on the left to view something! 🥺
      </span>
    </div>
  )
}

```

**1.5. 生成静态路由**

`generateStaticParams` 和动态路由一起使用，用于在构建时静态生成路由：

```javascript
// app/[lng]/layout.js
import './style.css'
import Sidebar from '@/components/Sidebar'
import { locales } from '@/config.js'

export async function generateStaticParams() {
  return locales.map((lng) => ({ lng }))
}

export default async function RootLayout({
  children,
  params: {
    lng
  }
}) {

  return (
    <html lang={lng}>
      <body>
        <div className="container">
          <div className="main">
            <Sidebar />
            <section className="col note-viewer">{children}</section>
          </div>
        </div>
      </body>
    </html>
  )
}

```

#### 2. 文字的翻译

虽然文字的翻译实现，我们也可以参照 [《路由篇 | 国际化》](https://juejin.cn/book/7307859898316881957/section/7308914342949290022)中的介绍手动实现字典功能，但当项目复杂时，更适合使用 `i18next` 这样的库帮助我们开发。

**2.1. i18next**

`i18next` 是一个用 JavaScript 编写的国际化框架，它实现的最主要的功能是字典翻译，最基本的一个例子：

```javascript
import i18next from 'i18next';

i18next.init({
  lng: 'en', 
  resources: {
    en: {
      translation: {
        "hello": "hello world"
      }
    },
    zh: {
      translation: {
        "hello": "你好"
      }
    }
  }
});

// 你好
console.log(i18next.t('hello', {lng: 'zh'}))
```

`i18next` 支持命名空间，这意味着原本需要将所有翻译内容写在一起的文件可以拆分成多个小文件，比如按页面进行拆分，基本使用方式如下：

```javascript
import i18next from 'i18next';

i18next.init({
  lng: 'en', 
  resources: {
    en: {
      translation: {
        "hello": "hello world"
      },
      profilePage: {
      	"save": "save"	
      }
    },
    zh: {
      translation: {
        "hello": "你好"
      },
      profilePage: {
        "save": "保存"
      }
    }
  }
});

// 保存
console.log(i18next.t('save', {lng: 'zh', ns: 'profilePage'}))
```

其中，`ns` 是命名空间 `namespace` 的缩写。

好了，i18next 就讲这些我们会用到的，更多内容欢迎参考 [i18next 文档](https://www.i18next.com/)。

**2.2. react-i18next**

`react-i18next` 是 `i18next` 的一个插件，为了方便在 React 中使用。示意用法如下：

```javascript
import React from "react";
import i18n from "i18next";
import { useTranslation, initReactI18next } from "react-i18next";

i18n
  .use(initReactI18next)
  .init({
    resources: {
      en: {
        translation: {
          "Welcome to React": "Welcome to React and react-i18next"
        }
      }
    },
    lng: "en",
    fallbackLng: "en",
  });

// 使用
function App() {
  const { t } = useTranslation();
  return <h2>{t('Welcome to React')}</h2>;
}
```

此外我们还会用到：

[i18next-resources-to-backend](https://github.com/i18next/i18next-resources-to-backend)，因为将翻译内容定义在 JS 文件中并不方便，定义在多个 json 文件中更为合适，i18next-resources-to-backend 帮助我们读取 json 文件资源，生成字典。

[i18next-browser-languageDetector](https://github.com/i18next/i18next-browser-languageDetector)，在浏览器端自动检测语言

**2.3. 服务端组件使用**

现在让我们来实现文字的翻译功能。安装会用到的库：

```bash
npm i i18next i18next-resources-to-backend react-i18next
```

创建 `app/i18n/index.js`文件，代码如下：

```javascript
import { createInstance } from 'i18next'
import resourcesToBackend from 'i18next-resources-to-backend'
import { initReactI18next } from 'react-i18next/initReactI18next'
import { locales, defaultLocale } from '@/config.js'

const initI18next = async (lng = defaultLocale, ns = 'basic') => {
  const i18nInstance = createInstance()
  await i18nInstance
    .use(initReactI18next)
    .use(resourcesToBackend((language, namespace) => import(`./locales/${language}/${namespace}.json`)))
    .init({
      // debug: true,
      supportedLngs: locales,
      fallbackLng: defaultLocale,
      lng,
      fallbackNS: 'basic',
      defaultNS: 'basic',
      ns
    })
  return i18nInstance
}

export async function useTranslation(lng, ns, options = {}) {
  const i18nextInstance = await initI18next(lng, ns)
  return {
    t: i18nextInstance.getFixedT(lng, Array.isArray(ns) ? ns[0] : ns, options.keyPrefix),
    i18n: i18nextInstance
  }
}
```

准备翻译文件：

```markdown
app                      
└─ i18n                  
   ├─ locales            
   │  ├─ en              
   │  │  └─ basic.json  
   │  └─ zh              
   │     └─ basic.json        
   └─ index.js                  
```

这里文件之所以叫 `basic.json`，是因为我们在 `init` 的时候传入的 `defaultNS` 是 `basic`，你可以随意命名，但要保持一致。

`en/basic.json`代码如下：

```javascript
{
  "new": "new",
  "initText": "Click a note on the left to view something! 🥺",
  "search": "search"
}
```

`zh/basic.json`代码如下：

```javascript
{
  "new": "新建",
  "initText": "点击左侧笔记查阅内容 🥺",
  "search": "搜索"
}
```

现在让我们开始应用，修改 `app/[lng]/page.js`：

```javascript
import { useTranslation } from "@/app/i18n/index.js"

export default async function Page({ params: { lng } }) {
  const { t } = await useTranslation(lng)
  return (
    <div className="note--empty-state">
      <span className="note-text--empty-state">
        {t('initText')}
      </span>
    </div>
  )
}

```

此时页面已经可以正常运行，访问 `http://localhost:3000/`：

![image.png](https://p3-juejin.byteimg.com/tos-cn-i-k3u1fbpfcp/0043fa6cf6154c99ae8971e3b8a3c4e2~tplv-k3u1fbpfcp-jj-mark:0:0:0:0:q75.image#?w=2070\&h=1084\&s=164055\&e=png\&b=f5f6f9)

将首选语言设置为英文，访问 `http://localhost:3000/`：

![image.png](https://p3-juejin.byteimg.com/tos-cn-i-k3u1fbpfcp/abd118bc5b354466b55727406491bbb2~tplv-k3u1fbpfcp-jj-mark:0:0:0:0:q75.image#?w=2150\&h=1086\&s=175777\&e=png\&b=f5f6f9)

刚才修改的是页面，如果要修改组件中的文字怎么办？

将 `lng` 属性通过 props 传给组件即可。比如我们修改新建笔记的 `NEW` 按钮：

修改 `app/[lng]/layout.js`：

```javascript
import './style.css'
import Sidebar from '@/components/Sidebar'
import { locales } from '@/config.js'

export async function generateStaticParams() {
  return locales.map((lng) => ({ lng }))
}

export default async function RootLayout({
  children,
  params: {
    lng
  }
}) {
  return (
    <html lang={lng}>
      <body>
        <div className="container">
          <div className="main">
            <Sidebar lng={lng} />
            <section className="col note-viewer">{children}</section>
          </div>
        </div>
      </body>
    </html>
  )
}

```

修改 `/components/Sidebar.js`：

```jsx
import React, { Suspense } from 'react'
import Link from 'next/link'
import SidebarSearchField from '@/components/SidebarSearchField';
import SidebarNoteList from '@/components/SidebarNoteList';
import EditButton from '@/components/EditButton';
import NoteListSkeleton from '@/components/NoteListSkeleton';
import { useTranslation } from "@/app/i18n/index.js"

export default async function Sidebar({lng}) {
  const { t } = await useTranslation(lng)
  return (
    <>
      <section className="col sidebar">
        <Link href={'/'} className="link--unstyled">
          <section className="sidebar-header">
            <img
              className="logo"
              src="/logo.svg"
              width="22px"
              height="20px"
              alt=""
              role="presentation"
              />
            <strong>React Notes</strong>
          </section>
        </Link>
        <section className="sidebar-menu" role="menubar">
          <SidebarSearchField lng={lng} />
          <EditButton noteId={null}>{t('new')}</EditButton>
        </section>
        <nav>
          <Suspense fallback={<NoteListSkeleton />}>
            <SidebarNoteList />
          </Suspense>
        </nav>
      </section>
    </>
  )
}

```

此时效果如下：

![image.png](https://p3-juejin.byteimg.com/tos-cn-i-k3u1fbpfcp/5dda15bbf8a84fc5a33791ee3d3306f4~tplv-k3u1fbpfcp-jj-mark:0:0:0:0:q75.image#?w=1974\&h=1192\&s=172209\&e=png\&b=f5f6f9)

可以看到，因为文字改为了 “新建”，导致样式发生了变化，这其实就是本地化中常遇到的问题。

一种解决方案是设计通用的样式，保持不同的文字样式一致。一种是根据不同的语言单独定义样式，比如我们可以为 button 添加一个 `edit-button-${lng}` 类名，然后设置单独的样式。又或者我们干脆改为使用更为通用的图标来实现，比如语雀的添加按钮就是一个 `+` 号：

![image.png](https://p3-juejin.byteimg.com/tos-cn-i-k3u1fbpfcp/1f636b0df33b429f89539483bbb2f6eb~tplv-k3u1fbpfcp-jj-mark:0:0:0:0:q75.image#?w=906\&h=100\&s=11551\&e=png\&b=f4f5f5)

这里为了简单解决这个问题，中文的时候我们不使用“新建” 这个词，而改为使用 `+`：

![image.png](https://p3-juejin.byteimg.com/tos-cn-i-k3u1fbpfcp/b99b1f15b3964060ba6a1e512473b5a7~tplv-k3u1fbpfcp-jj-mark:0:0:0:0:q75.image#?w=2044\&h=1090\&s=161667\&e=png\&b=f5f6f9)

此外，因为在服务端组件中使用，翻译的内容会直接打包到 HTML 中，所以翻译文件并不会影响文件大小：

![截屏2023-12-29 下午5.55.49.png](https://p3-juejin.byteimg.com/tos-cn-i-k3u1fbpfcp/e45c2b75997b45f6a2d4d7e161967dc4~tplv-k3u1fbpfcp-jj-mark:0:0:0:0:q75.image#?w=3664\&h=1124\&s=496499\&e=png\&b=2b2b2b)

**2.4. 语言切换器**

现在让我们实现一个语言切换器，加深理解。

新建一个 `/components/Footer.js`，代码如下：

```javascript
import Link from 'next/link'
import { Trans } from 'react-i18next/TransWithoutContext'
import { locales } from '@/config.js'
import { useTranslation } from "@/app/i18n/index.js"

export const Footer = async ({ lng }) => {
  const { t } = await useTranslation(lng, 'footer')
  return (
    <footer style={{ margin: 20 }}>
      <Trans i18nKey="languageSwitcher" t={t}>
        Switch from <strong>{{lng}}</strong> to:{' '}
      </Trans>
      {locales.filter((l) => lng !== l).map((l, index) => {
        return (
          <span key={l}>
            {index > 0 && (' | ')}
            <Link href={`/${l}`}>
              {l}
            </Link>
          </span>
        )
      })}
    </footer>
  )
}
```

修改 `app/[lng]/layout.js`，引入该 Footer 组件：

```javascript
import './style.css'
import Sidebar from '@/components/Sidebar'
import { locales } from '@/config.js'
import { Footer } from '@/components/Footer'

export async function generateStaticParams() {
  return locales.map((lng) => ({ lng }))
}

export default async function RootLayout({
  children,
  params: {
    lng
  }
}) {
  return (
    <html lang={lng}>
      <body>
        <div className="container">
          <div className="main">
            <Sidebar lng={lng} />
            <section className="col note-viewer">{children}</section>
          </div>
          <Footer lng={lng} />
        </div>
      </body>
    </html>
  )
}

```

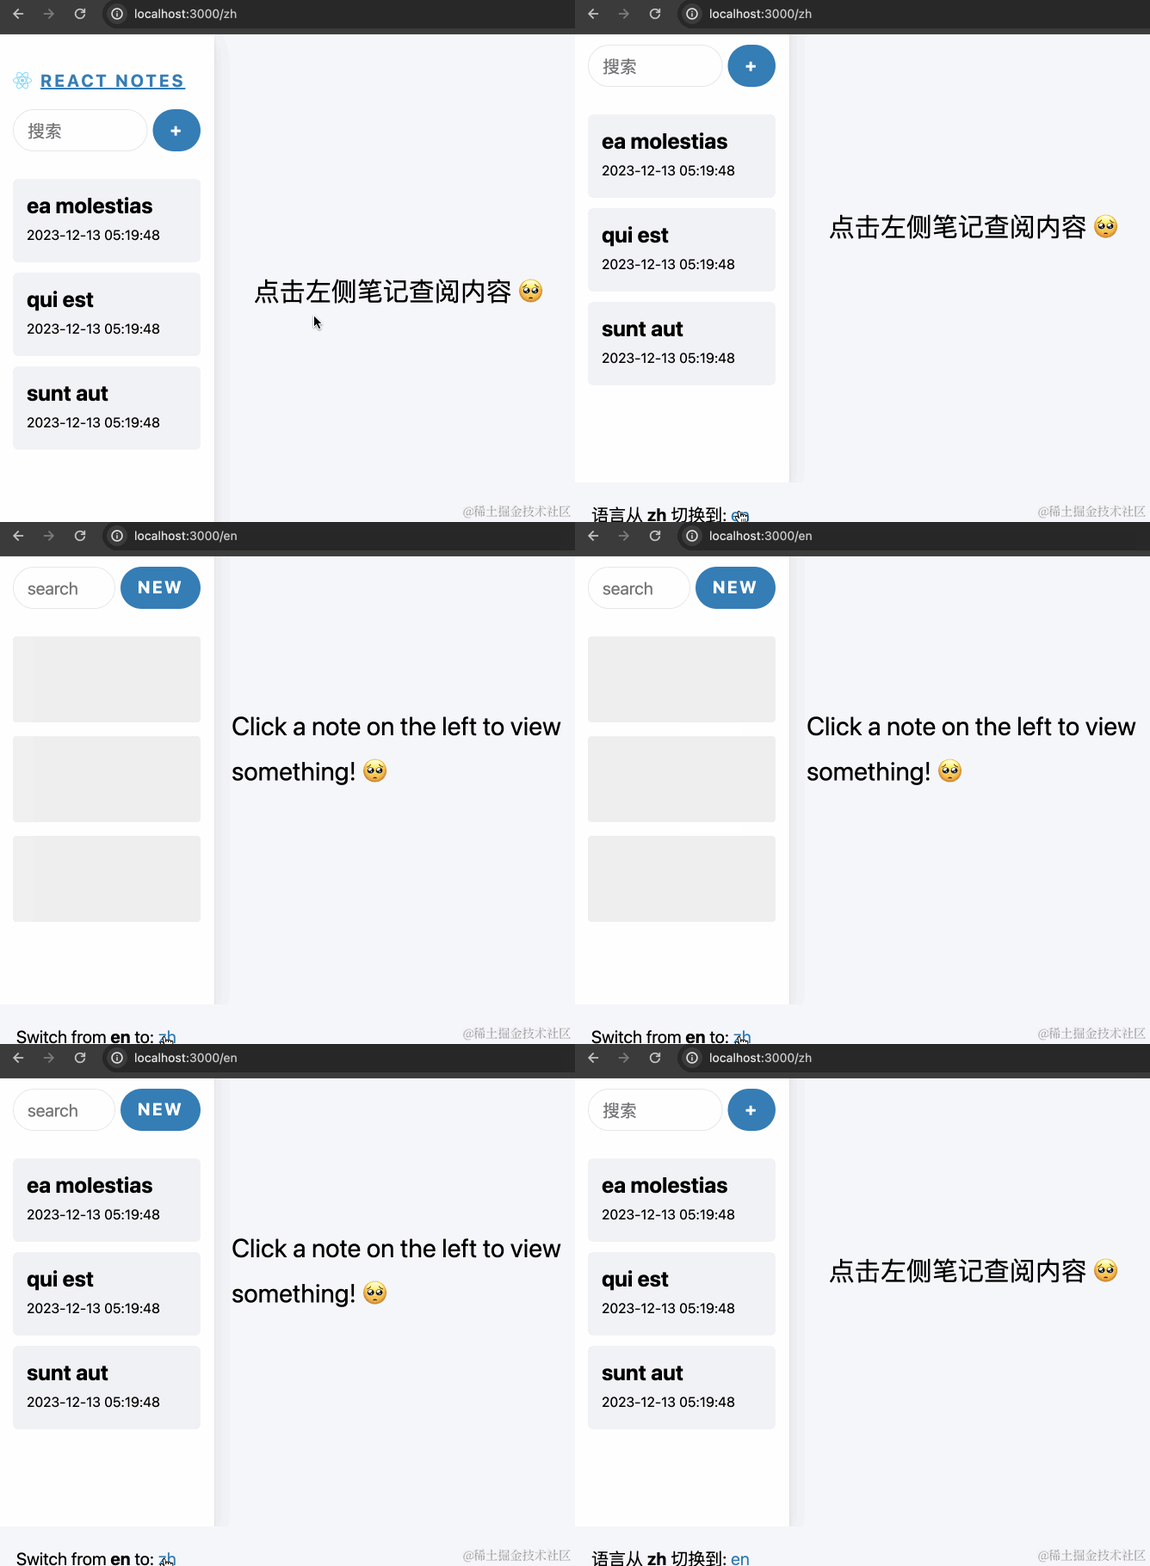
Footer 本身的内容需要做翻译，我们为其单独新建一个 json 翻译文件（其实也可以不建立，这里是为了演示拆分为多个 json 的场景）：

```javascript
i18n                  
├─ locales            
│  ├─ en              
│  │  ├─ basic.json   
│  │  └─ footer.json  
│  └─ zh              
│     ├─ basic.json   
│     └─ footer.json        
└─ index.js           

```

`en/basic.json`代码如下：

```javascript
{
  "languageSwitcher": "Switch from <1>{{lng}}</1> to: "
}
```

`zh/basic.json`代码如下：

```javascript
{
  "languageSwitcher": "语言从 <1>{{lng}}</1> 切换到: "
}
```

其中 `<1>{{lng}}</1>` 这样的写法看起来有些奇怪，其实都是 `react-i18next` 的用法，具体参考 [Trans 组件文档](https://react.i18next.com/latest/trans-component)。

此时效果如下：

![ReactNotes-语言切换器.gif](https://p3-juejin.byteimg.com/tos-cn-i-k3u1fbpfcp/9c8804eb3359417fb0ff6a1127fc3285~tplv-k3u1fbpfcp-jj-mark:0:0:0:0:q75.image#?w=747\&h=550\&s=245828\&e=gif\&f=36\&b=f3f5f8)

**2.5. 客户端组件使用**

如果要在客户端组件中怎么使用呢？之前讲过，客户端组件不支持 `async`，所以我们不能像在服务端组件中这样使用：

```javascript
import { useTranslation } from "@/app/i18n/index.js"

export const Footer = async ({ lng }) => {
  const { t } = await useTranslation(lng, 'footer')
  return // ...
}
```

所以我们需要一些调整，现在我们新建一个 `app/i18n/client.js`，代码如下：

```javascript
'use client'

import { useEffect, useState } from 'react'
import i18next from 'i18next'
import { initReactI18next, useTranslation as useTranslationOrg } from 'react-i18next'
import { useCookies } from 'react-cookie'
import resourcesToBackend from 'i18next-resources-to-backend'
import LanguageDetector from 'i18next-browser-languagedetector'
import { locales, defaultLocale } from '@/config.js'
export const cookieName = 'i18next'

const runsOnServerSide = typeof window === 'undefined'

i18next
  .use(initReactI18next)
  .use(LanguageDetector)
  .use(resourcesToBackend((language, namespace) => import(`./locales/${language}/${namespace}.json`)))
  .init({
    supportedLngs: locales,
    fallbackLng: defaultLocale,
    lng: defaultLocale,
    fallbackNS: 'basic',
    defaultNS: 'basic',
    ns: 'basic',
    lng: undefined,
    detection: {
      order: ['path', 'htmlTag', 'cookie', 'navigator'],
    },
    preload: runsOnServerSide ? locales : []
  })

export function useTranslation(lng, ns, options) {
  const [cookies, setCookie] = useCookies([cookieName])
  const ret = useTranslationOrg(ns, options)
  const { i18n } = ret
  if (runsOnServerSide && lng && i18n.resolvedLanguage !== lng) {
    i18n.changeLanguage(lng)
  } else {
    const [activeLng, setActiveLng] = useState(i18n.resolvedLanguage)
    useEffect(() => {
      if (activeLng === i18n.resolvedLanguage) return
      setActiveLng(i18n.resolvedLanguage)
    }, [activeLng, i18n.resolvedLanguage])
    useEffect(() => {
      if (!lng || i18n.resolvedLanguage === lng) return
      i18n.changeLanguage(lng)
    }, [lng, i18n])
    useEffect(() => {
      if (cookies.i18next === lng) return
      setCookie(cookieName, lng, { path: '/' })
    }, [lng, cookies.i18next])
  }
  return ret
}
```

安装用到的库：

```javascript
npm i react-cookie i18next-browser-languagedetector
```

现在我们修改下 `/components/SidebarSearchField.js`这个组件（这是个客户端组件）：

```javascript
'use client';

//...
import { useTranslation } from "@/app/i18n/client.js"

export default function SidebarSearchField({lng}) {
  const { t } = useTranslation(lng, 'basic')
  // ...

  return (
    <div className="search" role="search">
    	// ...
      <input
        id="sidebar-search-input"
        placeholder={t('search')}
        type="text"
      // ...
    </div>
  );
}
```

此时效果如下：

![ReactNotes-语言切换器带搜索.gif](https://p3-juejin.byteimg.com/tos-cn-i-k3u1fbpfcp/6c719a6d97bf4cee8155084d0ae5cb6d~tplv-k3u1fbpfcp-jj-mark:0:0:0:0:q75.image#?w=668\&h=607\&s=217126\&e=gif\&f=29\&b=f3f5f8)

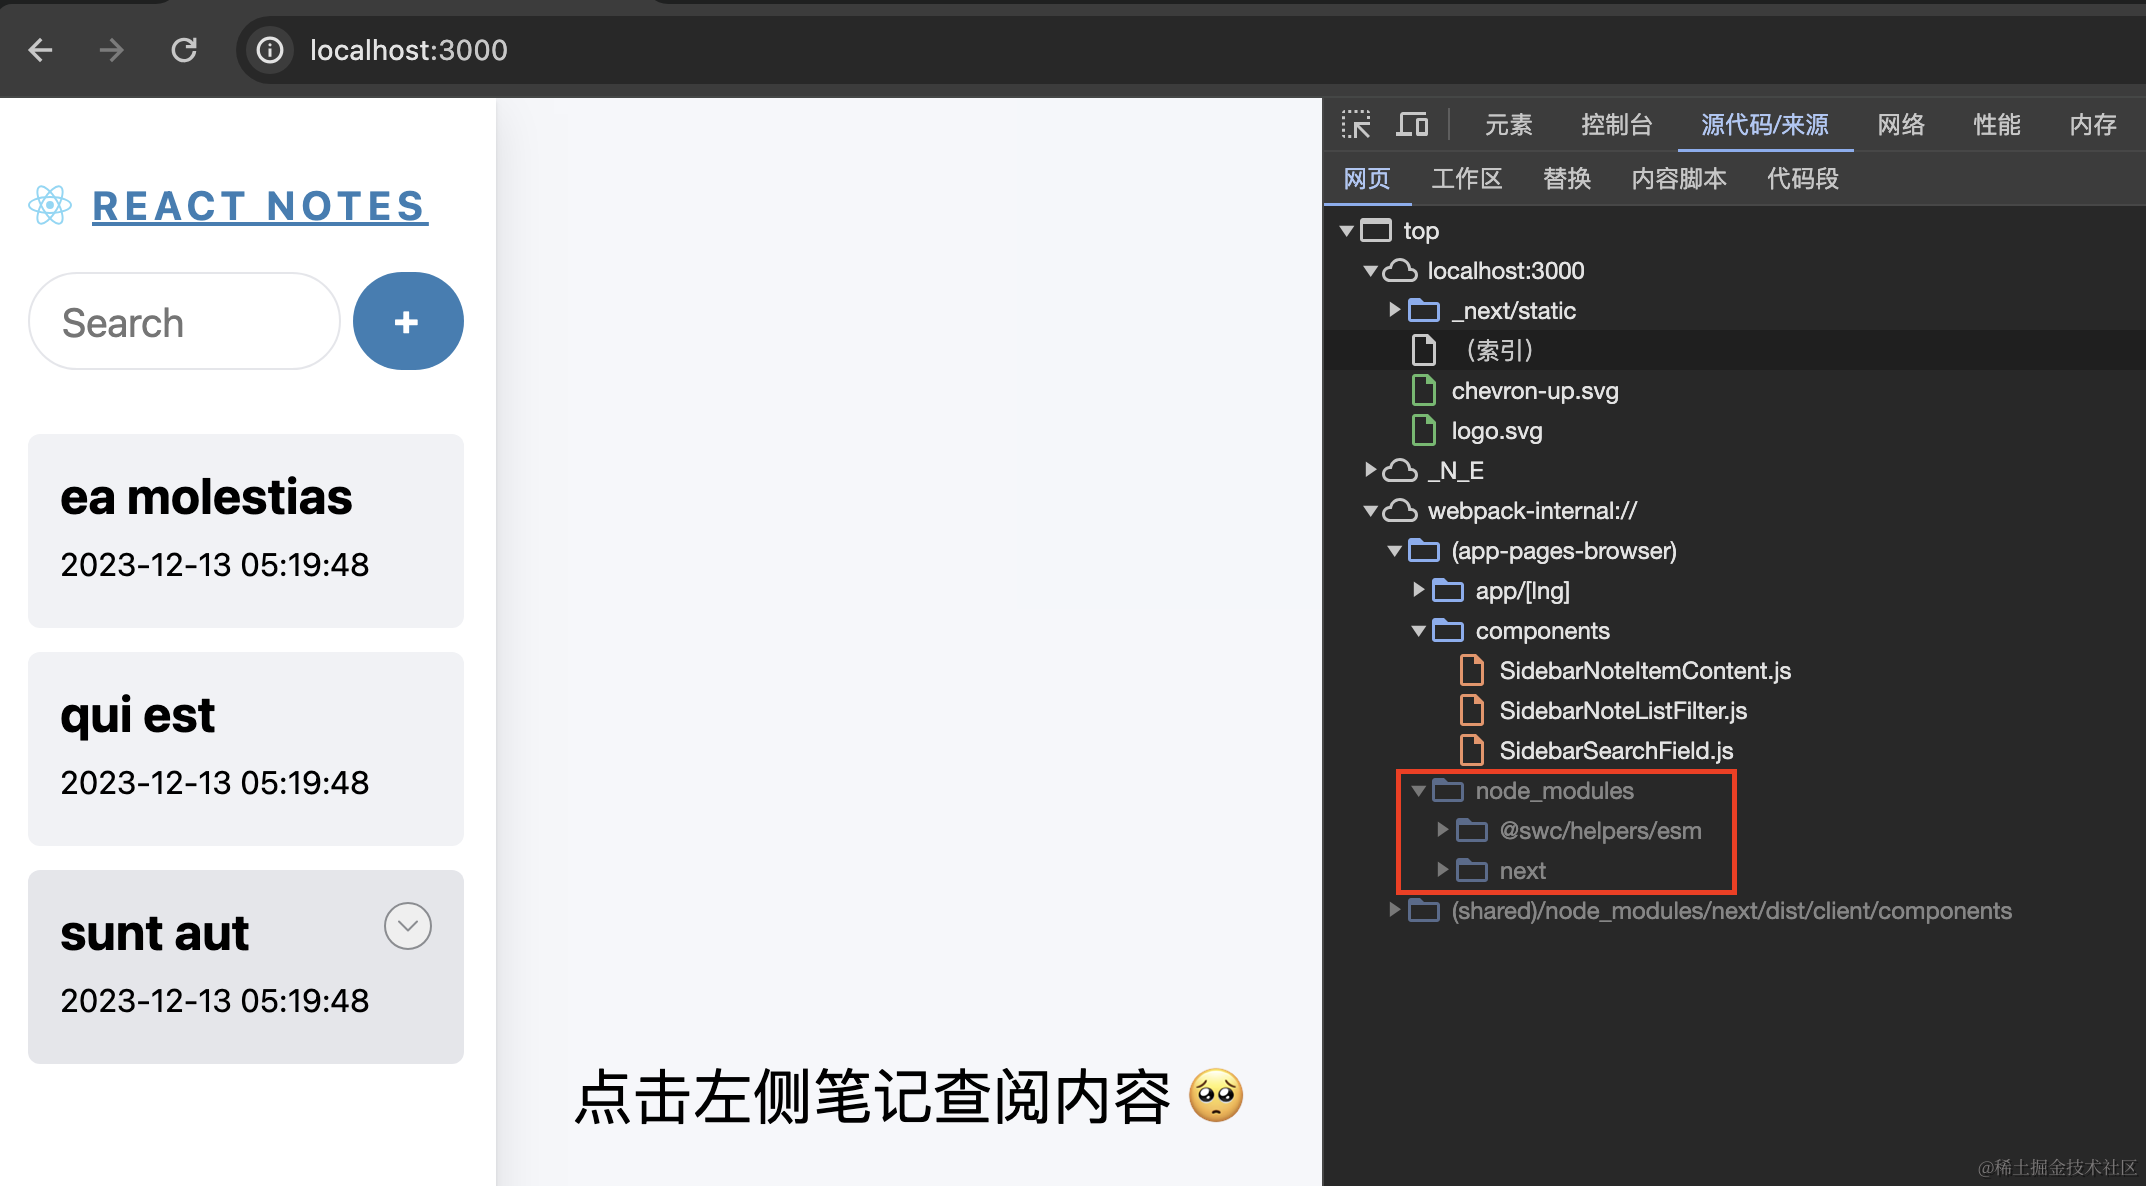
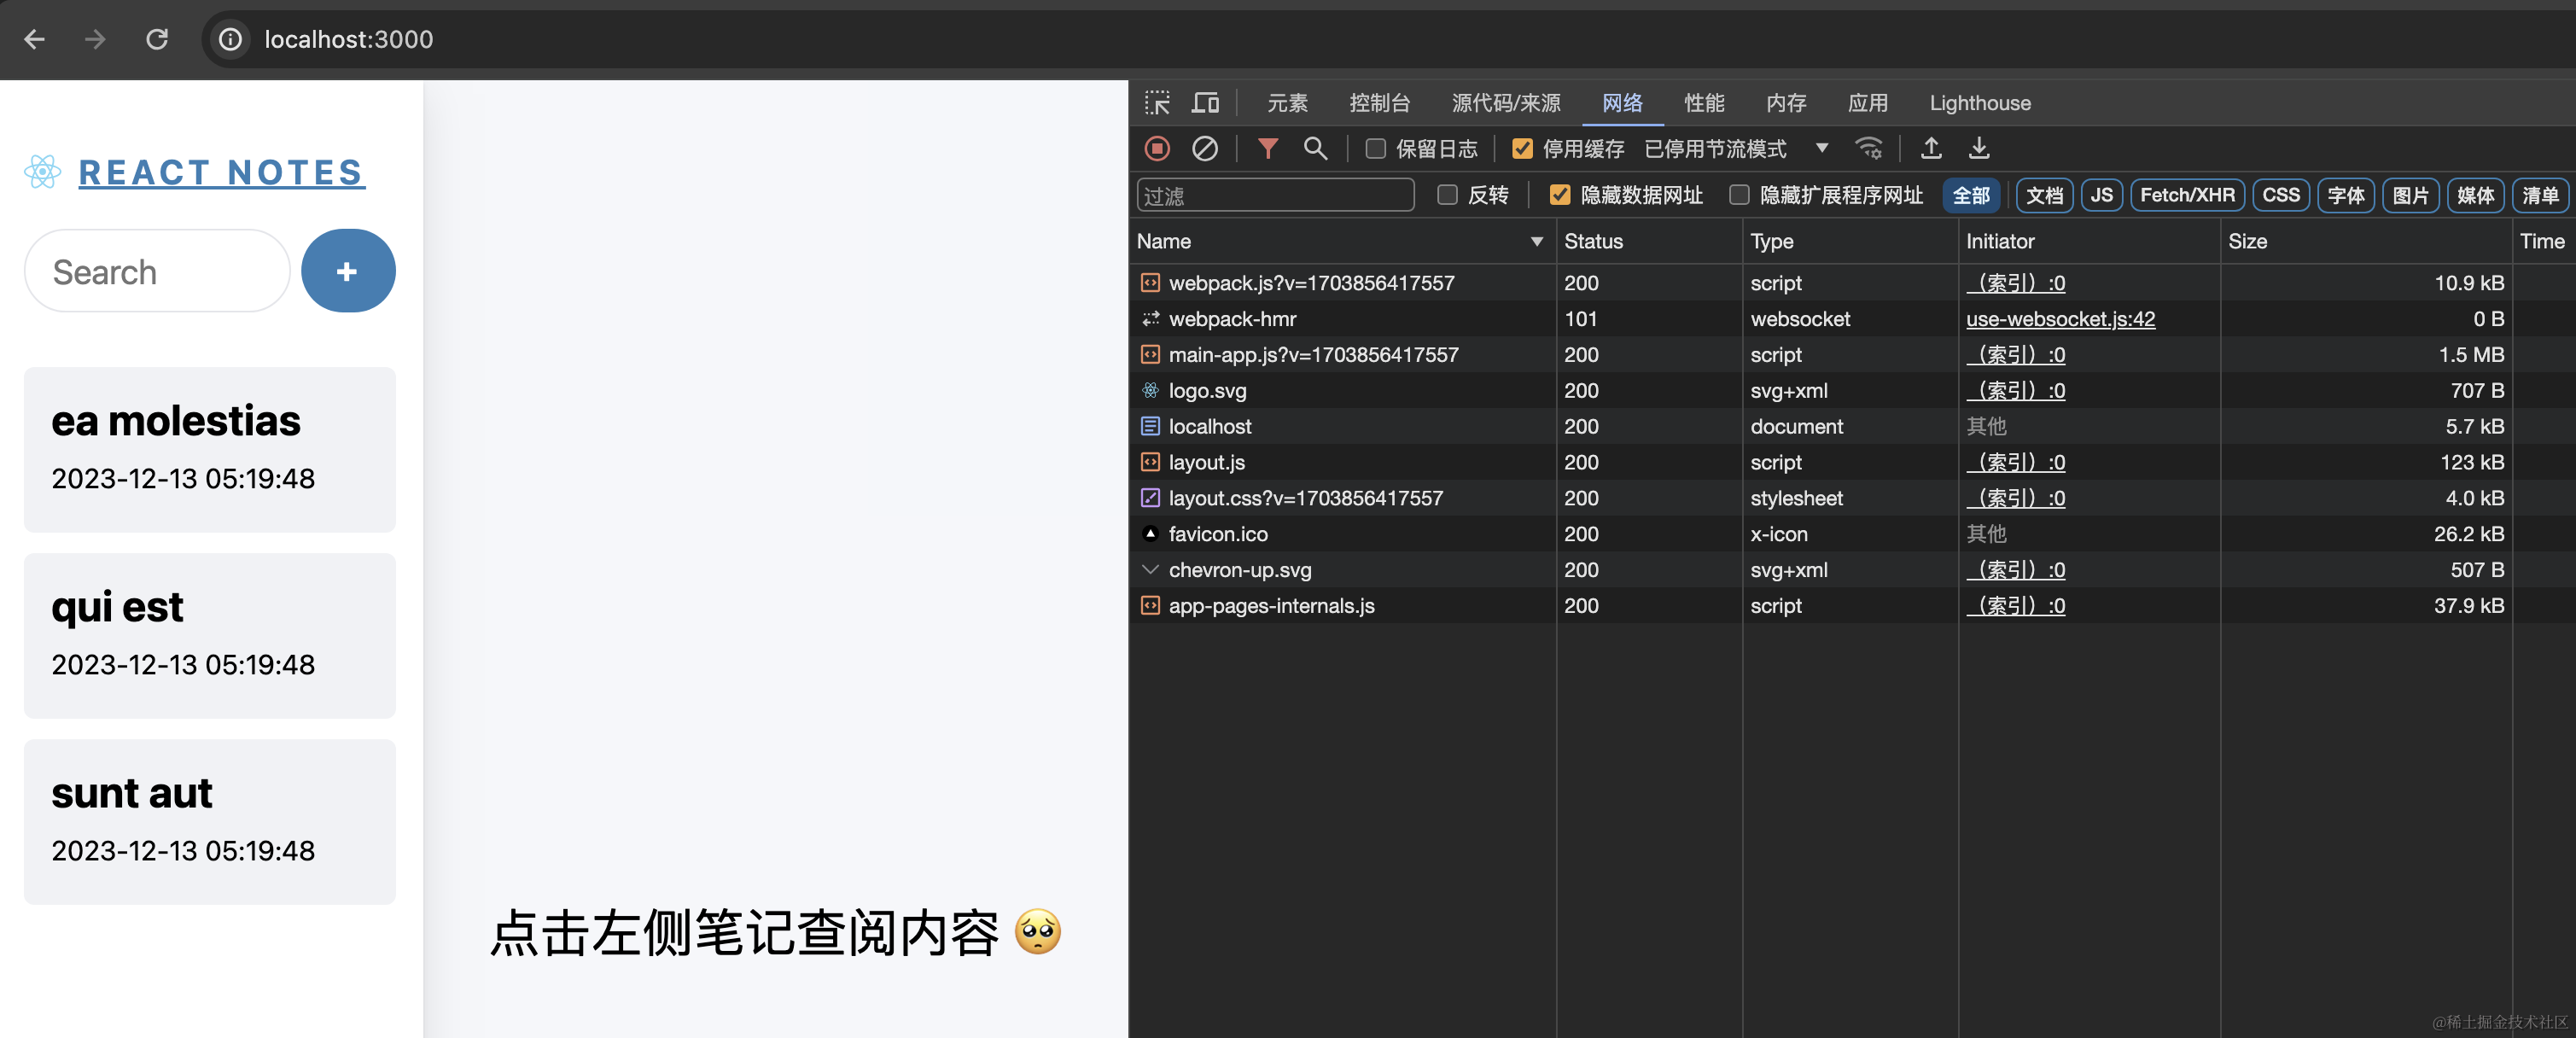
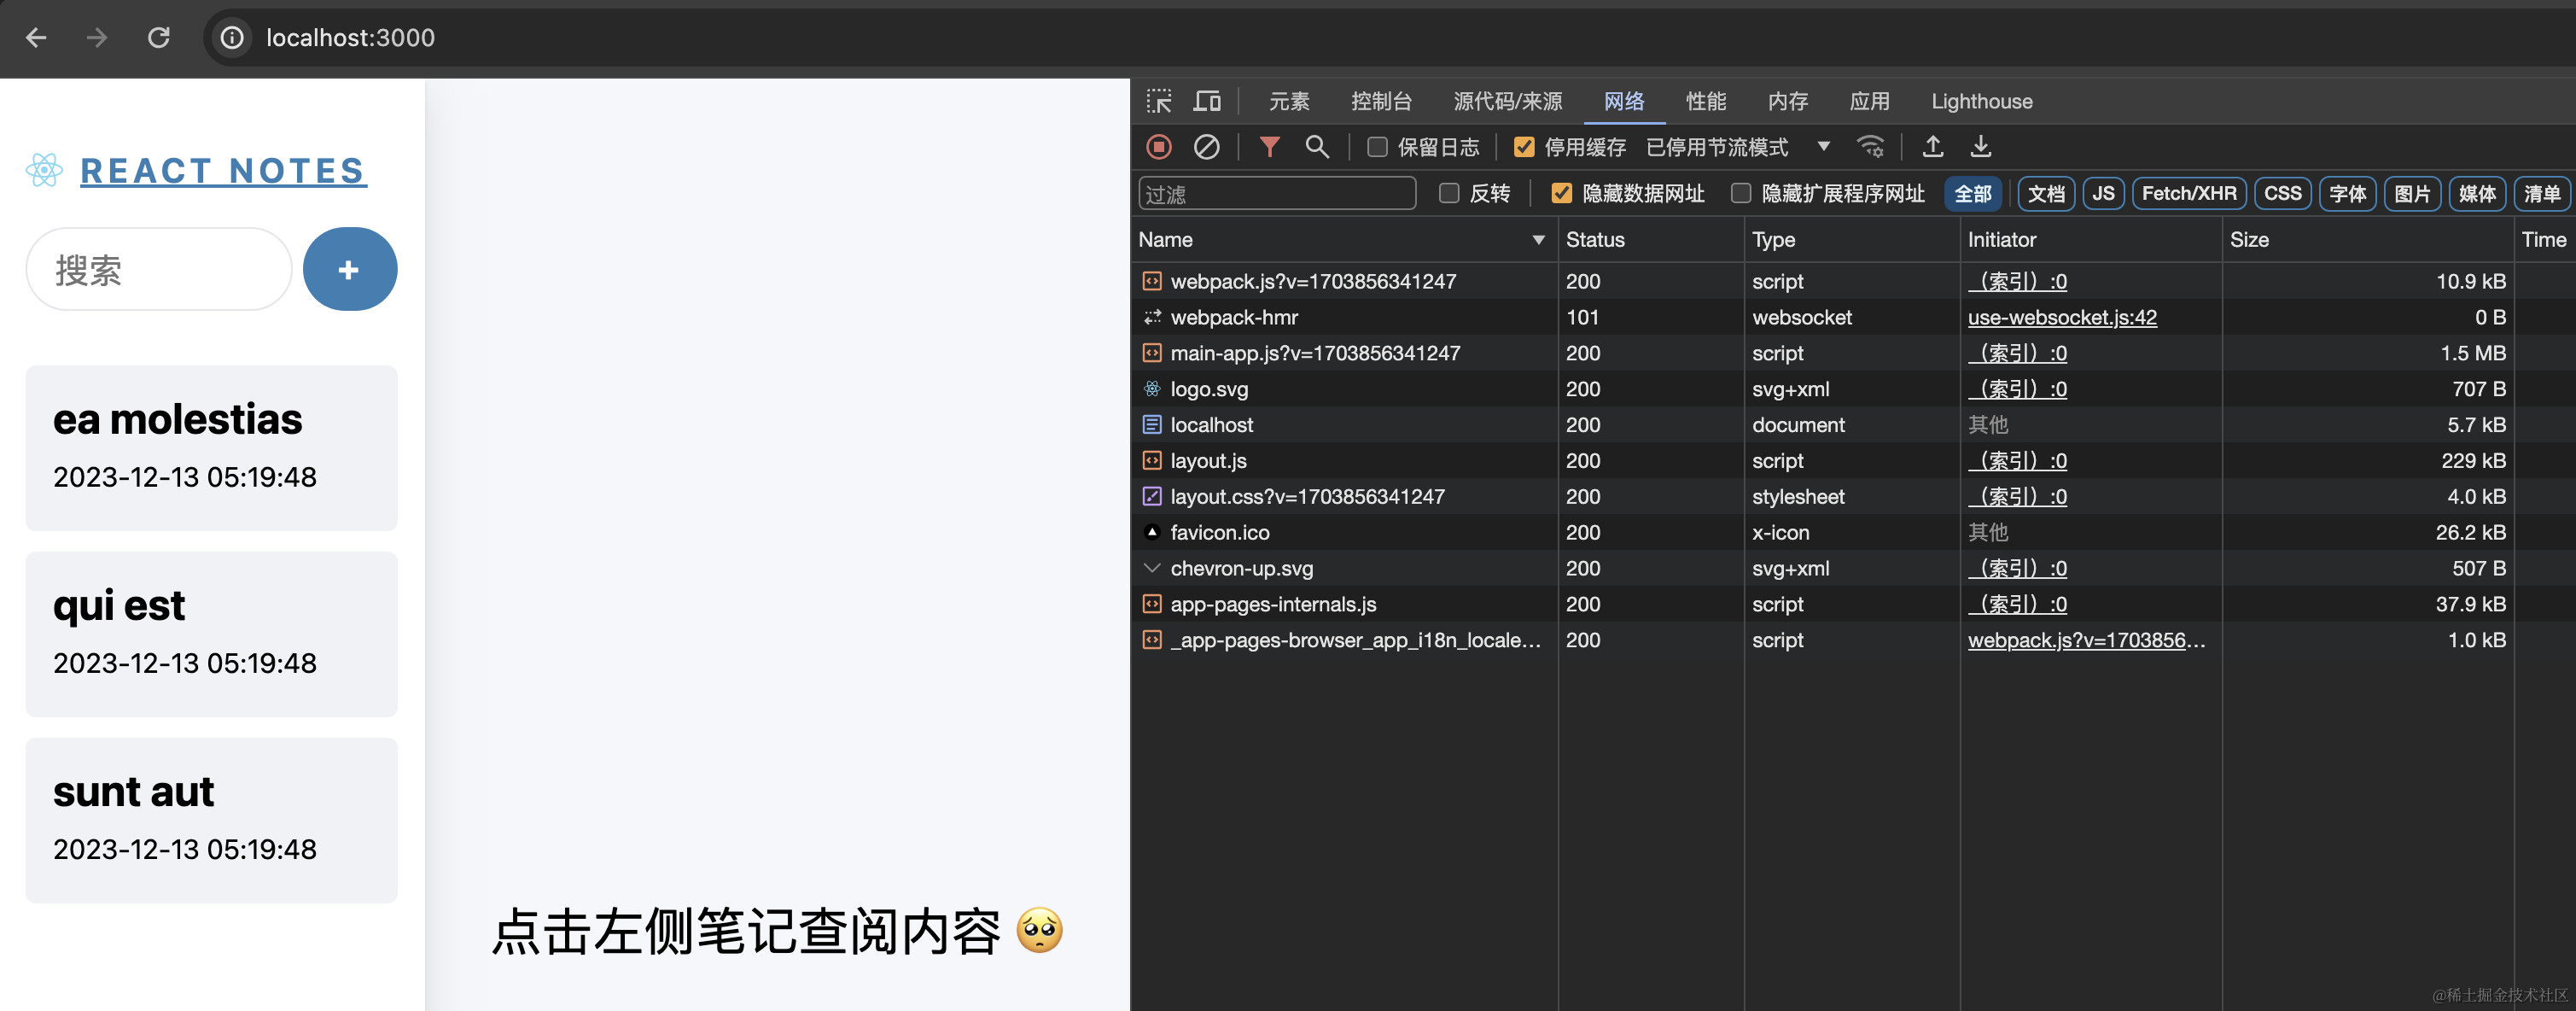
当然在客户端组件中使用肯定是有代价的，如果不在客户端组件中使用，用到的库的代码并不会打包到客户端中：

![截屏2023-12-29 下午9.23.35.png](https://p3-juejin.byteimg.com/tos-cn-i-k3u1fbpfcp/613423d8fadc4d57832c984e9492b6c6~tplv-k3u1fbpfcp-jj-mark:0:0:0:0:q75.image#?w=2146\&h=1186\&s=247465\&e=png\&b=f4f5f8)

此时 `layout.js` 的大小为 123kB：

![image.png](https://p3-juejin.byteimg.com/tos-cn-i-k3u1fbpfcp/6743c4de32214bc983968278d8cff635~tplv-k3u1fbpfcp-jj-mark:0:0:0:0:q75.image#?w=3018\&h=1216\&s=397500\&e=png\&b=282828)

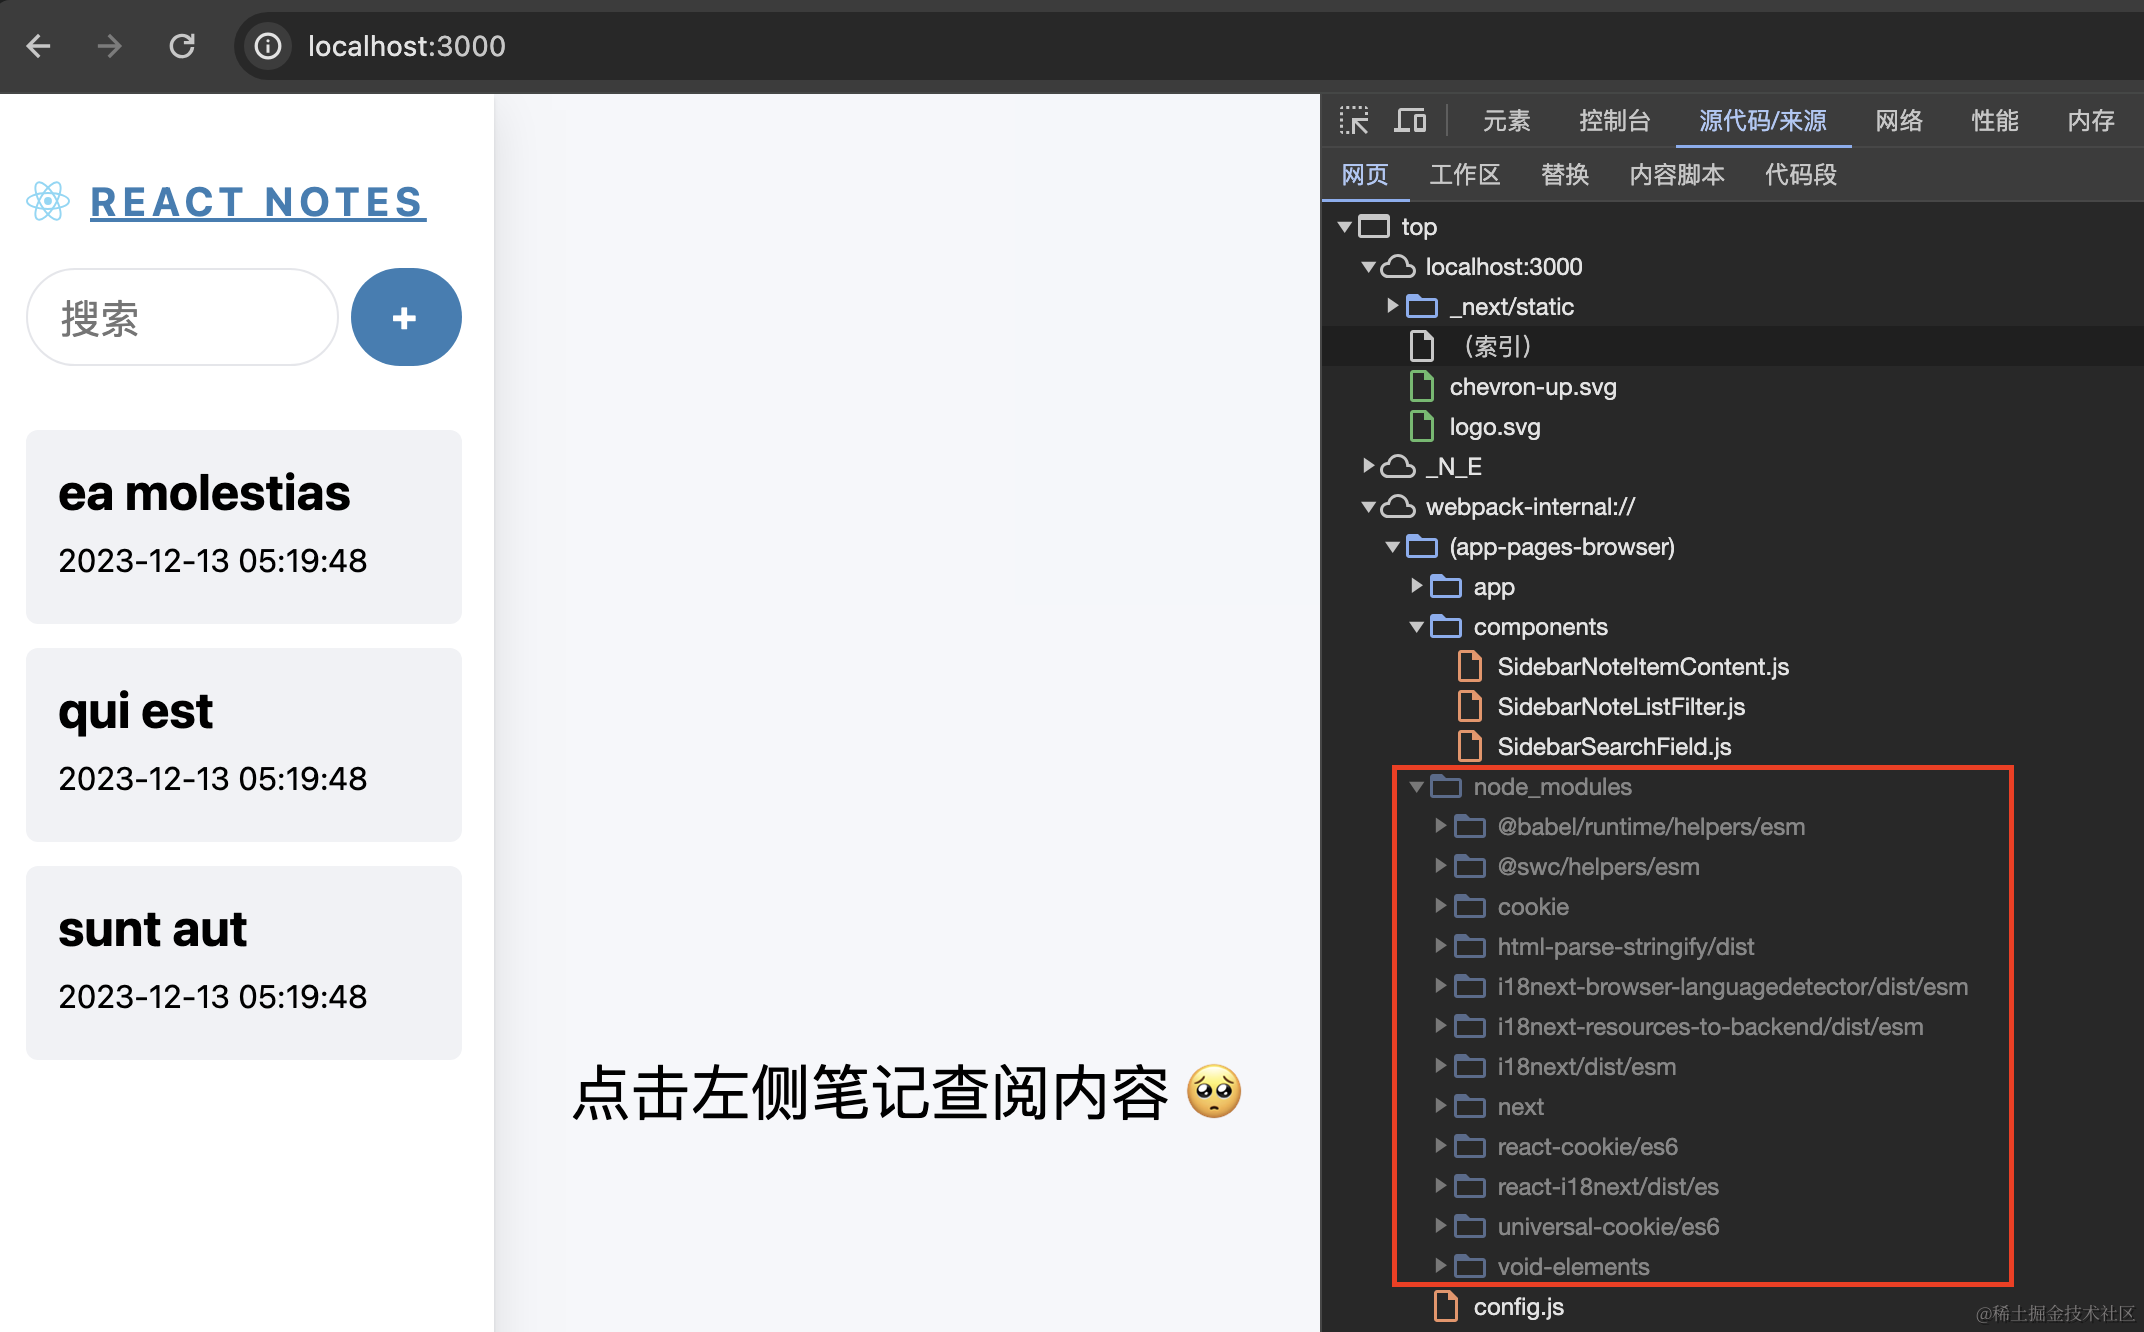
在客户端组件中使用后，用到的库会打包到客户端中：

![截屏2023-12-29 下午9.25.07.png](https://p3-juejin.byteimg.com/tos-cn-i-k3u1fbpfcp/6aef324194ac4ab6af7fda9400b301ae~tplv-k3u1fbpfcp-jj-mark:0:0:0:0:q75.image#?w=2144\&h=1332\&s=292256\&e=png\&b=f4f5f8)

此时 `layout.js` 的大小为 229kB，整整增加了一倍：

![image.png](https://p3-juejin.byteimg.com/tos-cn-i-k3u1fbpfcp/cd2c7e06fe5c44d89f6e74d1aa5c474c~tplv-k3u1fbpfcp-jj-mark:0:0:0:0:q75.image#?w=3018\&h=1184\&s=413911\&e=png\&b=292929)

### 第二种方式：next-intl

用 `react-i18next` 的时候是不是感觉很繁琐？但这种方式自由度高，在理解代码的前提下，可以自由开发。当然你也可以使用 `next-intl`，配置和使用都会更便捷一些，让我们看看如何使用 `next-intl`：

#### 1. 基础配置

安装 `next-intl`：

```bash
npm install next-intl
```

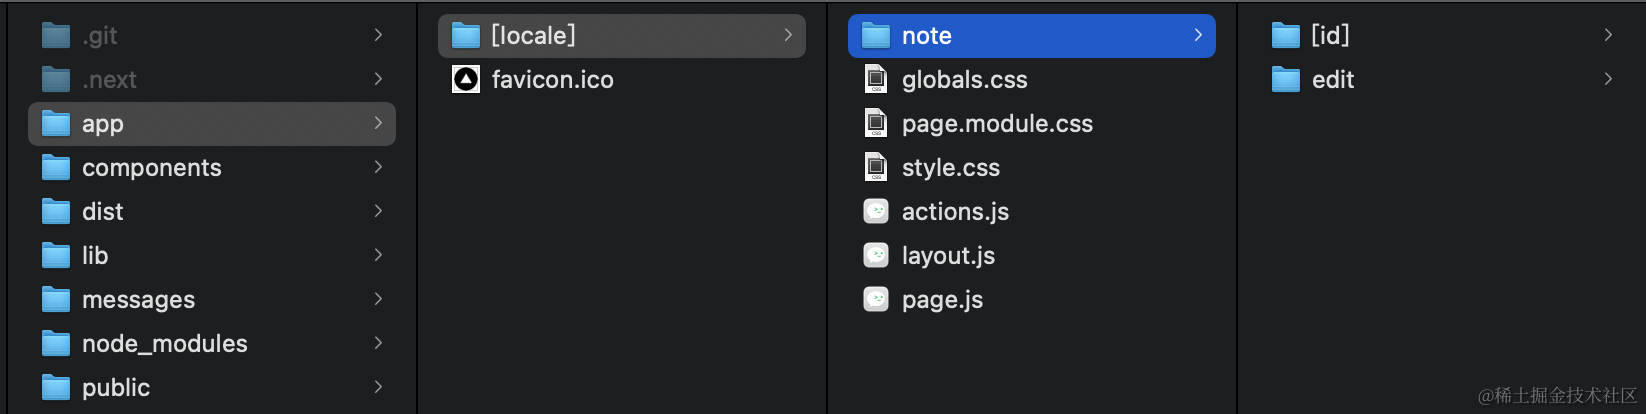
在 `app`目录下添加一个名为 `[locale]` 的文件夹，将 `favicon.ico`以外的文件，移动到该文件夹下：

![image.png](https://p3-juejin.byteimg.com/tos-cn-i-k3u1fbpfcp/6a8f40b43ef54ee78ec8c96fef15bf23~tplv-k3u1fbpfcp-jj-mark:0:0:0:0:q75.image#?w=1646\&h=414\&s=119823\&e=png\&b=1c1e20)

在根目录下添加一个 `config.js`文件用于自定义一些全局配置：

```javascript
export const locales = ['zh', 'en']
export const defaultLocale = 'zh'
```

为了方便导入，我们修改根目录的 `jsconfig.json`设置路径别名：

```json
{
  "compilerOptions": {
    "baseUrl": ".",
    "paths": {
      "@/actions": ["app/[locale]/actions.js"],
      "@/*": ["/*"]
    }
  }
}
```

修改 `next.config.js`，代码如下：

```javascript
const withNextIntl = require('next-intl/plugin')();

const nextConfig = {}

module.exports = withNextIntl(nextConfig)
```

根目录下新建 `i18n.js`（该文件为约定文件名，默认需要叫这个，当然也可以修改），代码如下：

```javascript
import {notFound} from "next/navigation";
import {getRequestConfig} from 'next-intl/server';
import { locales } from '@/config.js'
 
export default getRequestConfig(async ({locale}) => {
  if (!locales.includes(locale)) notFound();
 
  return {
    messages: (await import(`./messages/${locale}.json`)).default
  };
});
```

根目录下新建 `middleware.js`，代码如下：

```javascript
import createMiddleware from 'next-intl/middleware';
import { locales, defaultLocale } from '@/config.js';

export default createMiddleware({
  locales,
  defaultLocale,
  // 默认语言不重定向
  localePrefix: 'as-needed'
});
 
export const config = {
  matcher: ['/((?!api|_next|_vercel|.*\\..*).*)']
};
```

#### 2. 准备翻译文件

在根目录下新建名为 `message`的文件夹，新建 `en.json`，代码如下：

```javascript
{
  "Basic": {
    "new": "new",
    "initText": "Click a note on the left to view something! 🥺",
    "search": "search",
    "edit": "edit"
  }
}
```

新建 `zh.json`，代码如下：

```javascript
{
  "Basic": {
    "new": "+",
    "initText": "点击左侧笔记查阅内容 🥺",
    "search": "搜索",
    "edit": "编辑"
  }
}
```

#### 3. 服务端组件使用

使用的时候，要注意区分是在 async 组件中还是非 async 组件中。

**3.1. 非 async 组件**

当在非 async 组件中，以 `app/[lng]/page.js`为例：

```javascript
import {useTranslations} from 'next-intl';
export default function Page() {
  const t = useTranslations('Basic');
  return (
    <div className="note--empty-state">
      <span className="note-text--empty-state">
        {t('initText')}
      </span>
    </div>
  )
}
```

组件中也可以直接使用，以 `components/Sidebar.js`为例：

```javascript
// ...
import {useTranslations} from 'next-intl';

export default async function Sidebar() {
  const t = useTranslations('Basic');

  return (
    <>
      	// ...
        <section className="sidebar-menu" role="menubar">
          <SidebarSearchField />
          <EditButton noteId={null}>{t('new')}</EditButton>
        </section>
        // ...
      </section>
    </>
  )
}

```

**3.2. async 组件**

如果是在 async 组件中使用，依然以 `app/[lng]/page.js`为例：

```javascript
import {getTranslations} from 'next-intl/server';

export default async function Page() {
  const t = await getTranslations('Basic');
  return (
    <div className="note--empty-state">
      <span className="note-text--empty-state">
        {t('initText')}
      </span>
    </div>
  )
}

```

在 async 组件中使用 `useTranslations` 会导致报错：

![image.png](https://p3-juejin.byteimg.com/tos-cn-i-k3u1fbpfcp/5fe1f3ea87d24c849e663d52596b92e2~tplv-k3u1fbpfcp-jj-mark:0:0:0:0:q75.image#?w=1910\&h=254\&s=48039\&e=png\&b=ffffff)

#### 4. 客户端组件使用

**4.1. 通过 props 传给客户端组件**

如果要在客户端组件中使用，优先选择将翻译的内容通过 props 传给客户端组件，我们以 `/components/SidebarSearchField.js`为例：

修改 `/compoents/Sidebar.js`：

```javascript
// ...
import {useTranslations} from 'next-intl';

export default function Sidebar() {
  const t = useTranslations('Basic');
  // const messages = useMessages();
  return (
    <>
      <section className="col sidebar">
        // ...
        <section className="sidebar-menu" role="menubar">
          <SidebarSearchField search={t('search')} />
          <EditButton noteId={null}>{t('new')}</EditButton>
        </section>
        // ...
      </section>
    </>
  )
}

```

修改 `/compoents/SidebarSearchField.js`：

```javascript
'use client';

// ...
export default function SidebarSearchField({search}) {
  // ...
  return (
		<div className="search" role="search">
    	// ...
      <input
        id="sidebar-search-input"
        placeholder={search}
        type="text"
        onChange={(e) => handleSearch(e.target.value)}
      />
    </div>
  );
}
```

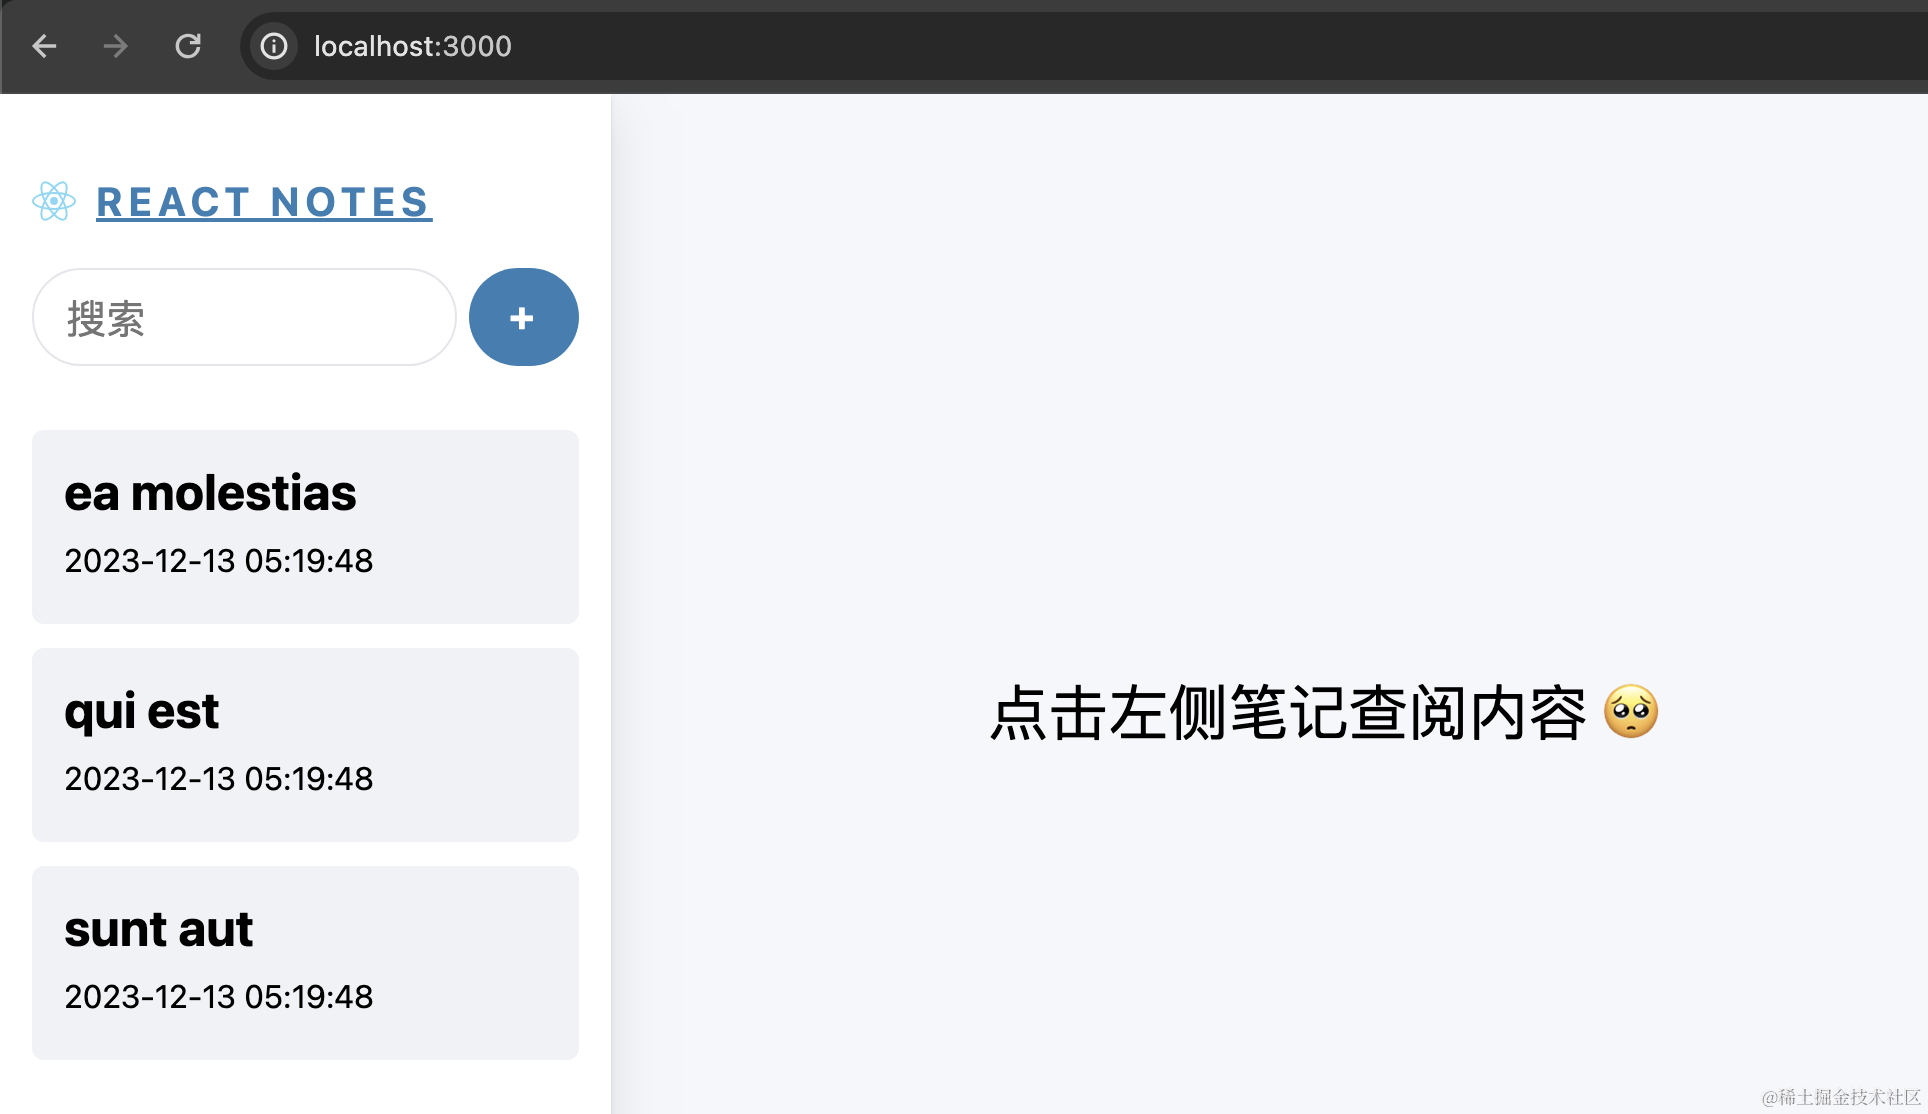
效果如下：

![image.png](https://p3-juejin.byteimg.com/tos-cn-i-k3u1fbpfcp/6585c1a3cca04582bc816c3b91d464d0~tplv-k3u1fbpfcp-jj-mark:0:0:0:0:q75.image#?w=1928\&h=1114\&s=163184\&e=png\&b=f5f6f9)

**4.2. 使用 NextIntlClientProvider**

如果不能这样做，比如用到一些动态的值，那就需要用 `NextIntlClientProvider` 将组件包裹起来，还是以 `/components/SidebarSearchField.js`为例：

修改 `/compoents/Sidebar.js`：

```jsx
// ...
import { useTranslations, NextIntlClientProvider, useMessages} from 'next-intl';

export default function Sidebar() {
  const t = useTranslations('Basic');
  const messages = useMessages();
  return (
    <>
      <section className="col sidebar">
        // ...
        <section className="sidebar-menu" role="menubar">
          <NextIntlClientProvider
            messages={{
              Basic: messages.Basic
            }}
            >
            <SidebarSearchField />
          </NextIntlClientProvider>
          <EditButton noteId={null}>{t('new')}</EditButton>
        </section>
        // ...
      </section>
    </>
  )
}

```

修改 `/compoents/SidebarSearchField.js`：

```jsx
'use client';

// ...
import {useTranslations} from 'next-intl';

export default function SidebarSearchField() {
  const t = useTranslations('Basic');

  //...

  return (
    <div className="search" role="search">
      // ...
      <input
        id="sidebar-search-input"
        placeholder={t('search')}
        type="text"
        onChange={(e) => handleSearch(e.target.value)}
        />
      // ...
    </div>
  );
}
```

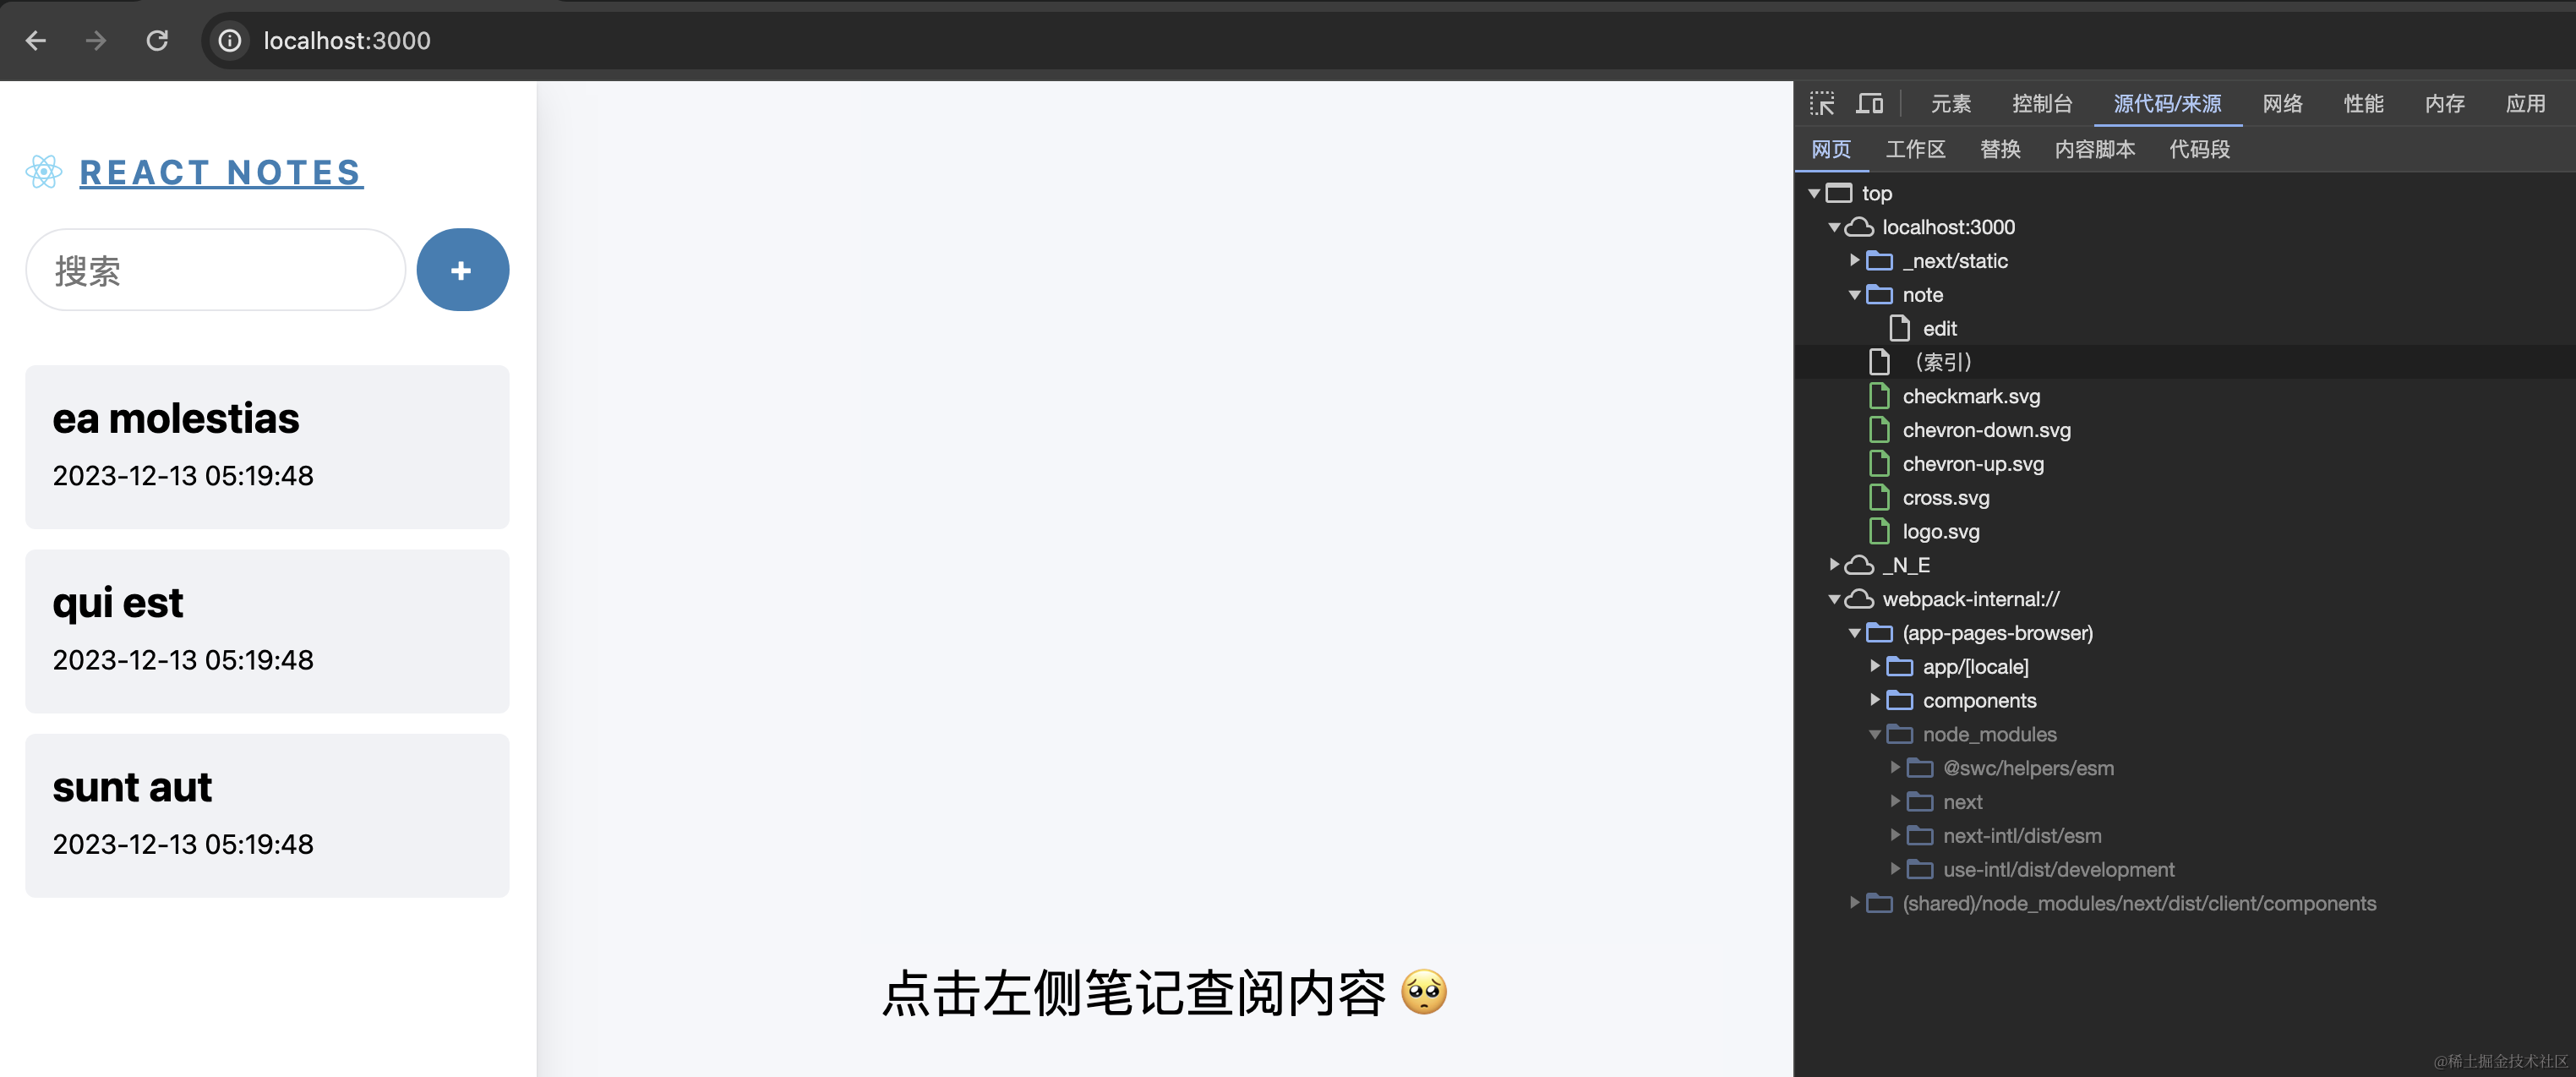
当然这样做也是有代价的，如果只是通过 props 传给客户端组件：

![image.png](https://p3-juejin.byteimg.com/tos-cn-i-k3u1fbpfcp/07e1ee5f5a29438283395aef0d2548a0~tplv-k3u1fbpfcp-jj-mark:0:0:0:0:q75.image#?w=3048\&h=1274\&s=320078\&e=png\&b=f4f6f9)

![image.png](https://p3-juejin.byteimg.com/tos-cn-i-k3u1fbpfcp/854bf710976b44e384dbea593c36fcb0~tplv-k3u1fbpfcp-jj-mark:0:0:0:0:q75.image#?w=3344\&h=1316\&s=414334\&e=png\&b=f3f5f8)

但改为使用 NextIntlClientProvider 后：

![image.png](https://p3-juejin.byteimg.com/tos-cn-i-k3u1fbpfcp/6051e73c43f2489e8fe777146977a7b8~tplv-k3u1fbpfcp-jj-mark:0:0:0:0:q75.image#?w=2848\&h=1362\&s=346660\&e=png\&b=f5f6f9)

![image.png](https://p3-juejin.byteimg.com/tos-cn-i-k3u1fbpfcp/c12ddfcd8acf45df9d5ebf99e77e9e62~tplv-k3u1fbpfcp-jj-mark:0:0:0:0:q75.image#?w=3340\&h=1328\&s=413543\&e=png\&b=f4f6f9)

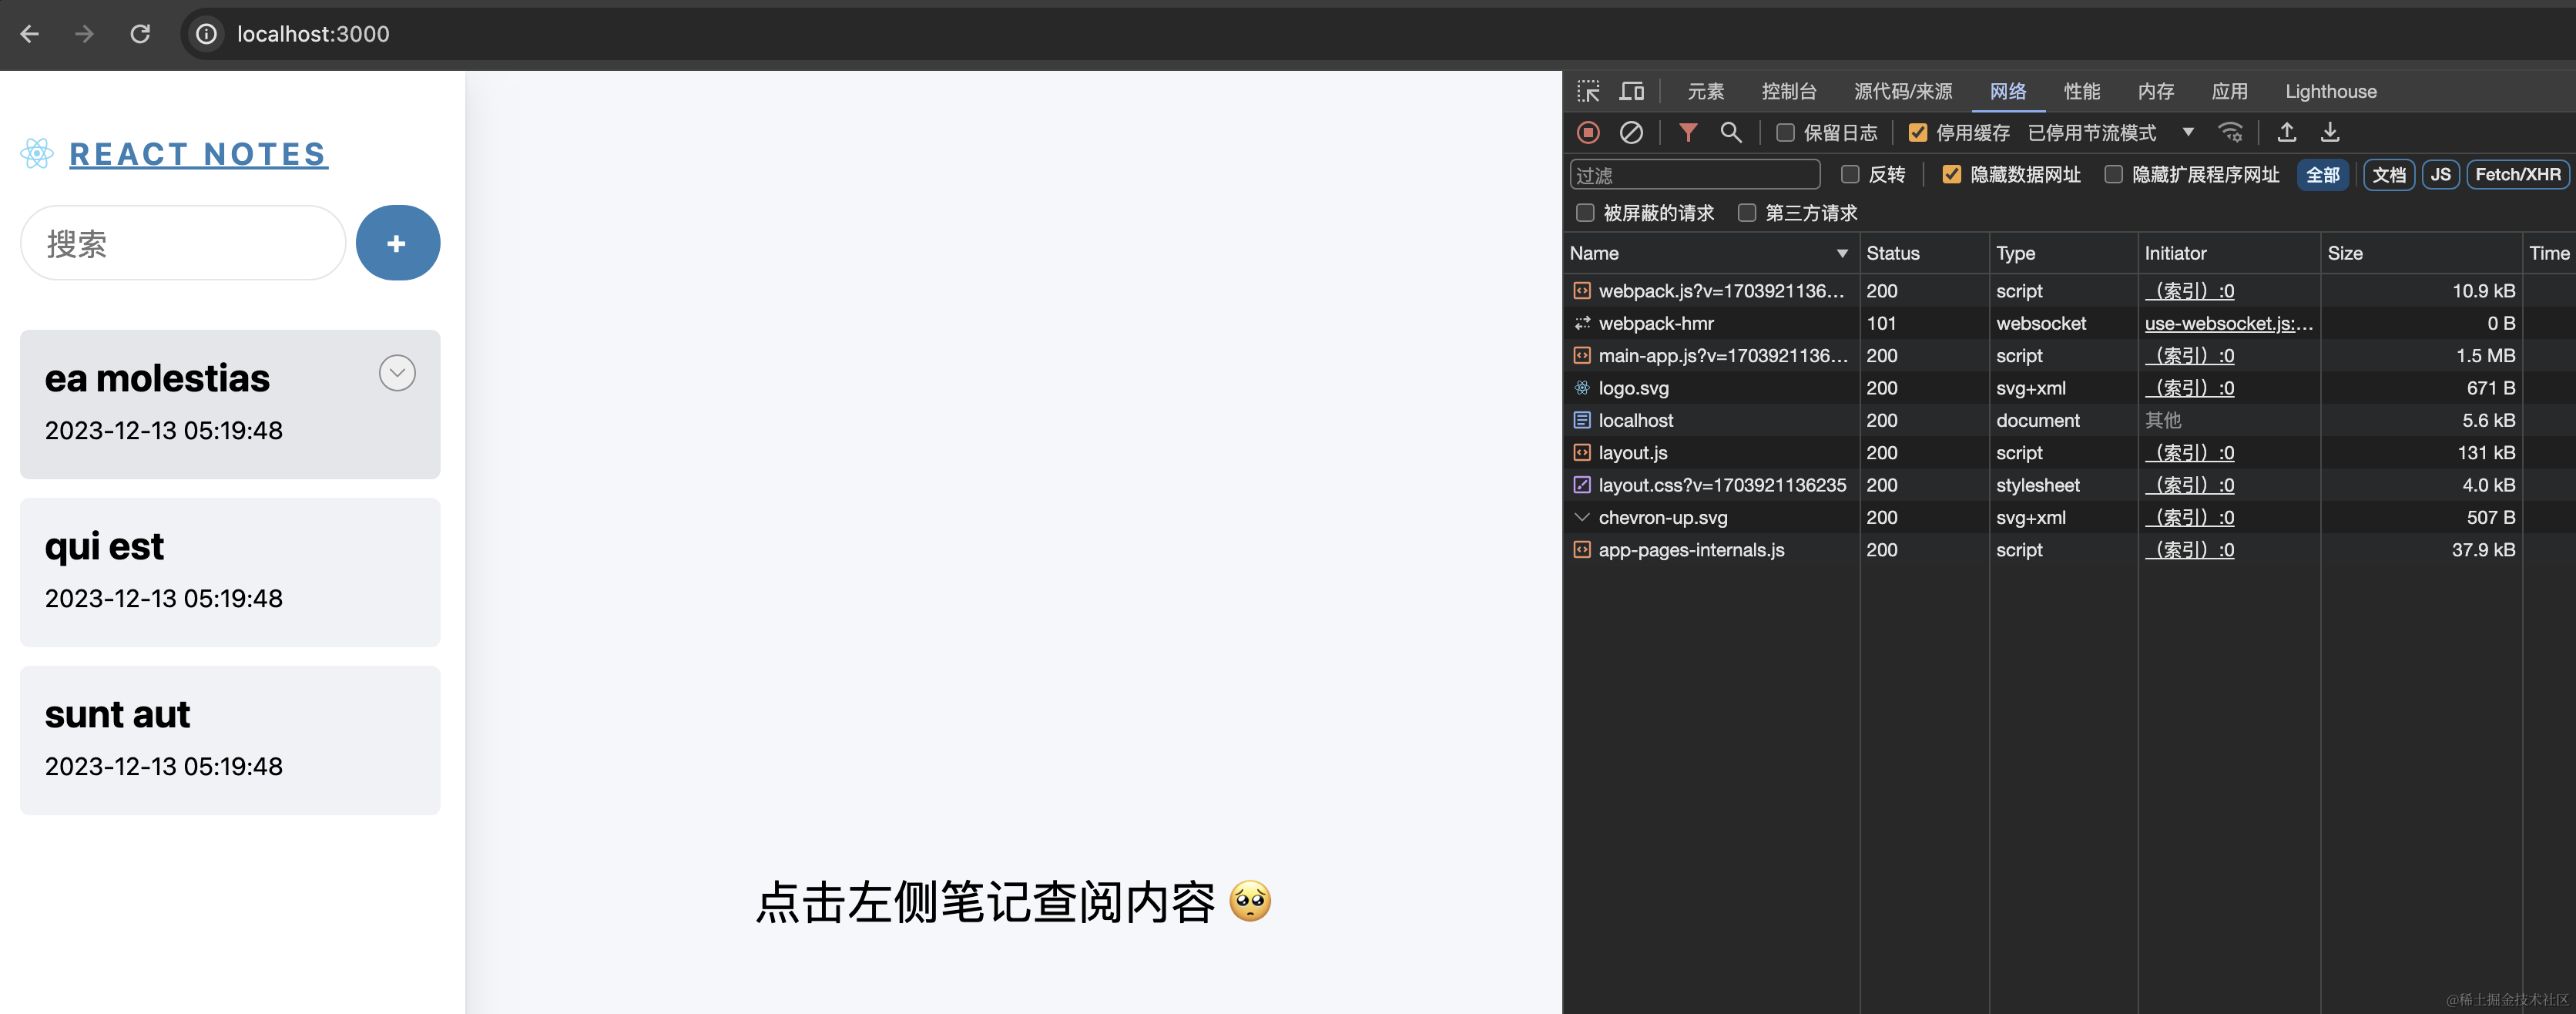
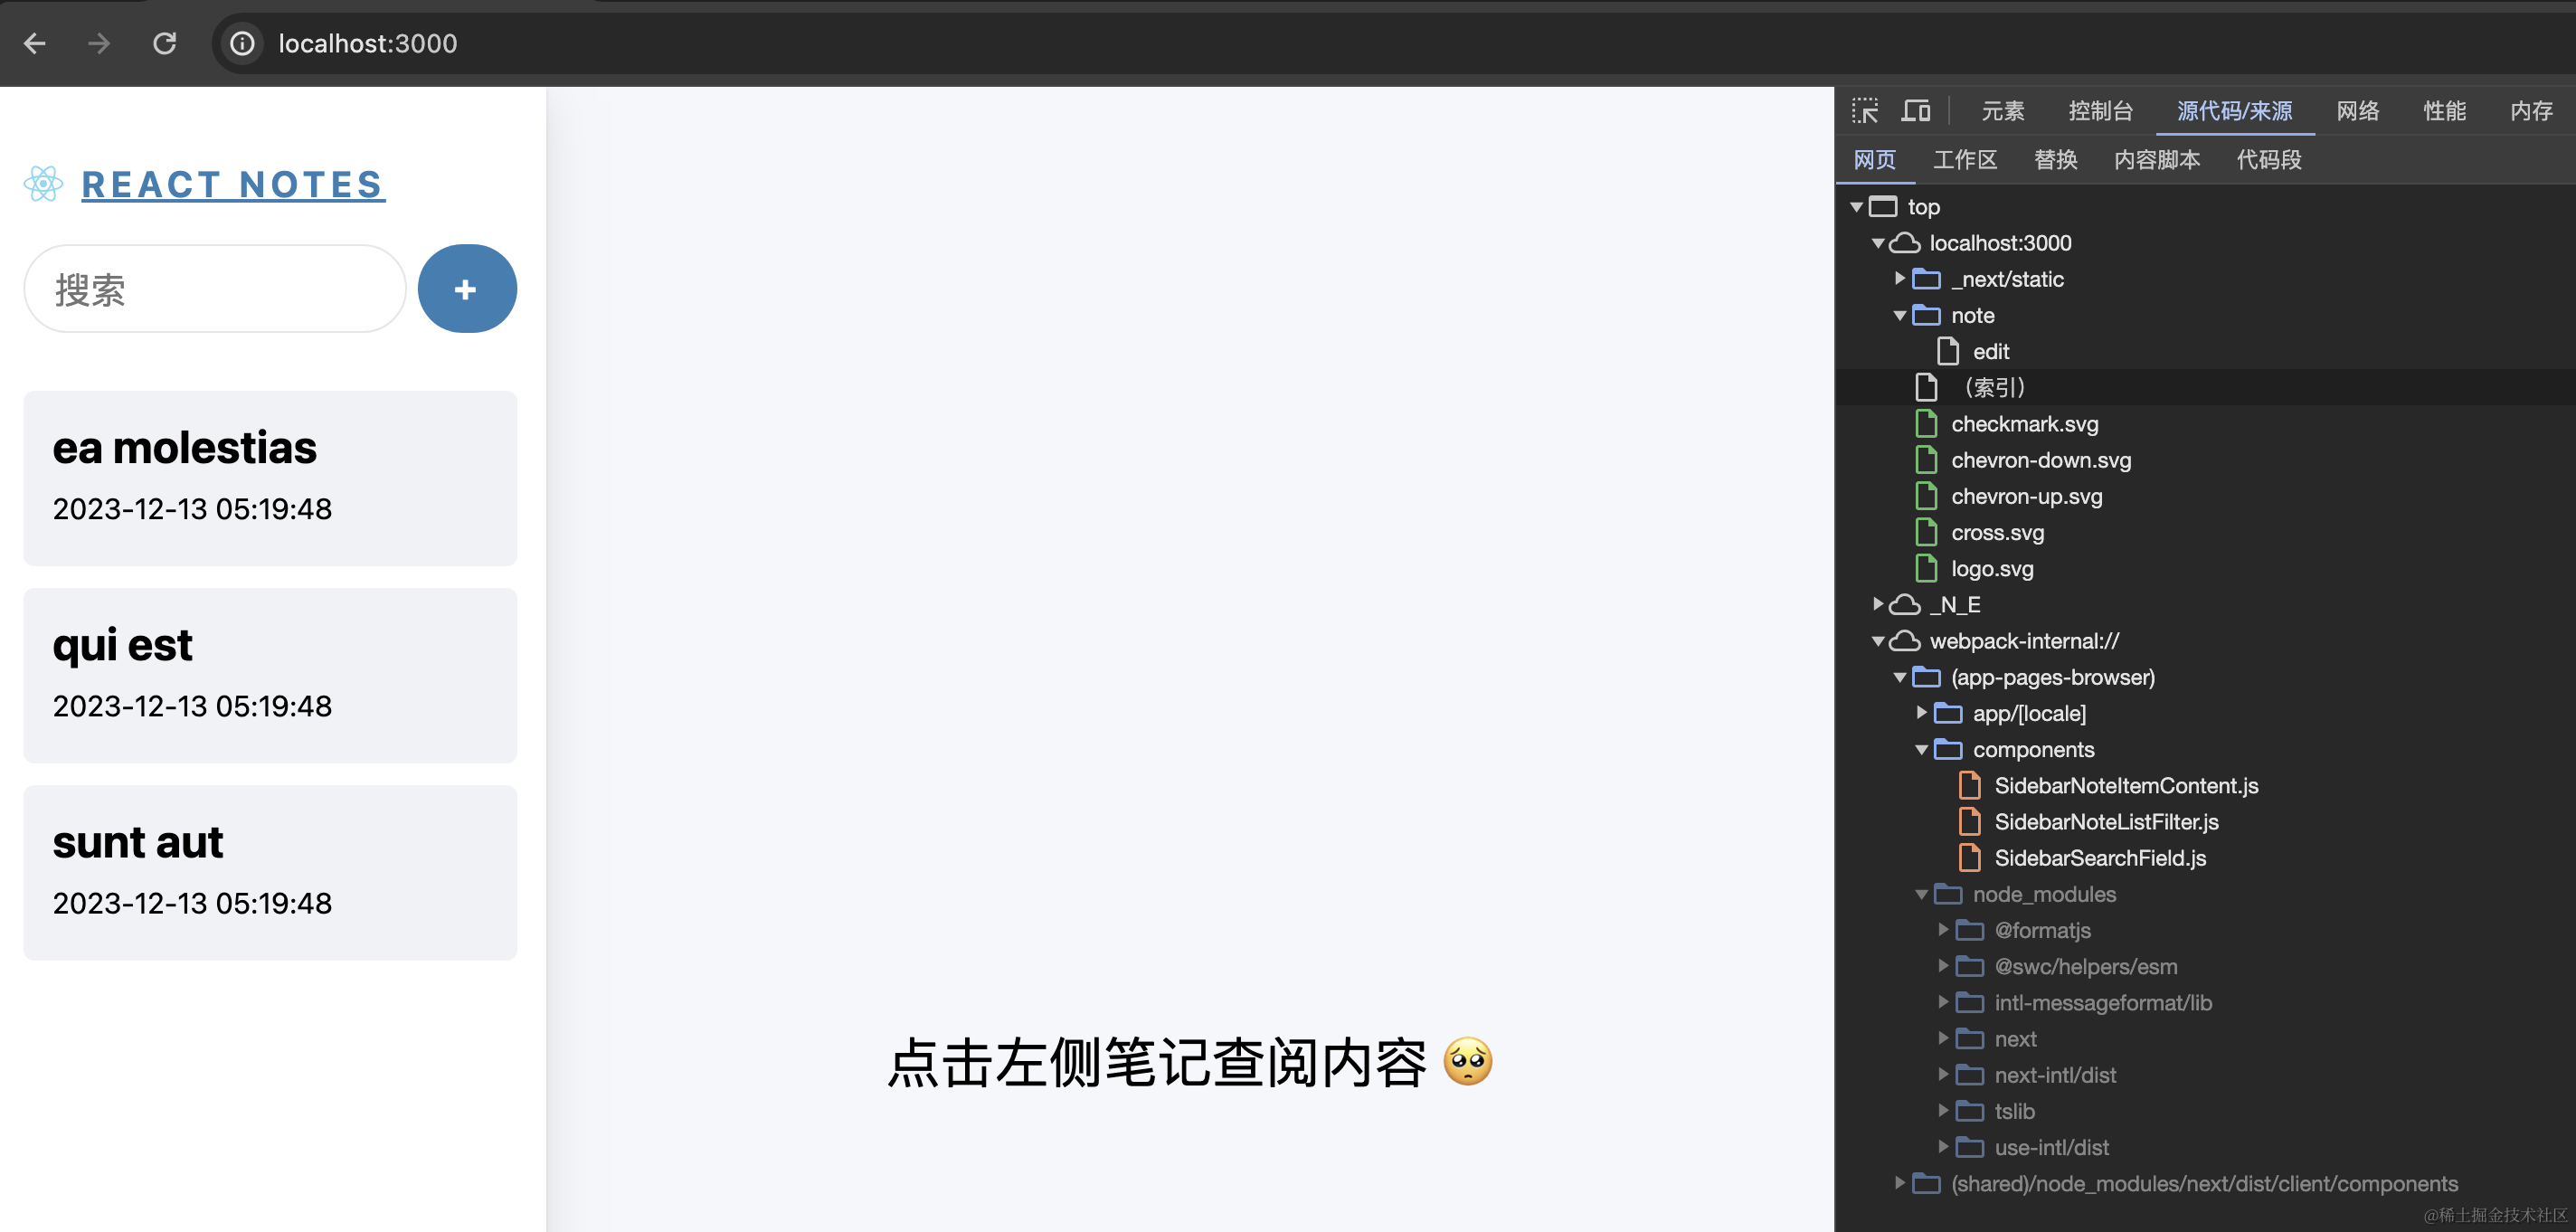
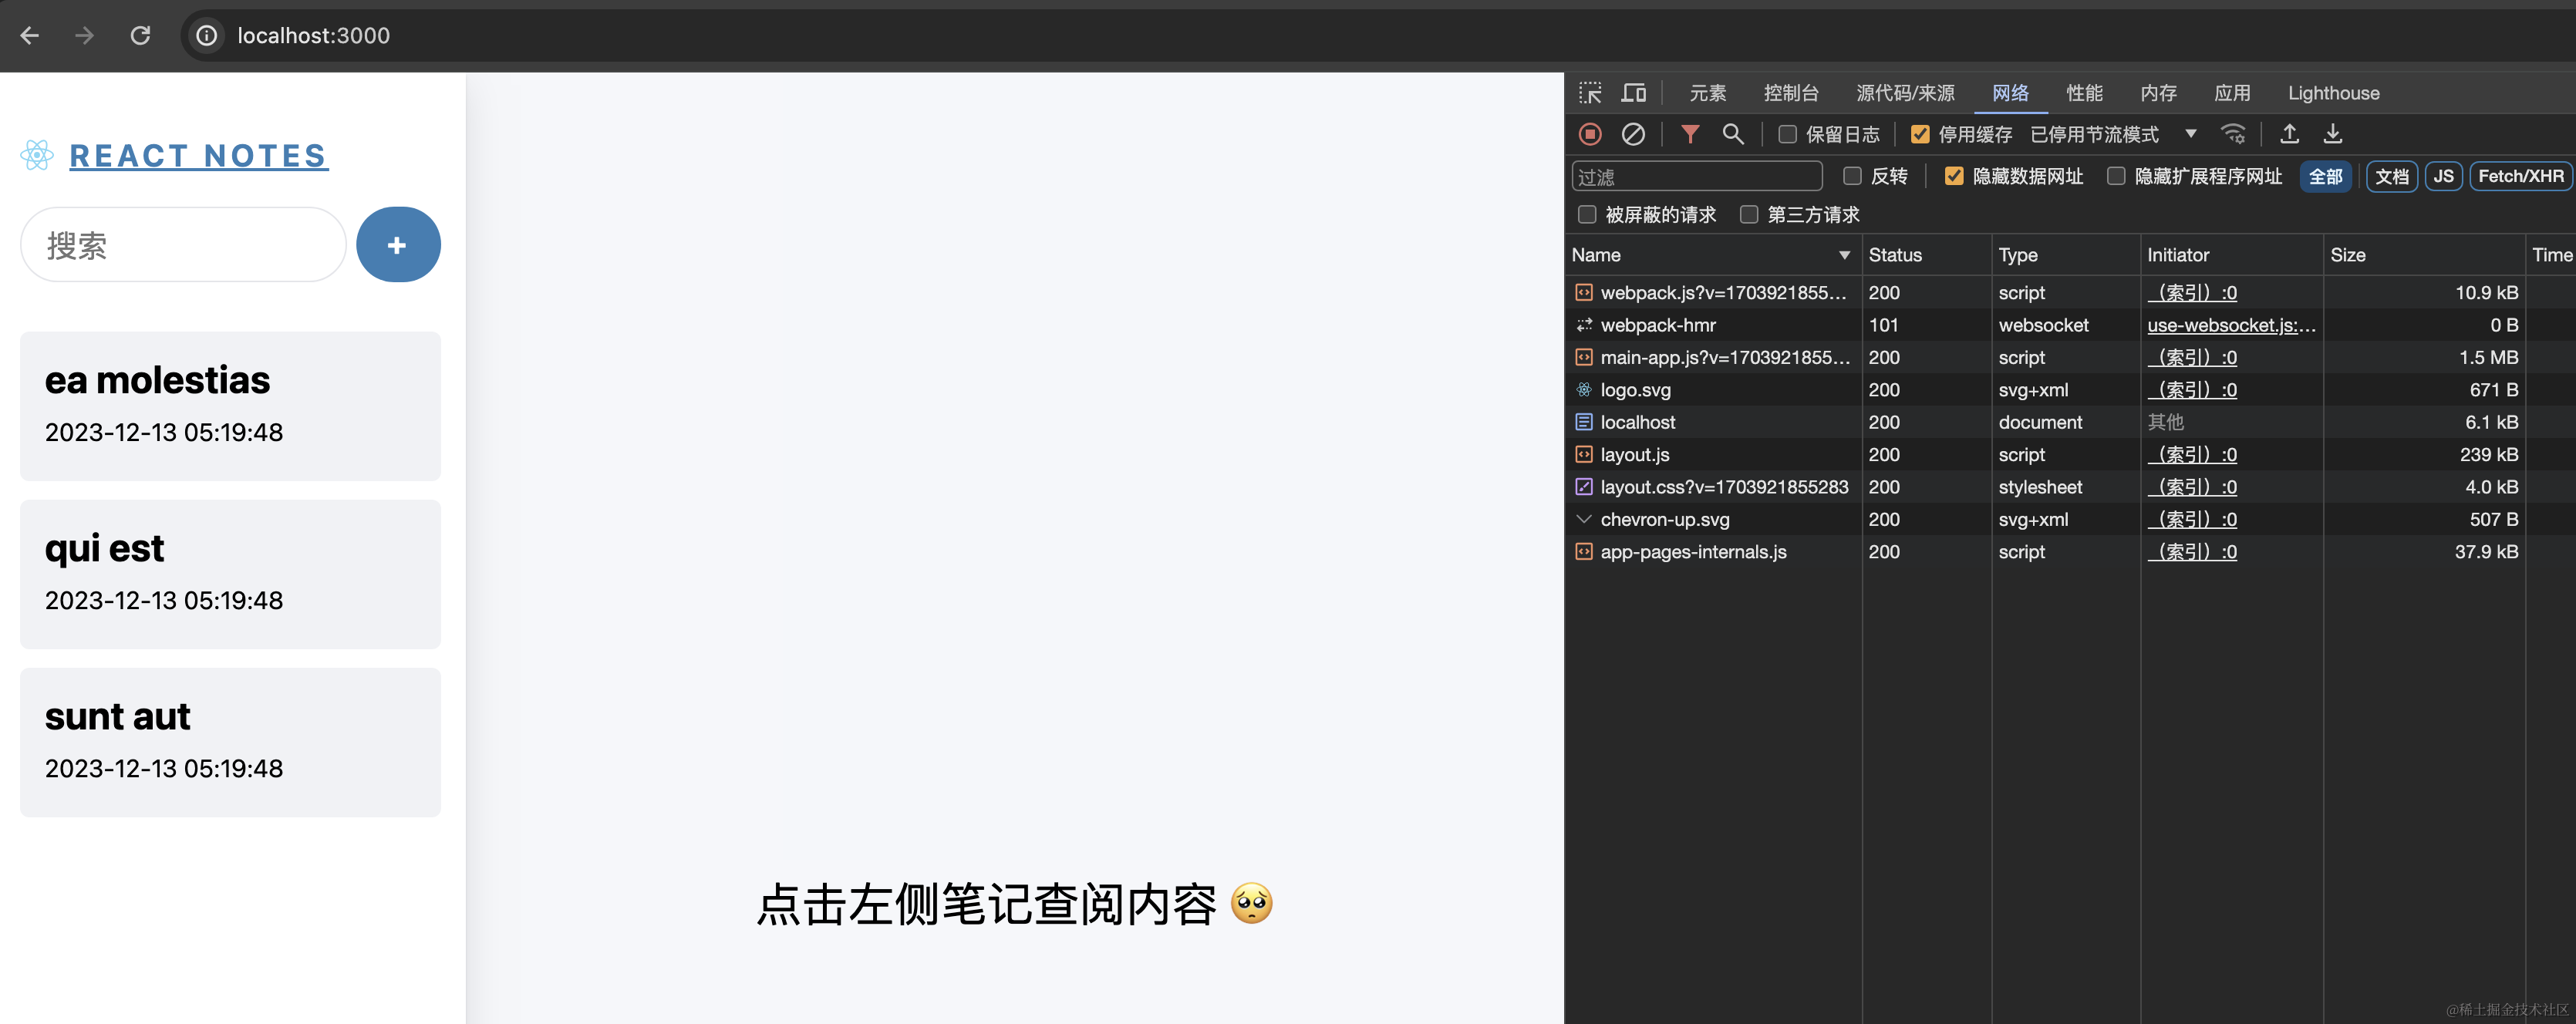
由于打包到客户端的包更多了，`layout.js` 的大小从之前的 `131kB` 变成了 `239kB`。

关于 next-intl，更详细具体的用法参考其[官方文档](https://next-intl-docs.vercel.app/docs/getting-started/app-router)。

### 总结

那么今天的内容就结束了，本篇的代码已经上传到[代码仓库](https://github.com/mqyqingfeng/next-react-notes-demo/tree/main)的 Day 6 分支：

* react-i18next 实现在 [day6](https://github.com/mqyqingfeng/next-react-notes-demo/tree/day6) 分支
* next-intl 实现在 [day6-1](https://github.com/mqyqingfeng/next-react-notes-demo/tree/day6-1) 分支

### 参考链接

1. [i18next documentation](https://www.i18next.com/)
2. [react-i18next documentation](https://react.i18next.com/)
3. [i18n with Next.js 13/14 and app directory / App Router (an i18next guide)](https://locize.com/blog/next-app-dir-i18n/)
4. <https://next-intl-docs.vercel.app/docs/getting-started/app-router>