> For the complete documentation index, see [llms.txt](https://onenesss-organization.gitbook.io/jj-xiaoce/llms.txt). Markdown versions of documentation pages are available by appending `.md` to page URLs; this page is available as [Markdown](https://onenesss-organization.gitbook.io/jj-xiaoce/next.js-kai-fa-zhi-nan/45.-shi-zhan-pian-react-notes-strapi.md).
# 45. 实战篇 ❘ React Notes ❘ Strapi
### 前言
先说说 CMS,所谓 CMS,Content Management System,中文译为内容管理系统。
> 内容管理系统的定义可以很狭窄,通常是指门户或商业网站的发布和管理系统;定义也可以很宽泛,个人网站系统也可归入其中。Wiki 也是一种内容管理系统,Blog 也算是一种内容管理系统。
比如常用于搭建博客的 Wordpress 就是一个知名的内容管理系统。
这些年来,headless CMS 也流行了起来。所谓 headless CMS,简单的来说,CMS 不再负责内容的展现,只提供内容存储库以及 API,这使得开发人员可以自定义展示内容,虽然带来了一定的工作量,但也让开发更加灵活自由。
今天要讲的 [Strapi](https://strapi.io/) 就是基于 Node.js 实现的 Headless CMS。借助 Strapi,不需要手动编写后端接口,通过可视化的界面就能直接创建 Restful API。
在实际开发项目的时候,这样做的好处就是 —— 快!而在那么多 Headless CMS 中选择 Strapi,是因为它应该是 [GitHub 上 star 最多](https://github.com/strapi/strapi)(58k)的 Headless CMS,用的人也比较多。
对于一些简单的项目,相比于从零开始搭建,不如直接使用像 Strapi 这样的工具,快速构建出项目!
### Strapi
现在让我们来使用 Strapi,执行以下命令构建本地项目:
```javascript
npx create-strapi-app@latest next-react-notes-strapi
```
#### 1. 数据库选择
Strapi 会让你进行一些自定义选择,比如数据库,Strapi 支持的数据库有:
| 数据库 | 最小版本 | 推荐版本 |
| ---------- | ----- | ---- |
| MySQL | 5.7.8 | 8.0 |
| MariaDB | 10.3 | 10.6 |
| PostgreSQL | 11.0 | 14.0 |
| SQLite | 3 | 3 |
不过目前 Strapi v4 并不支持 MongoDB,所以这里我们选择比较常用的 MySQL。
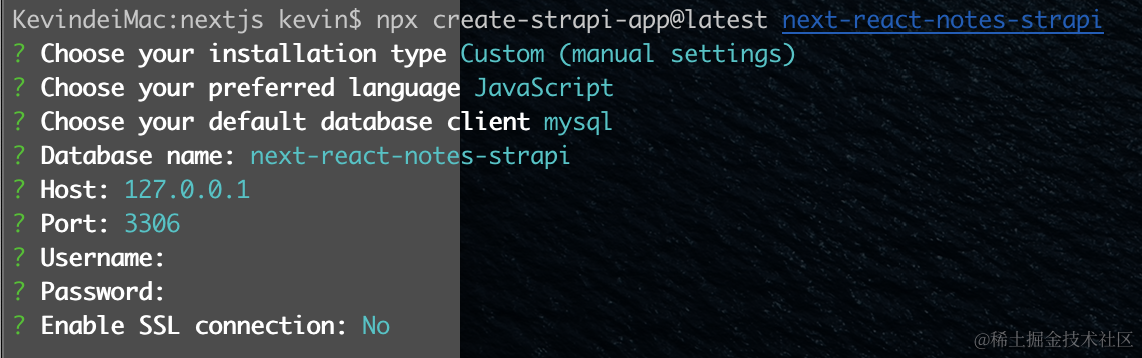
MySQL 数据库相关的设置如 name、Host、Port、Username 等,如果不知道,现在都可以默认,以后还可以改。
#### 2. 安装常见问题
安装的时候可能会遇到一些问题,比如 Strapi 要求 node 版本大于 18,小于等于 20。如果版本不符合,可以通过 [nvm](https://github.com/nvm-sh/nvm) 管理和切换 node 版本。
安装的时候可能会在安装 sharp 这个库的时候报错:
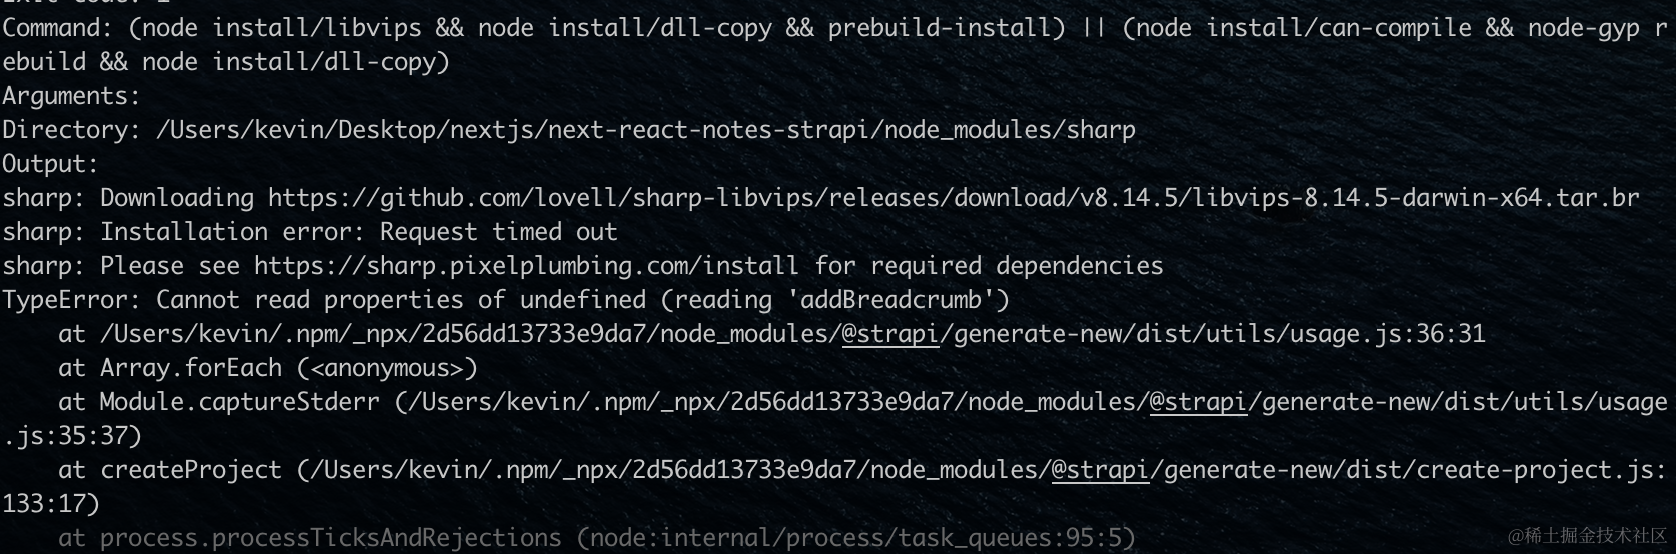
如果出现这种报错,打开电脑`~/.npmrc`这个文件,添加如下配置:
```javascript
sharp_binary_host=https://npm.taobao.org/mirrors/sharp
sharp_libvips_binary_host=https://npm.taobao.org/mirrors/sharp-libvips
```
如果成功安装,会显示项目的可用脚本命令:

### MySQL
当然现在运行 `npm run develop`也会报错,因为 MySQL 数据库相关的内容还没有设置,这里我们从安装到设置从头讲一遍。
#### 1. 安装
首先是安装 mysql 包,下载地址:
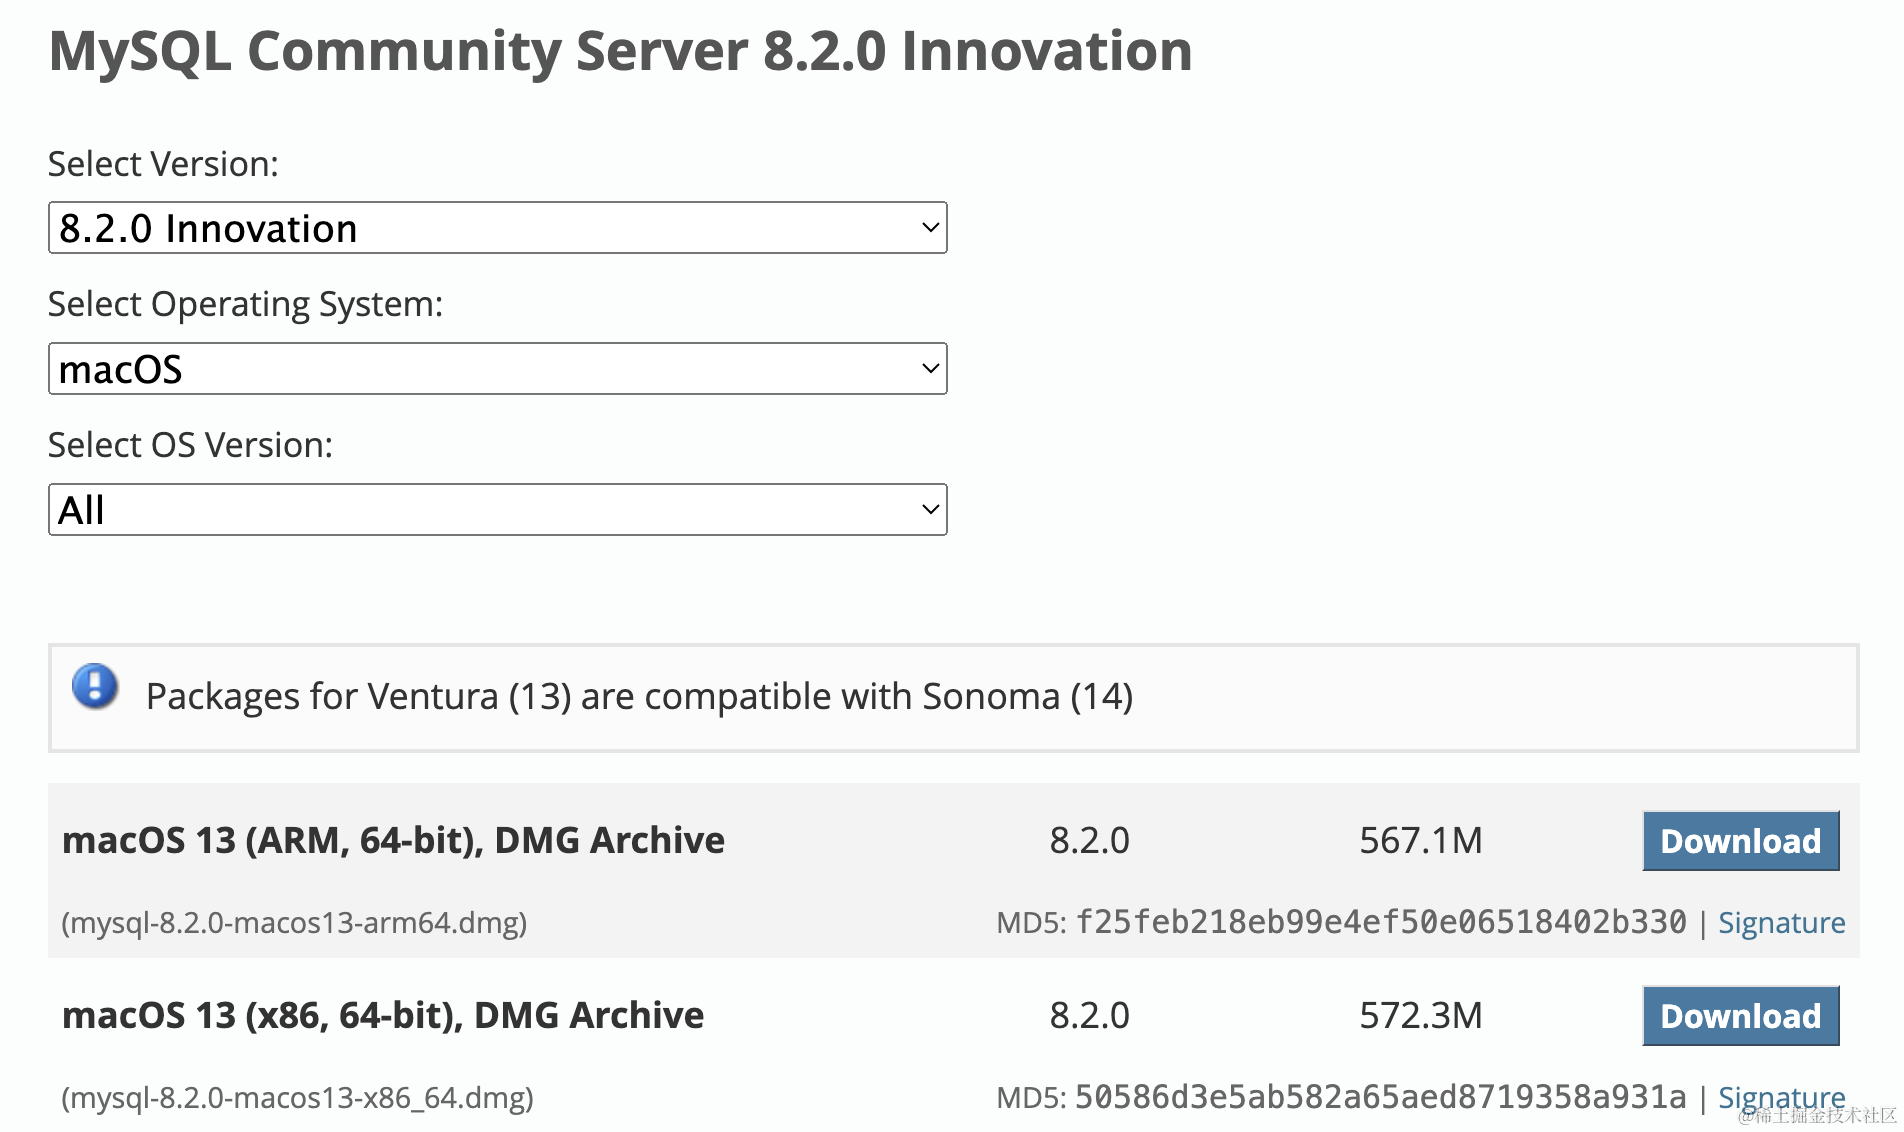
因为我个人的电脑是 macOS,所以讲一下 macOS 安装时会遇到的一些问题。
首先是选择合适的下载包。Strapi 推荐 8.0 版本,所以优先选择 8.0.xx 版本。
查看“关于本机”,如果处理器是 Intel ,选择带 `x86`的包,如果芯片是 Apple M1,选择带 `ARM`的包。
此外还要注意苹果系统的版本,下载包的名字包含了支持的 OS 系统版本。比如你的系统是 macOS 11,安装支持 macOS 13 的包,会出现报错:

如果系统是 macOS 11,可以选择 8.0.28 版本:
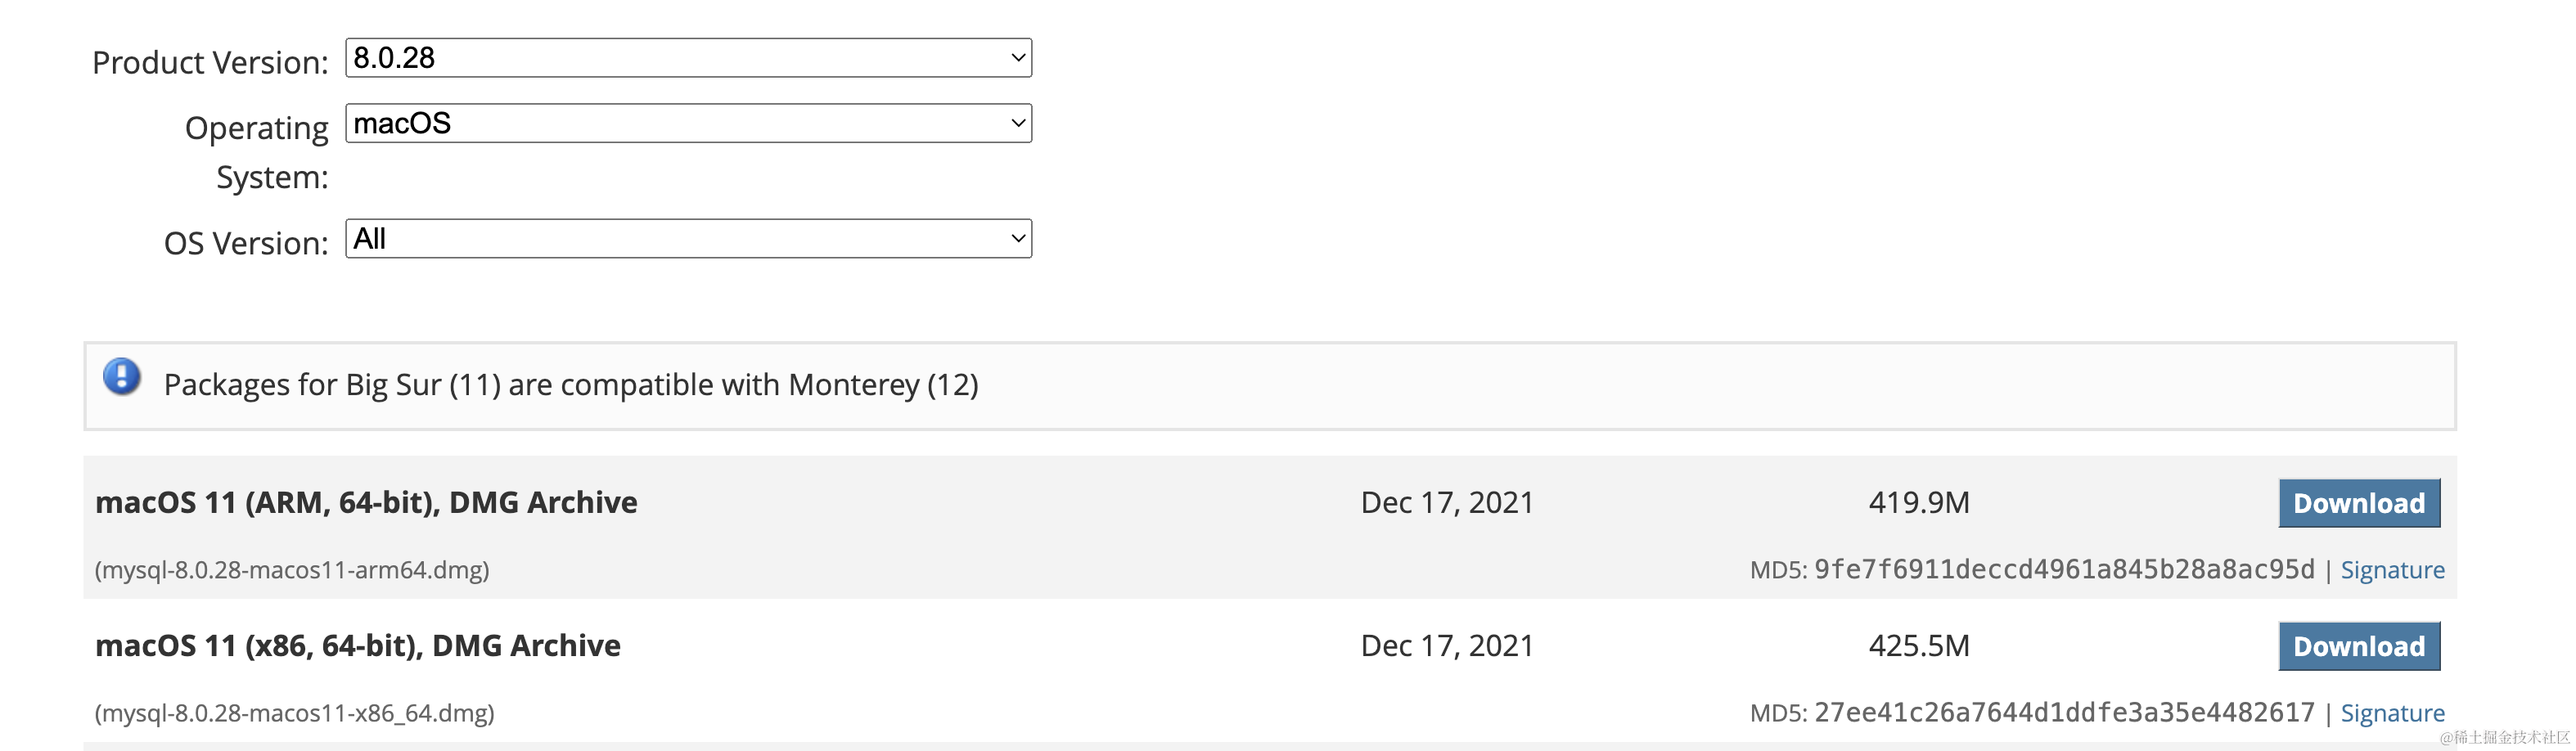
安装的过程中需要设置下 root 用户的密码,记住这个密码就行。
安装完成后,可以在“系统偏好设置”中查看到:
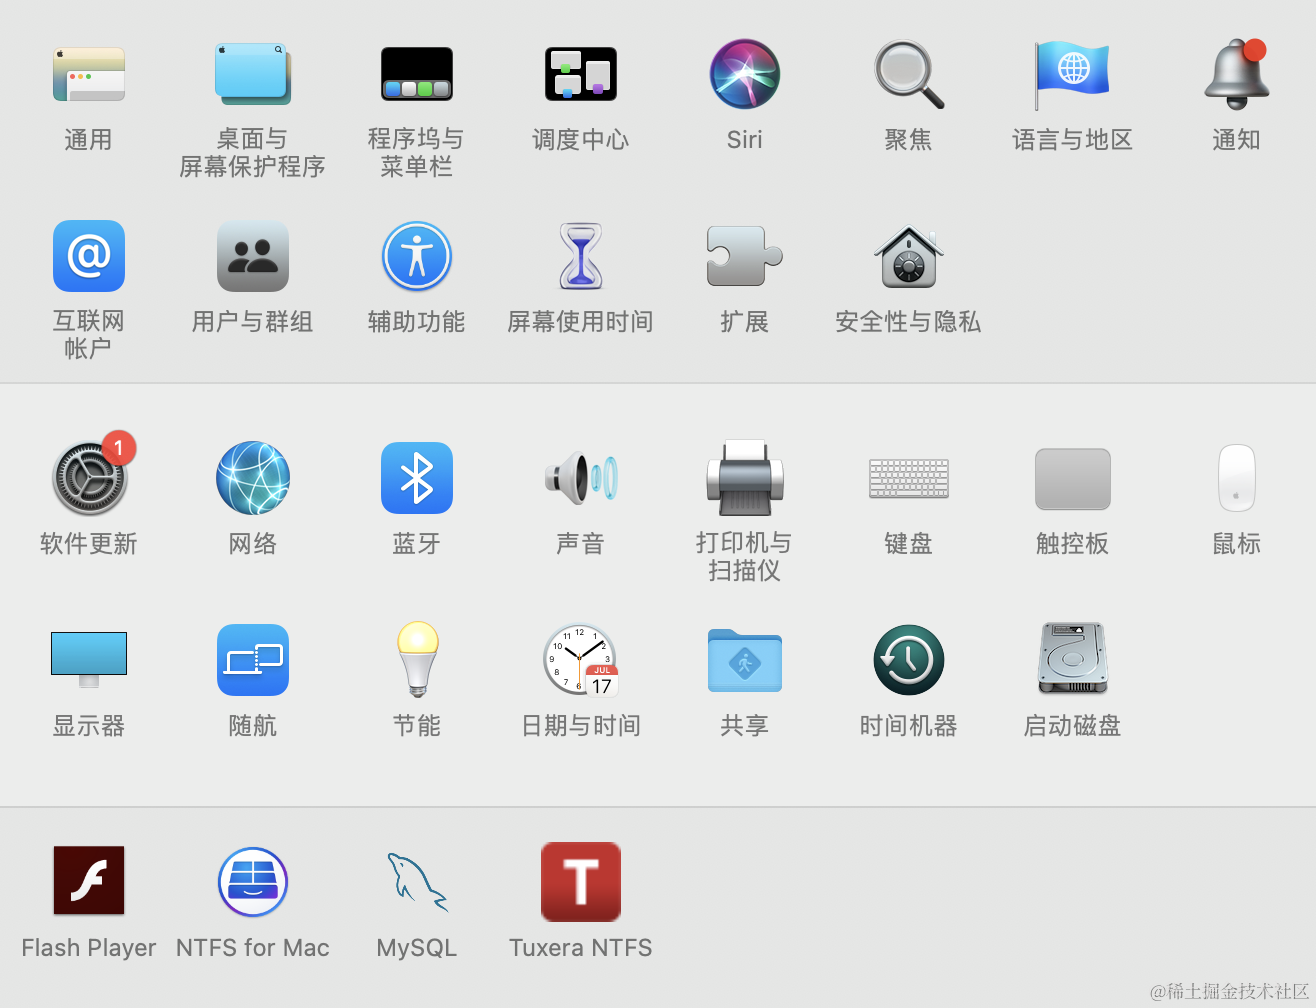
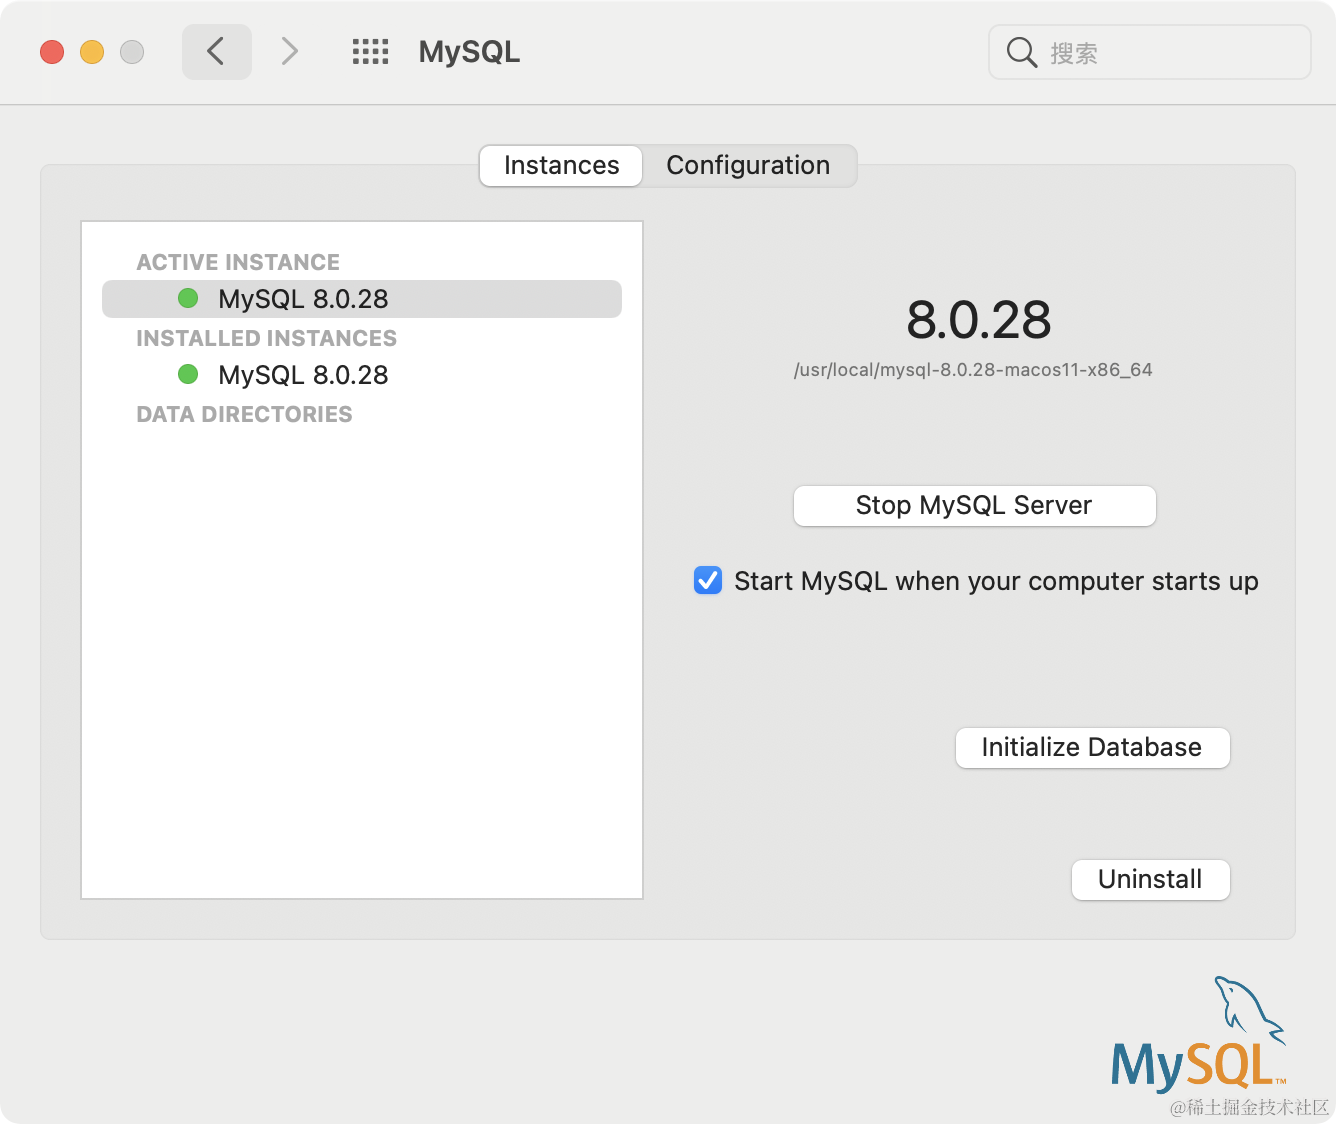
点击进入 MySQL 界面,点击 `Start MySQL Server`即可启动 MySQL:
#### 2. 配置环境变量
查看当前 Shell:
```bash
echo $SHELL
```
如果是 `/bin/bash`,说明用的是 bash,如果是 `/bin/zsh`,说明用的是 zsh。
如果是 `bash`:
```bash
# 1. 更改
vim ~/.bash_profile
# 2. 添加
export PATH=${PATH}:/usr/local/mysql/bin
# 3. 更新
source ~/.bash_profile
```
如果是 `zsh`:
```javascript
# 1. 更改
vim ~/.zshrc
# 2. 添加
export PATH=${PATH}:/usr/local/mysql/bin
# 3. 更新
source ~/.zshrc
```
此时在命令行中输入:
```bash
mysql -u root -p
```
输入安装时设置的密码,即可成功进入 MySQL CLI:

#### 3. 数据库配置
来都来了,那就顺便创建下会用到的数据库,执行:
```javascript
CREATE DATABASE strapi
```
别忘了在末尾带个 `\g`表示命令结束,这里我们创建了一个名为 strapi 的数据库:

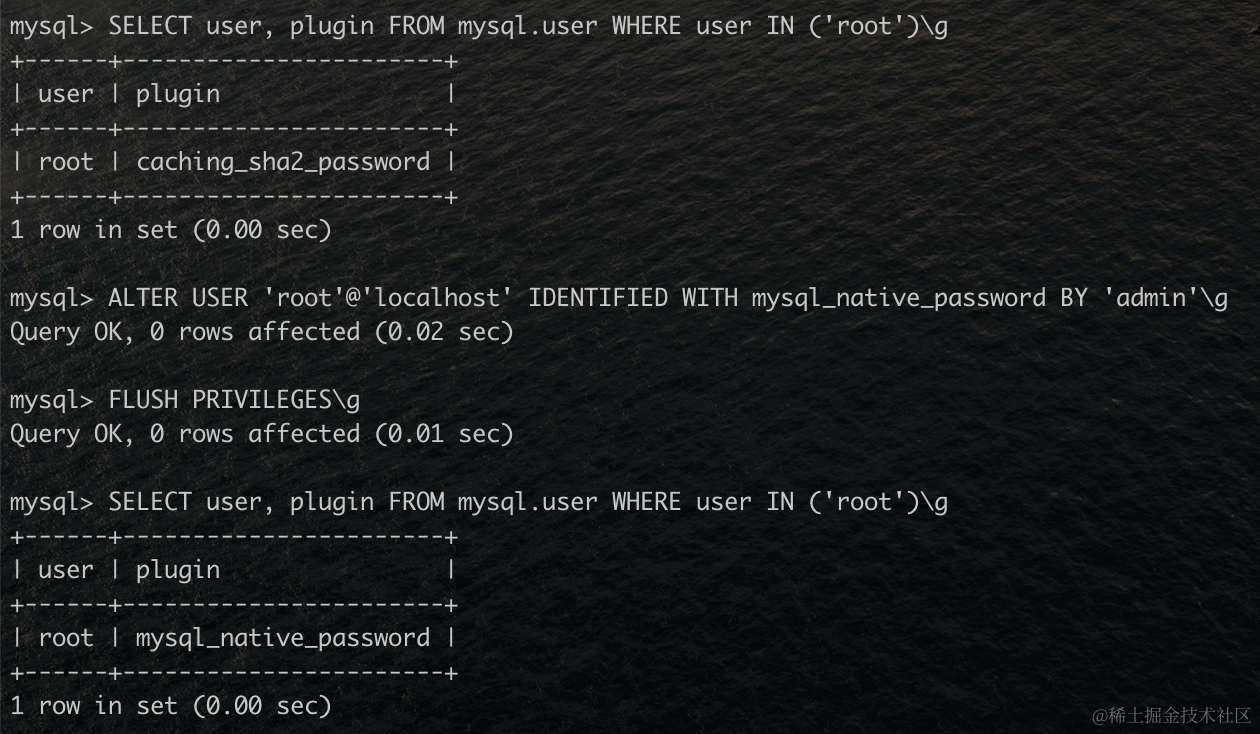
然后我们查看下 root 用户用到的 authentication 插件。因为 MySQL 8.0.x 默认的是 `chaching_sha2_password`,但是 Strapi 需要是 `mysql_native_password`,运行:
```javascript
SELECT user, plugin FROM mysql.user WHERE user IN ('root')
```
如果是 `caching_sha2_password`,运行:
```bash
ALTER USER 'root'@'localhost' IDENTIFIED WITH mysql_native_password BY 'admin'
```
注意其中 `admin` 表示设置的新密码,如果在这里修改,会影响你运行 `mysql -u root -p`时输入的密码。再运行:
```bash
FLUSH PRIVILEGES
```
此时再运行以下命令查看 pulgin:
```bash
SELECT user, plugin FROM mysql.user WHERE user IN ('root')
```
#### 4. 运行 Strapi 项目
现在我们已经获得了数据库的相关信息,也做好了准备,进入上节安装的 Strapi 项目目录,打开根目录的 `.env`文件,像下面这样填入数据库信息:
```javascript
# Database
DATABASE_CLIENT=mysql
DATABASE_HOST=127.0.0.1
DATABASE_PORT=3306
DATABASE_NAME=strapi
DATABASE_USERNAME=root
DATABASE_PASSWORD=admin
DATABASE_SSL=false
```
MySQL 数据库默认就是 3306 端口,所以不需要修改。数据库名称选择 `CREATE DATABASE xxxxxx`时填入的名字,用户名为 root,密码为运行 `ALTER USER 'root'@'localhost' IDENTIFIED WITH mysql_native_password BY 'xxxxx'` 时填写的密码,这里是 `admin`。
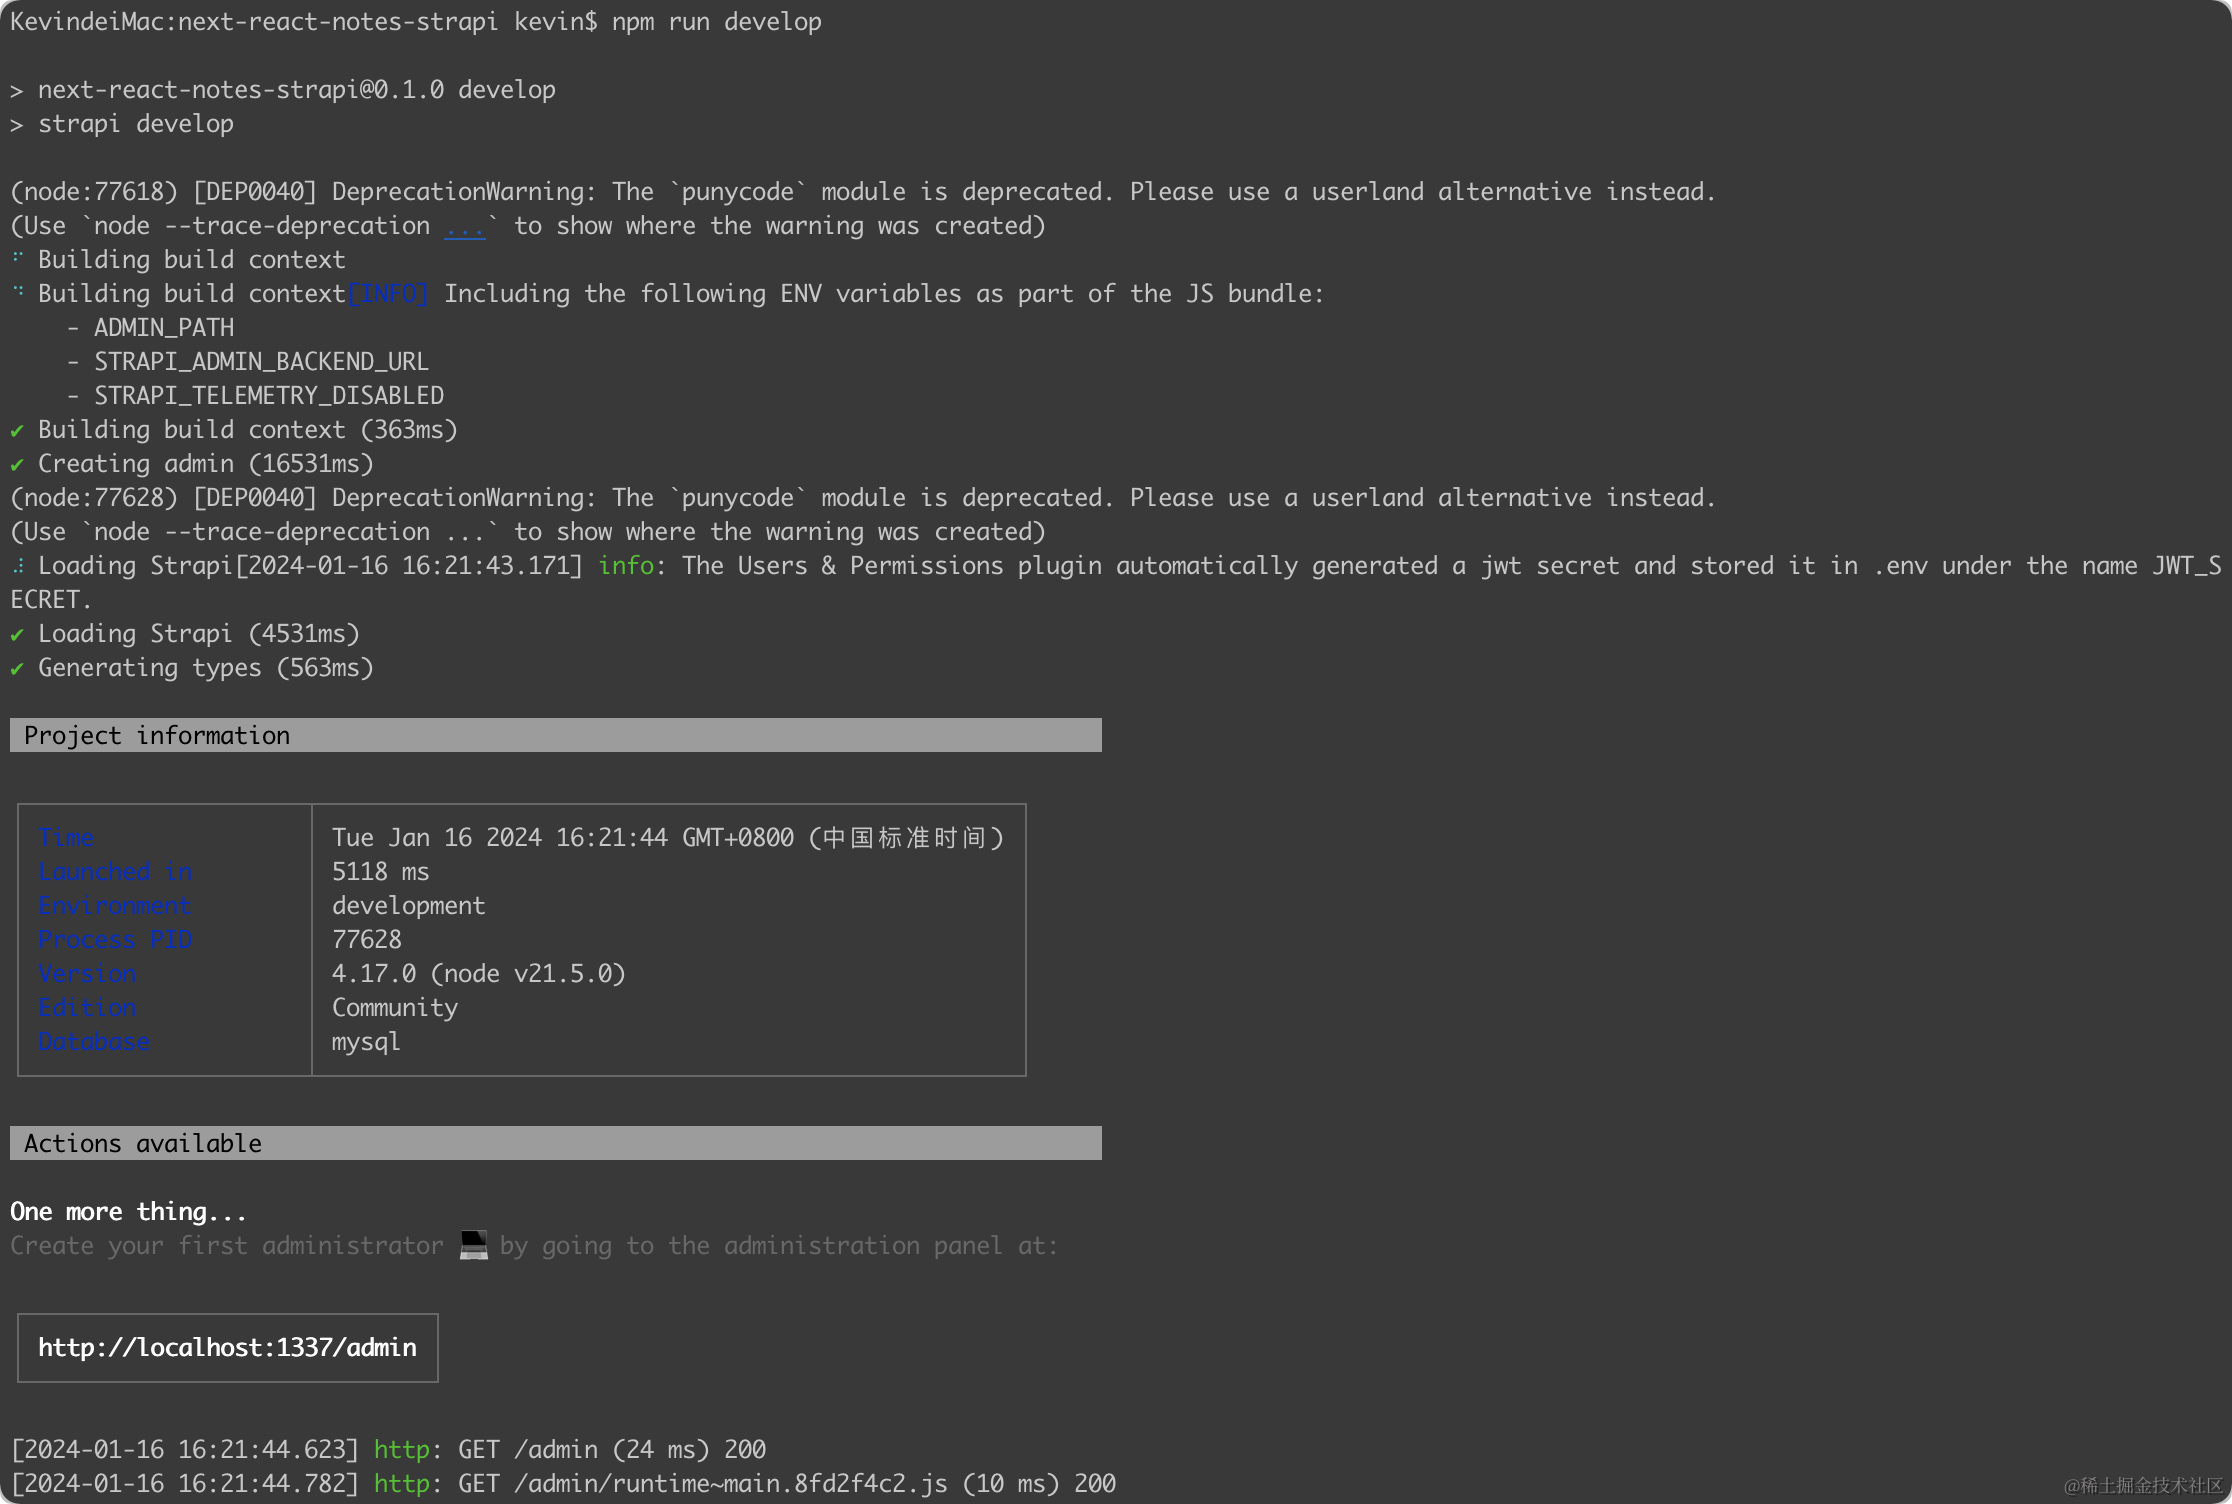
此时再运行 `npm run develop`,应该就能正常运行起来:
**这个安装过程可能会遇到很多问题,我也不能面面俱到,欢迎大家留言分享自己遇到的问题和解决方法,帮助后来的学习者。**
### Strapi 创建接口
如果你成功运行,应该会打开此页面:
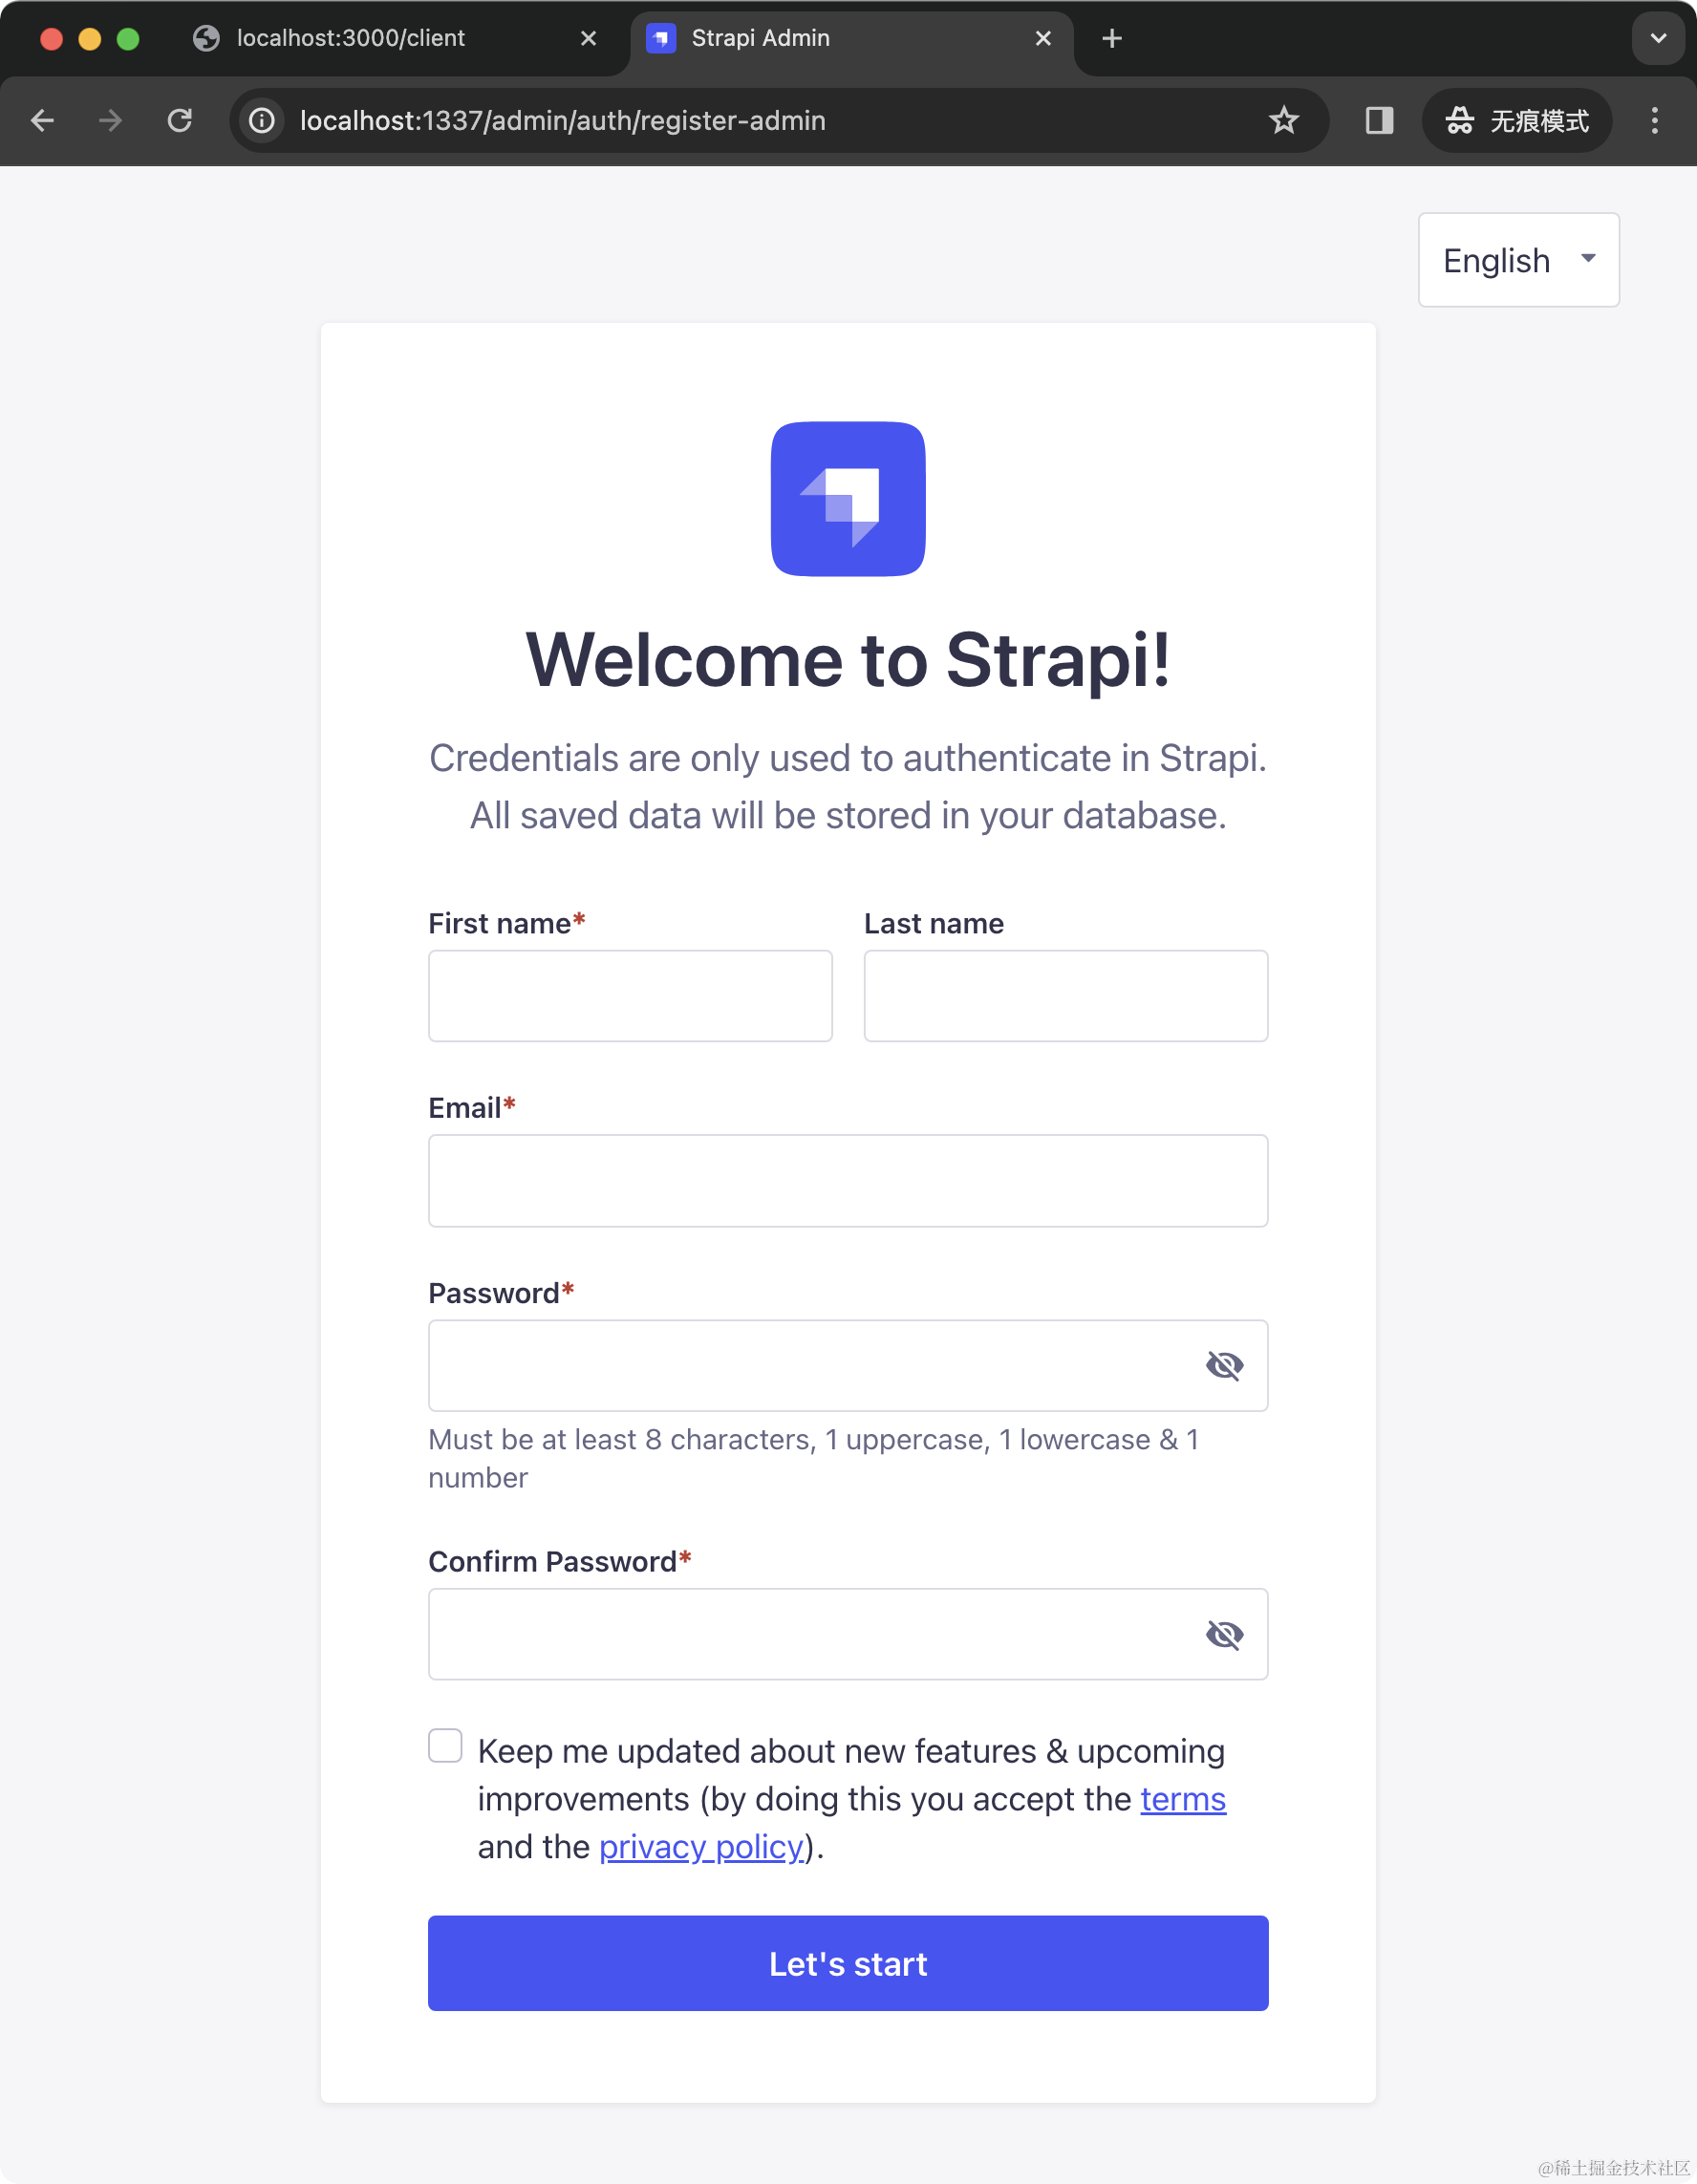
这里的信息用于 Strapi 认证,所有的数据也都存储在本地的数据库里。所以这里随便填,但是得记住,以后可能会用到。
填写完后进入主界面:
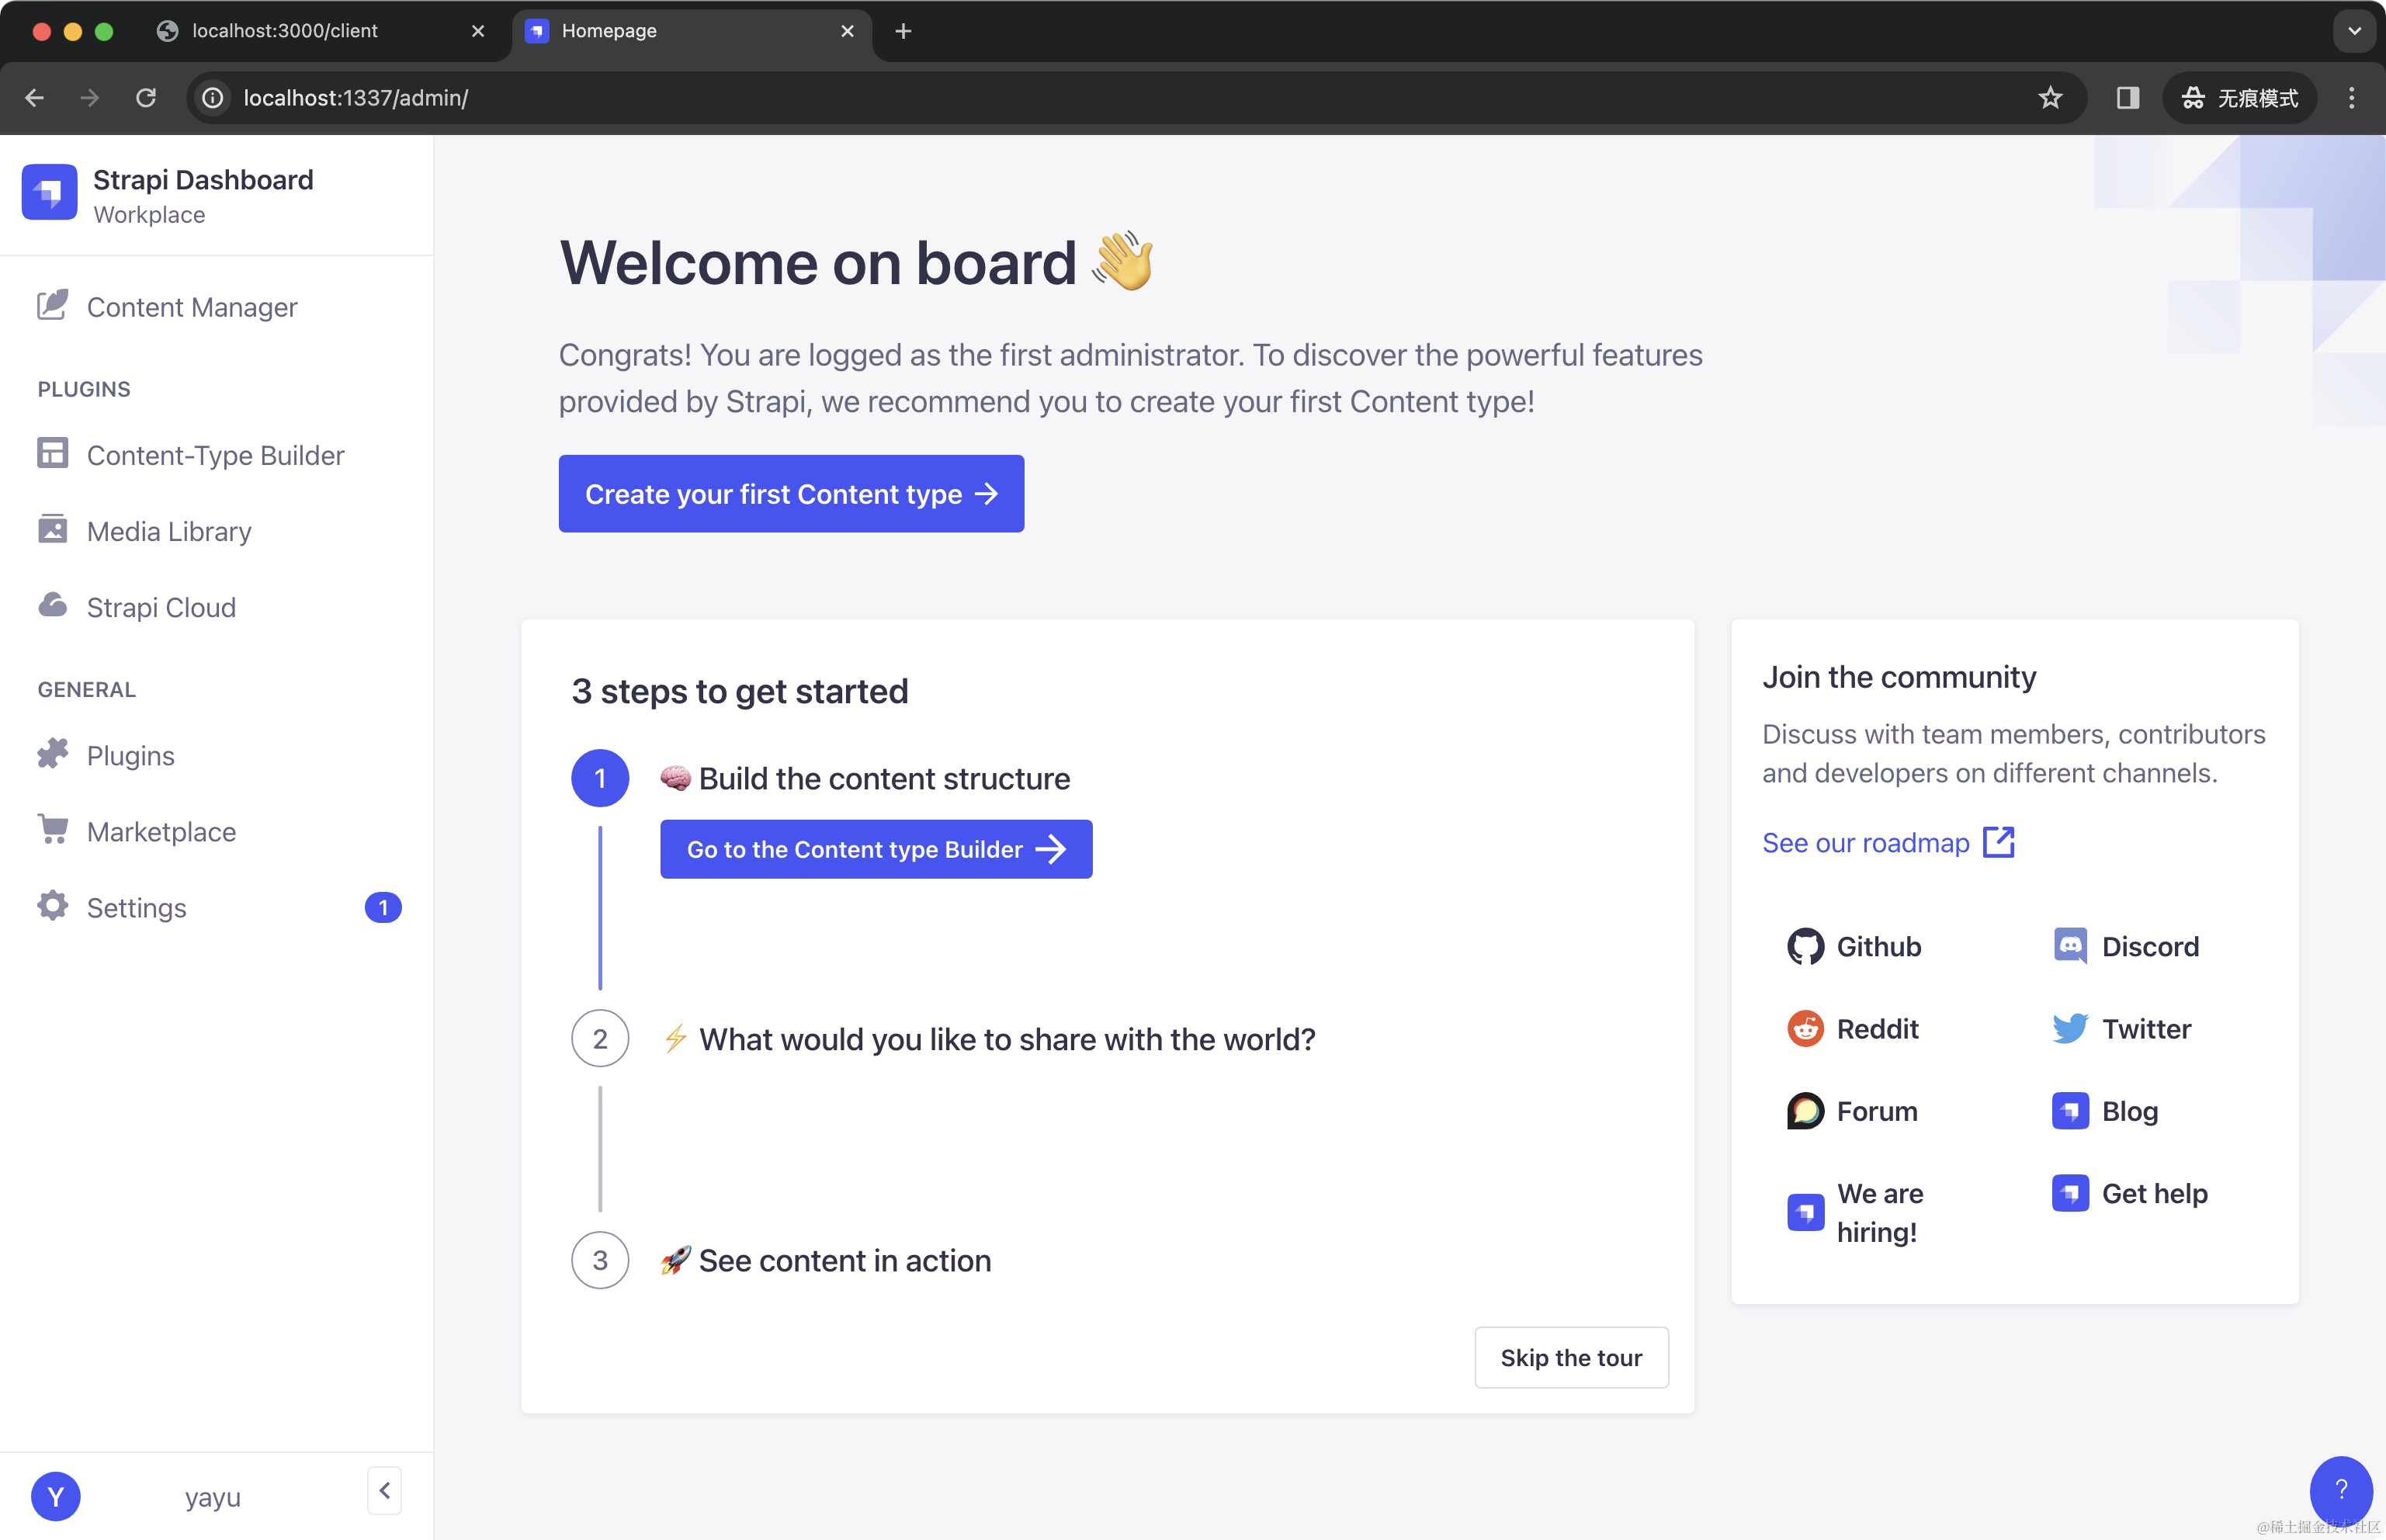
#### 1. 设置中文
为了方便使用,我们先把界面的中文设置了,打开 `src/admin/app.example.js`,重命名为`app.js`,在其中取消掉 `'zh-Hans'`的注释:
```javascript
const config = {
locales: [
// 'ar',
// 'fr',
// 'cs',
// 'de',
// 'dk',
// 'es',
// 'he',
// 'id',
// 'it',
// 'ja',
// 'ko',
// 'ms',
// 'nl',
// 'no',
// 'pl',
// 'pt-BR',
// 'pt',
// 'ru',
// 'sk',
// 'sv',
// 'th',
// 'tr',
// 'uk',
// 'vi',
'zh-Hans',
// 'zh',
],
};
const bootstrap = (app) => {
console.log(app);
};
export default {
config,
bootstrap,
};
```
然后点击左下角的用户名 -> Profile,拉到最下面,选择`中文(简体)`:
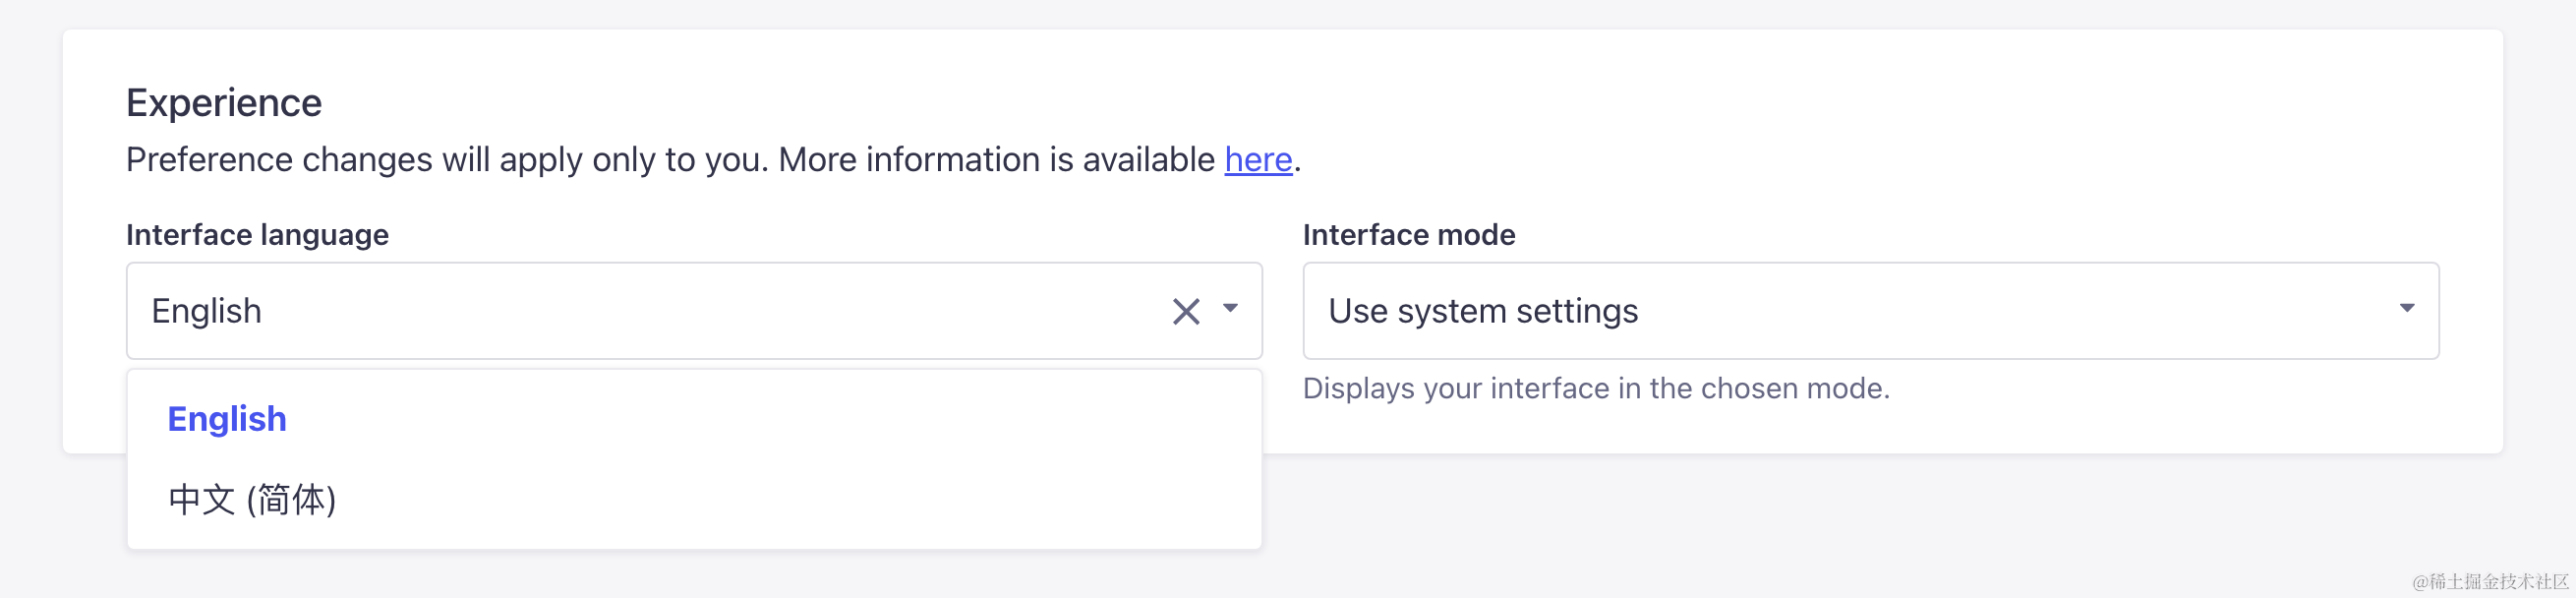
保存后,主界面即改为中文:
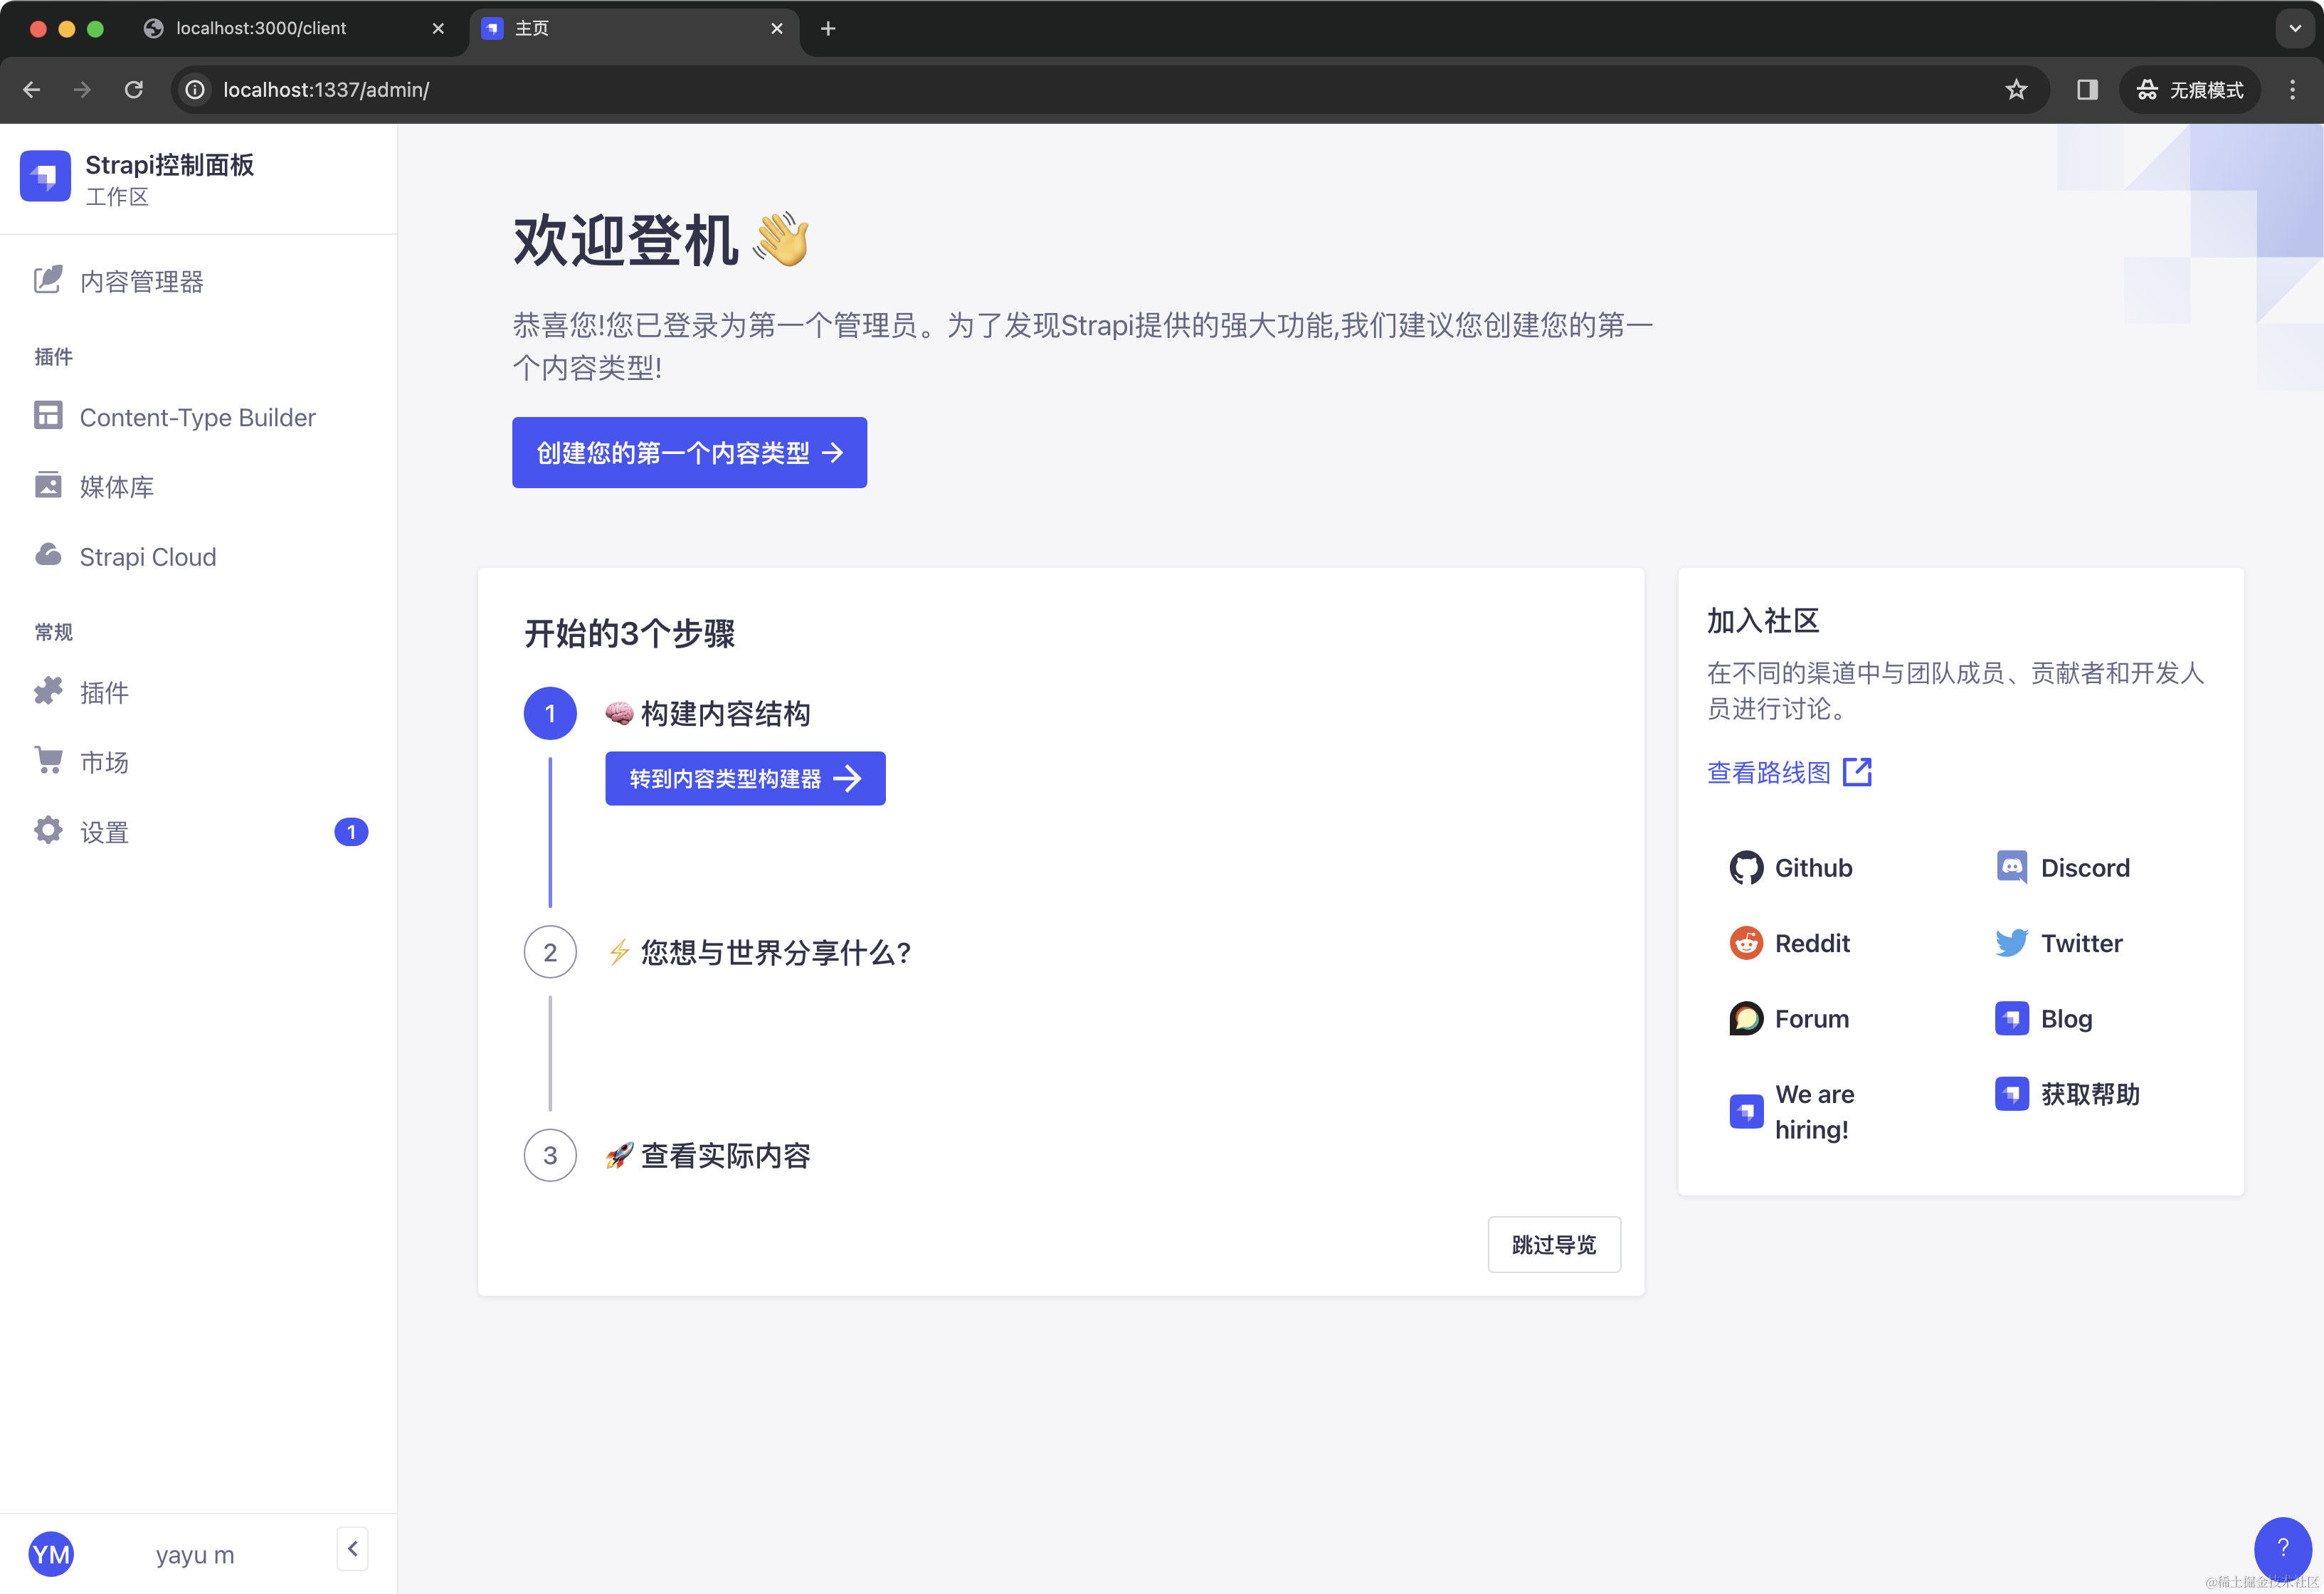
说真的,这中文翻译也就那样吧……我个人感觉还不如用英文。
#### 2. 创建 REST API
现在我们来创建接口吧!
**2.1. 建表**
首先打开 `Content-Type Builder`,这里有三种类型可以选择:
1. `COLLECTION TYPES`:管理多个条目的内容类型
2. `SINGLE TYPES`:管理一个条目的内容类型
3. `COMPONENTS`:一种可用于 `COLLECTION TYPES`和 `SINGLE TYPES` 的数据结构
简单的来说,`COLLECTION TYPES` 就是我们常说的数据库里的“表”,可以有多条数据。`SINGLE TYPES`只能管理一条数据,可用于全局配置。`COMPONENTS` 表示一种数据结构,它可以在其他类型中复用。比如你可以创建一个名为 SEO 的组件,负责管理标题、描述等字段。然后你可以在 Article 和 Product 这两个 COLLECTION TYPES 中复用这个组件,而不用重新一一建立。
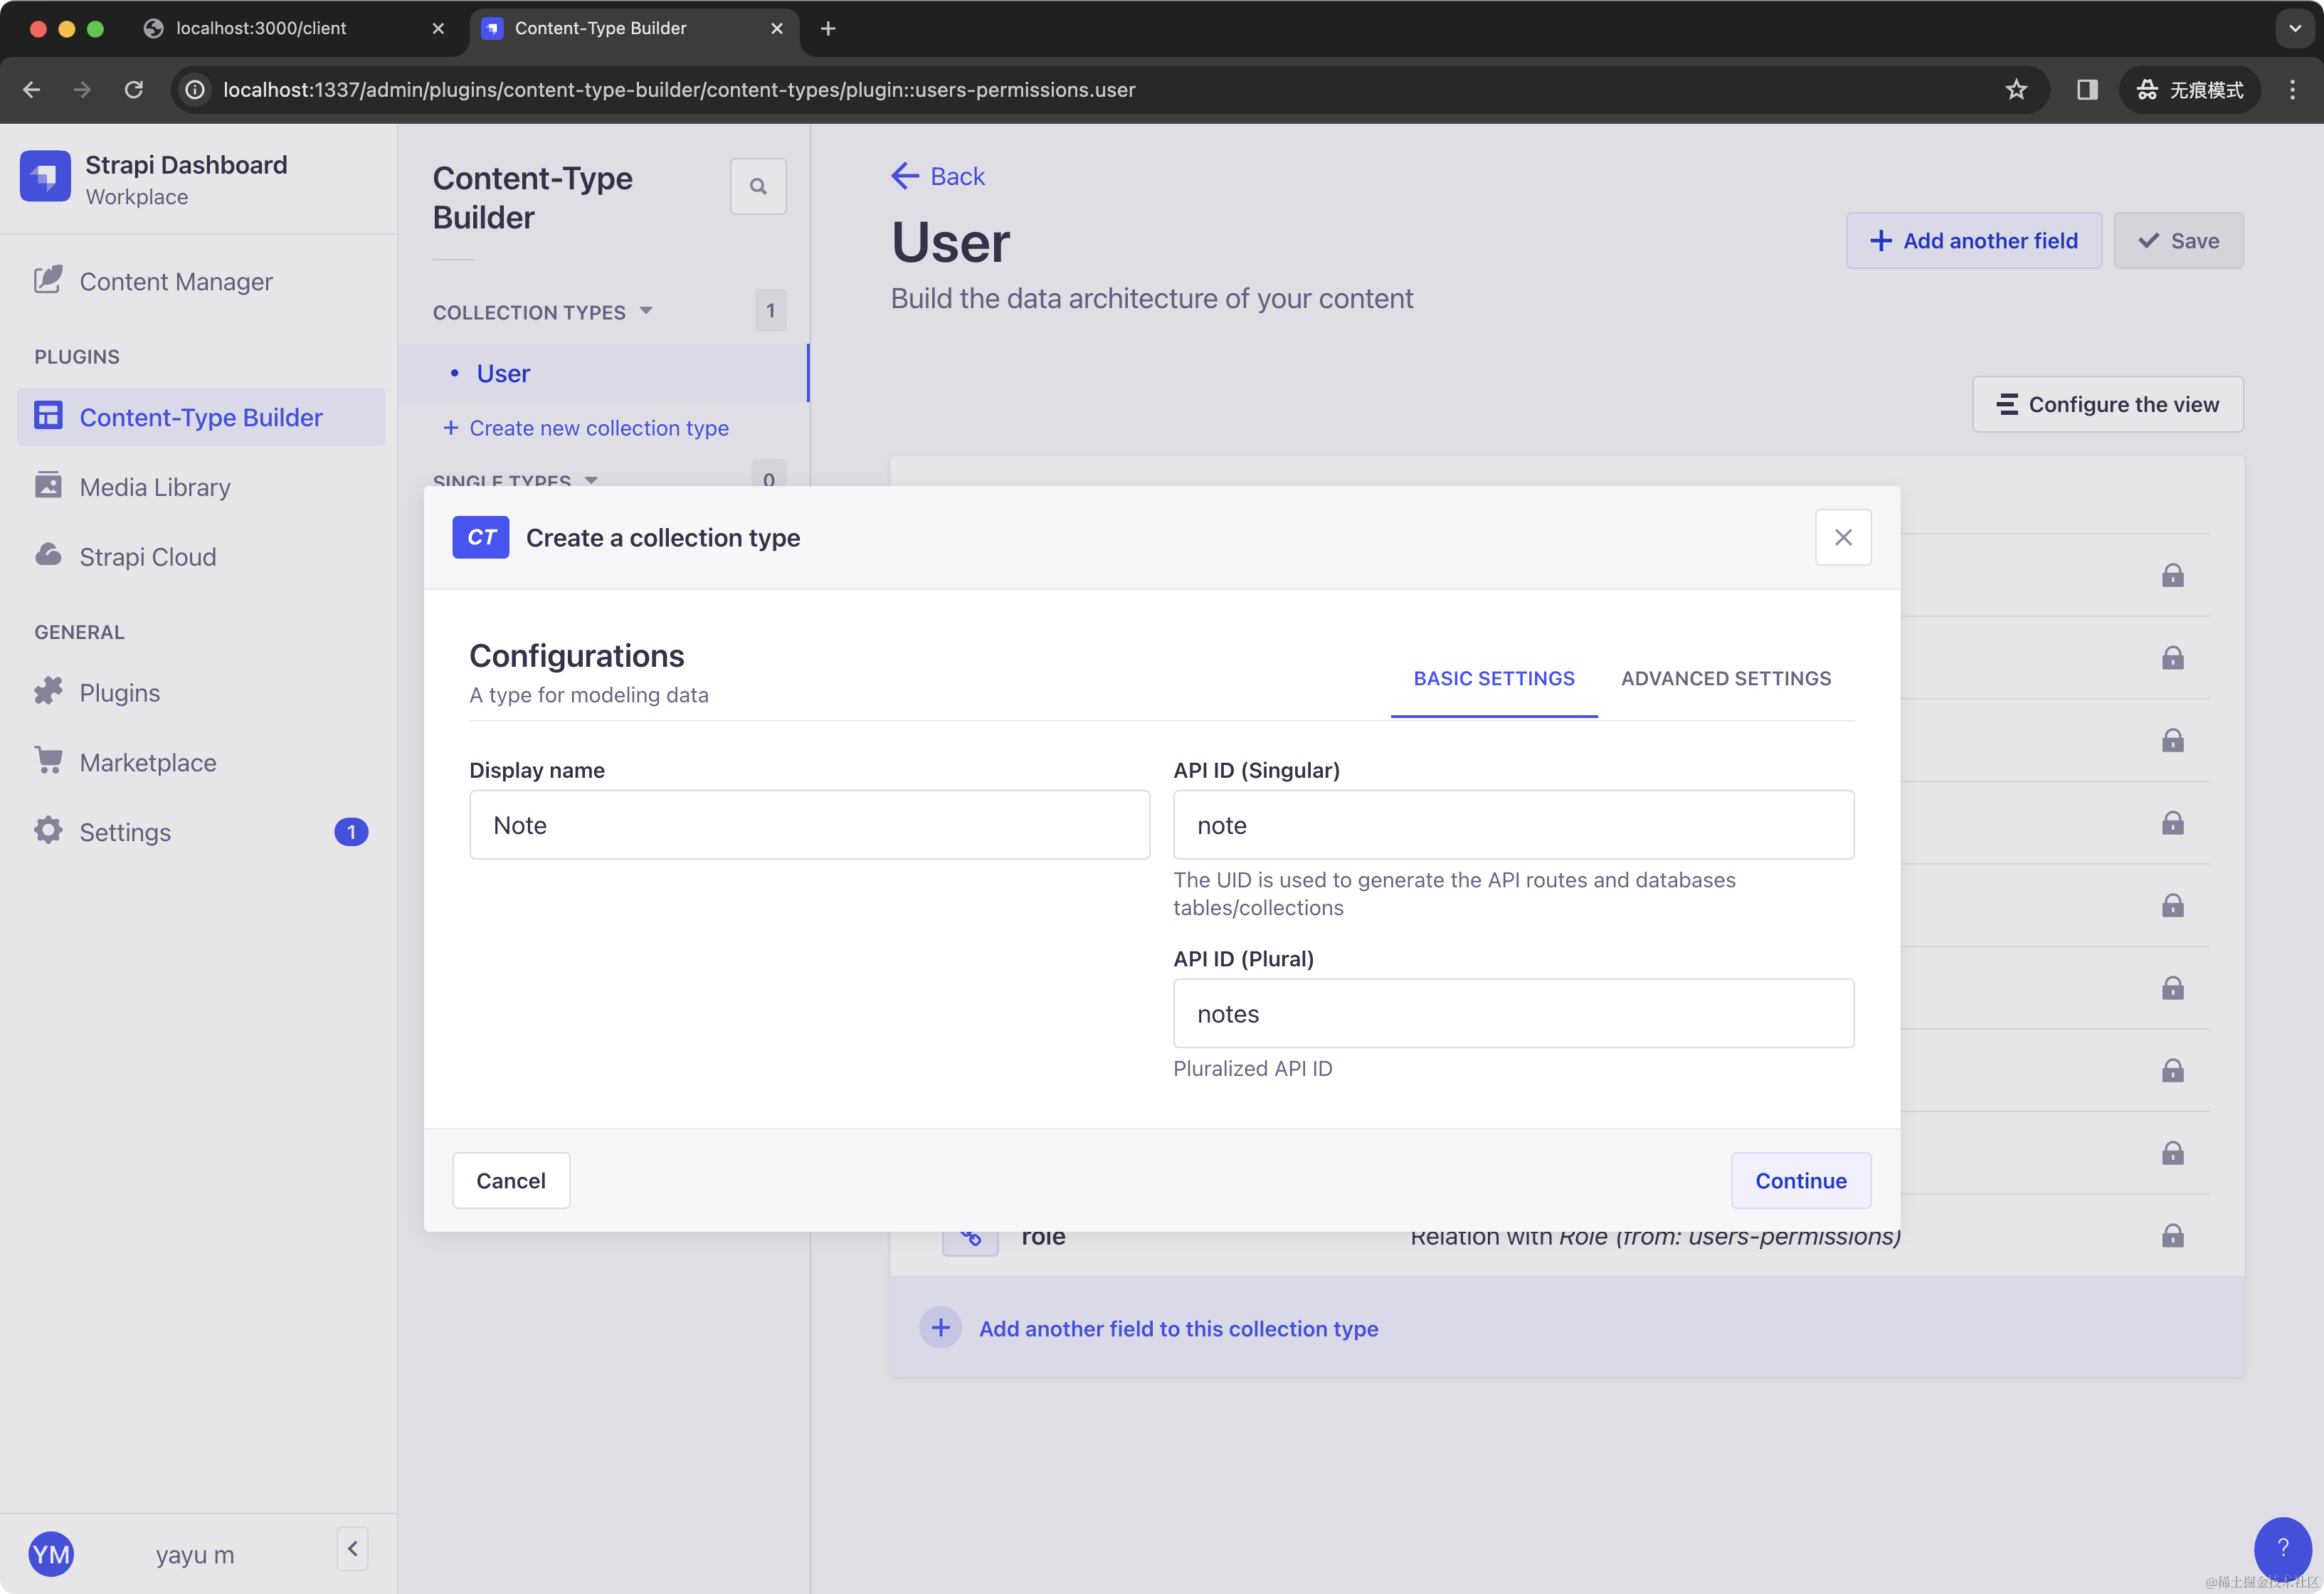
这里我们选择 `COLLECTION TYPES`,建立一个名为 Note 的集合类型,它对应的单数 ID 为 note,复数 ID 为 notes,这些是自动生成的,用于生成我们的接口地址。此步骤相当于建表。
### 
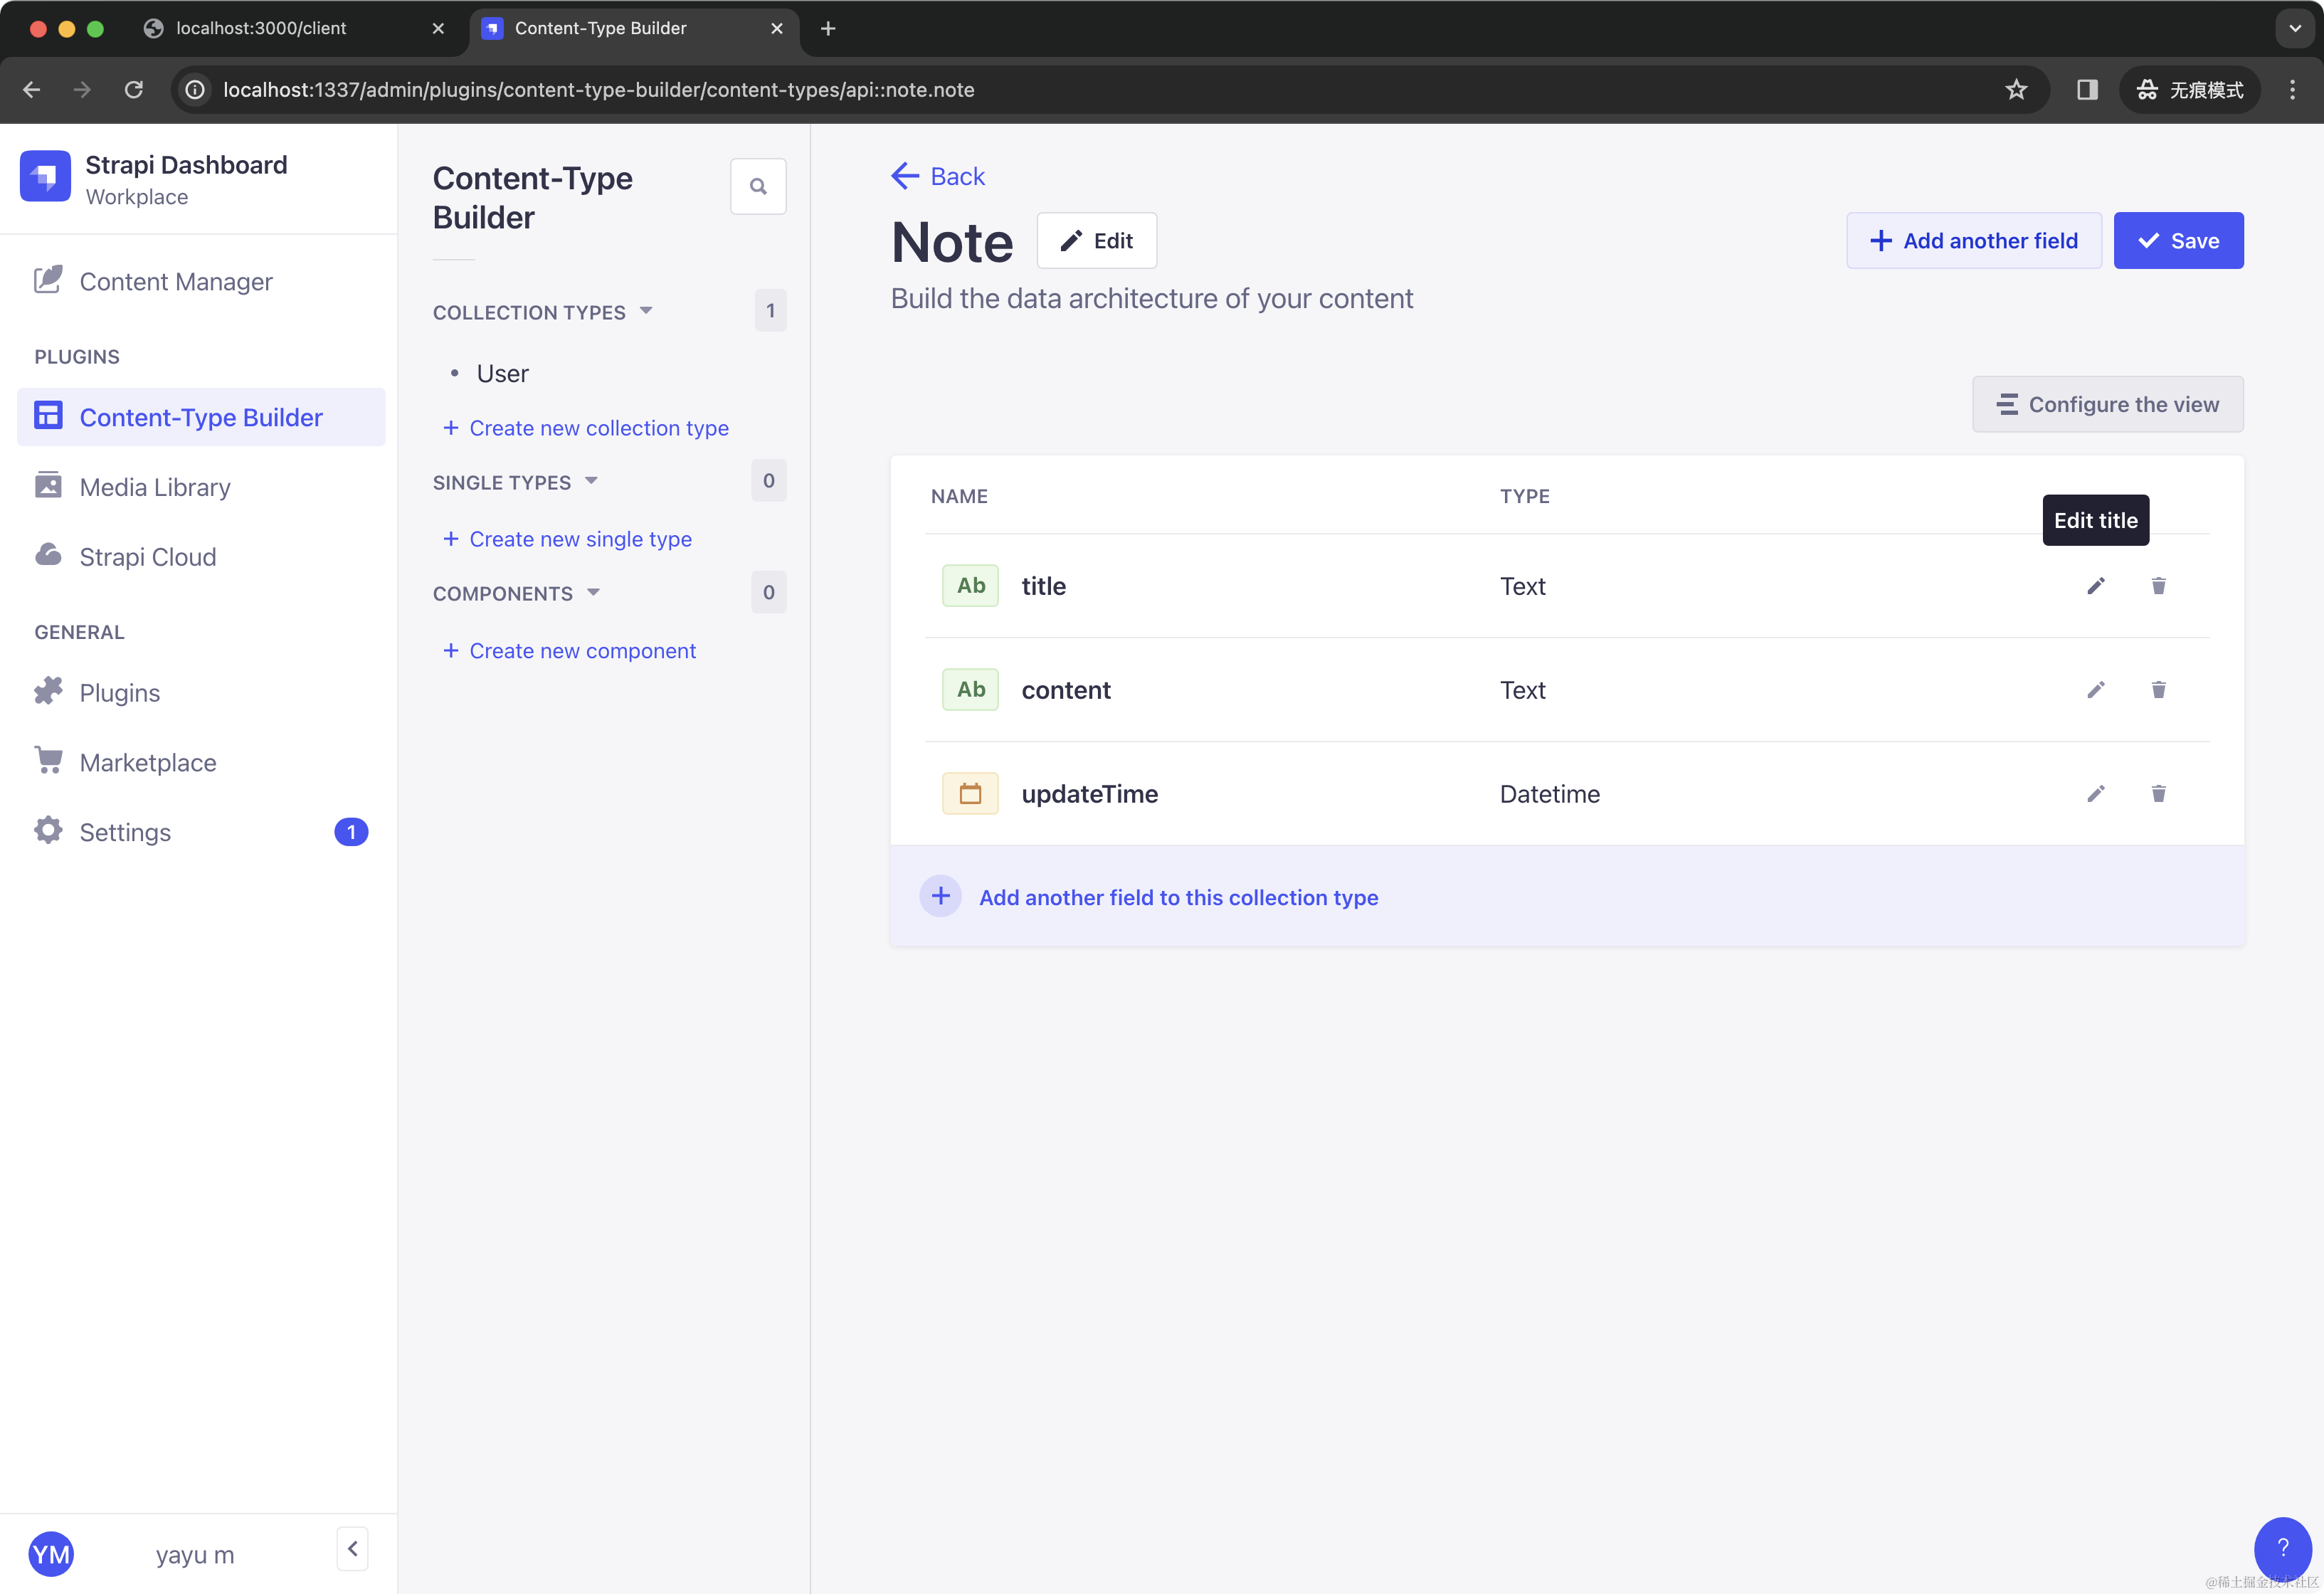
然后就是添加各种字段,对应为表建立各种字段:
**2.2. 填充数据**
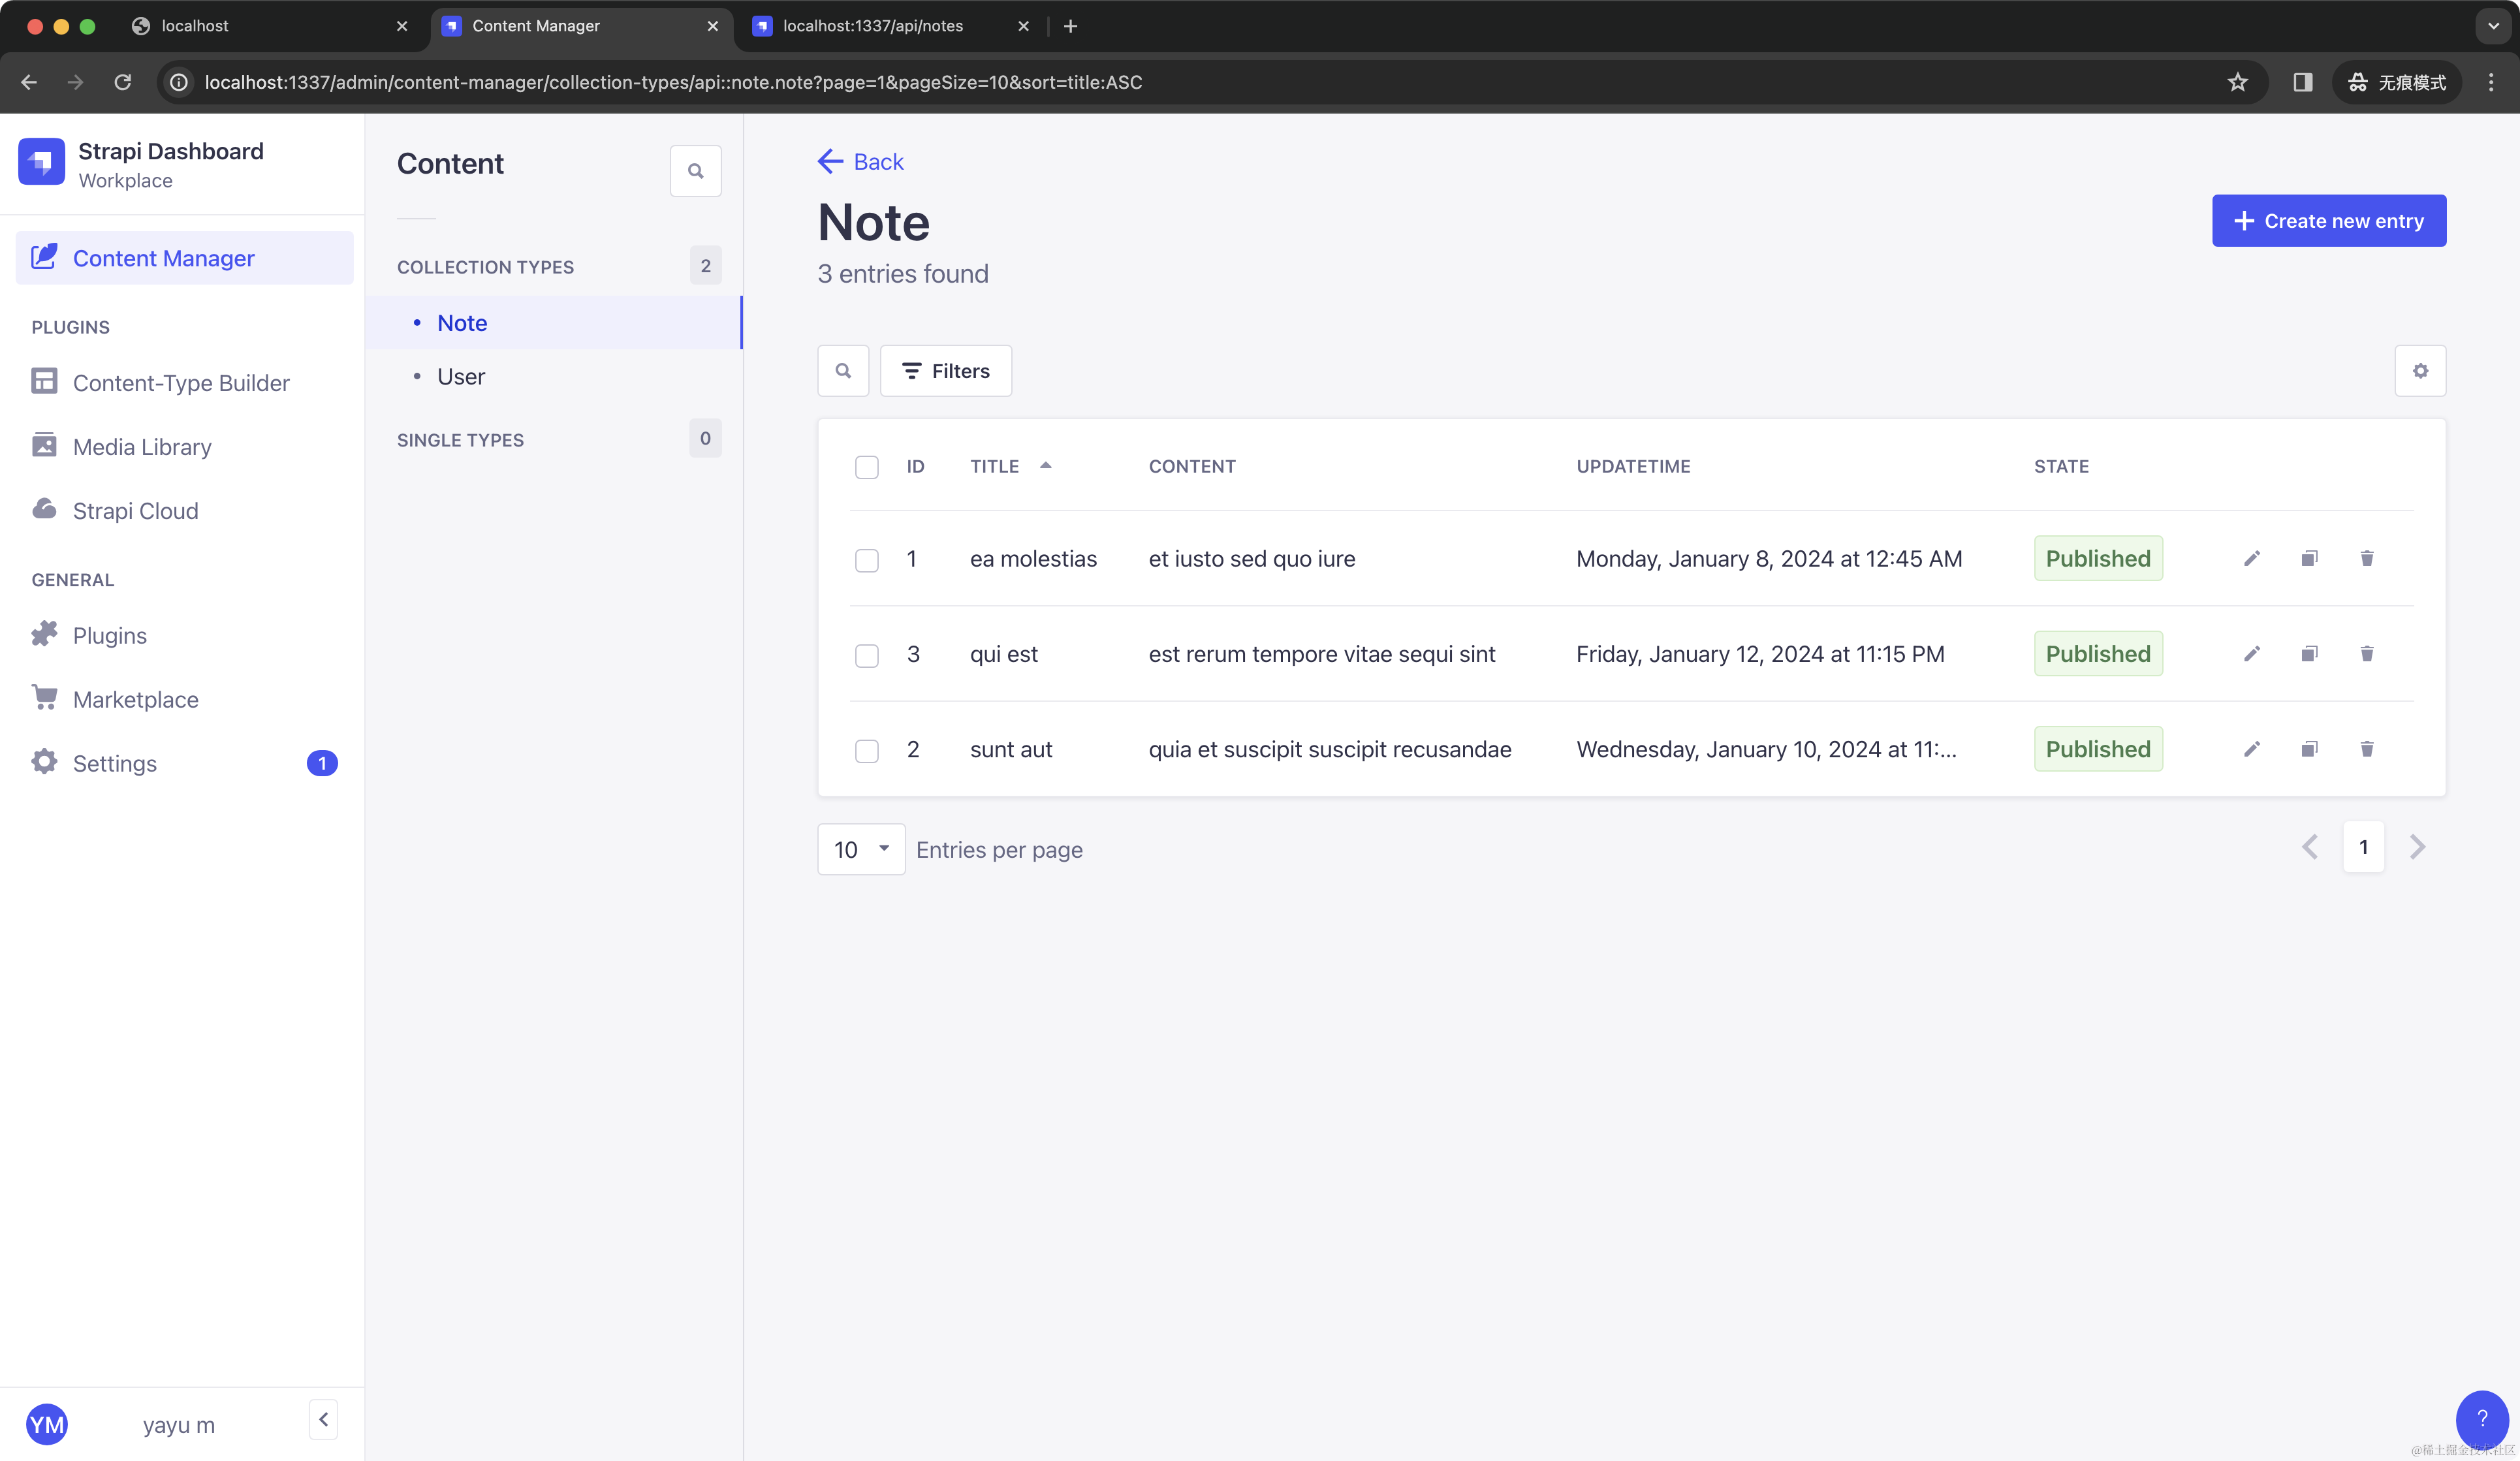
回到 `Content Manager`,选择 `Note`这个集合类型,然后点击 `Create new entry`,这步就是让你填充一些数据。我们象征性的填充一些数据:
**2.3. 生成 token**
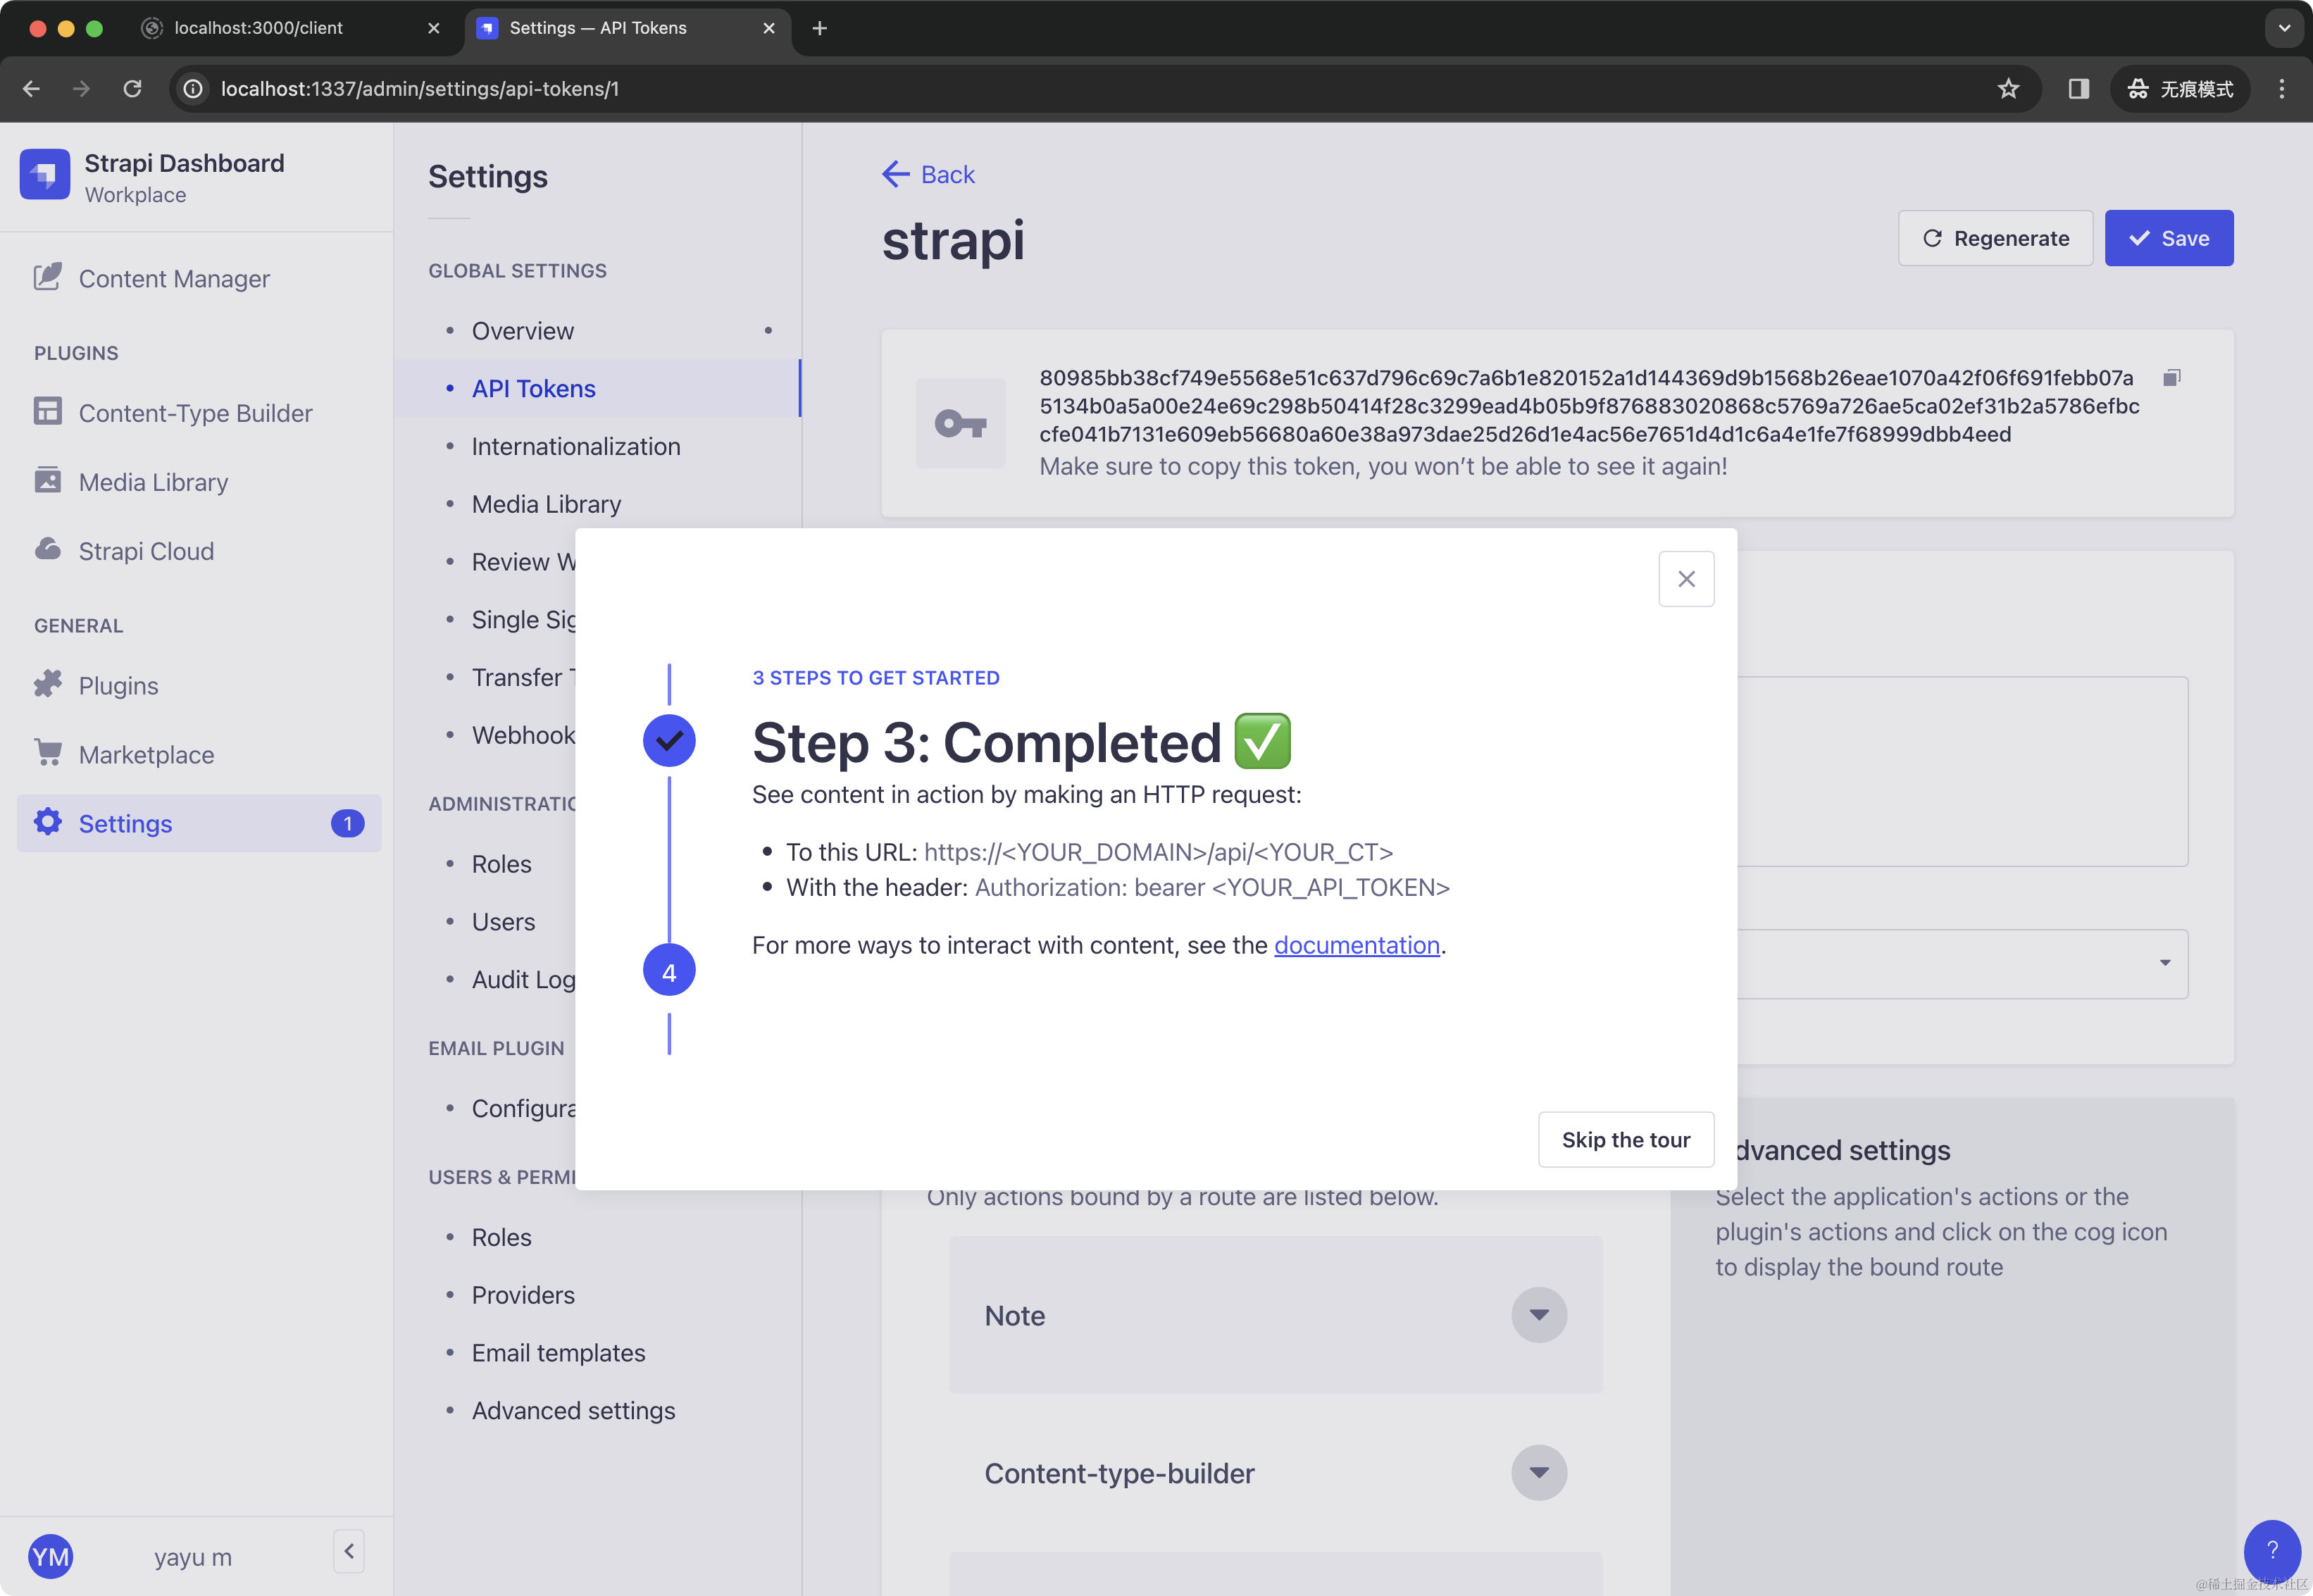
打开 `Settings` -> `API Tokens`,点击 `Create new API Token`,生成 API Token,该 Token 决定了权限范围和使用时间。
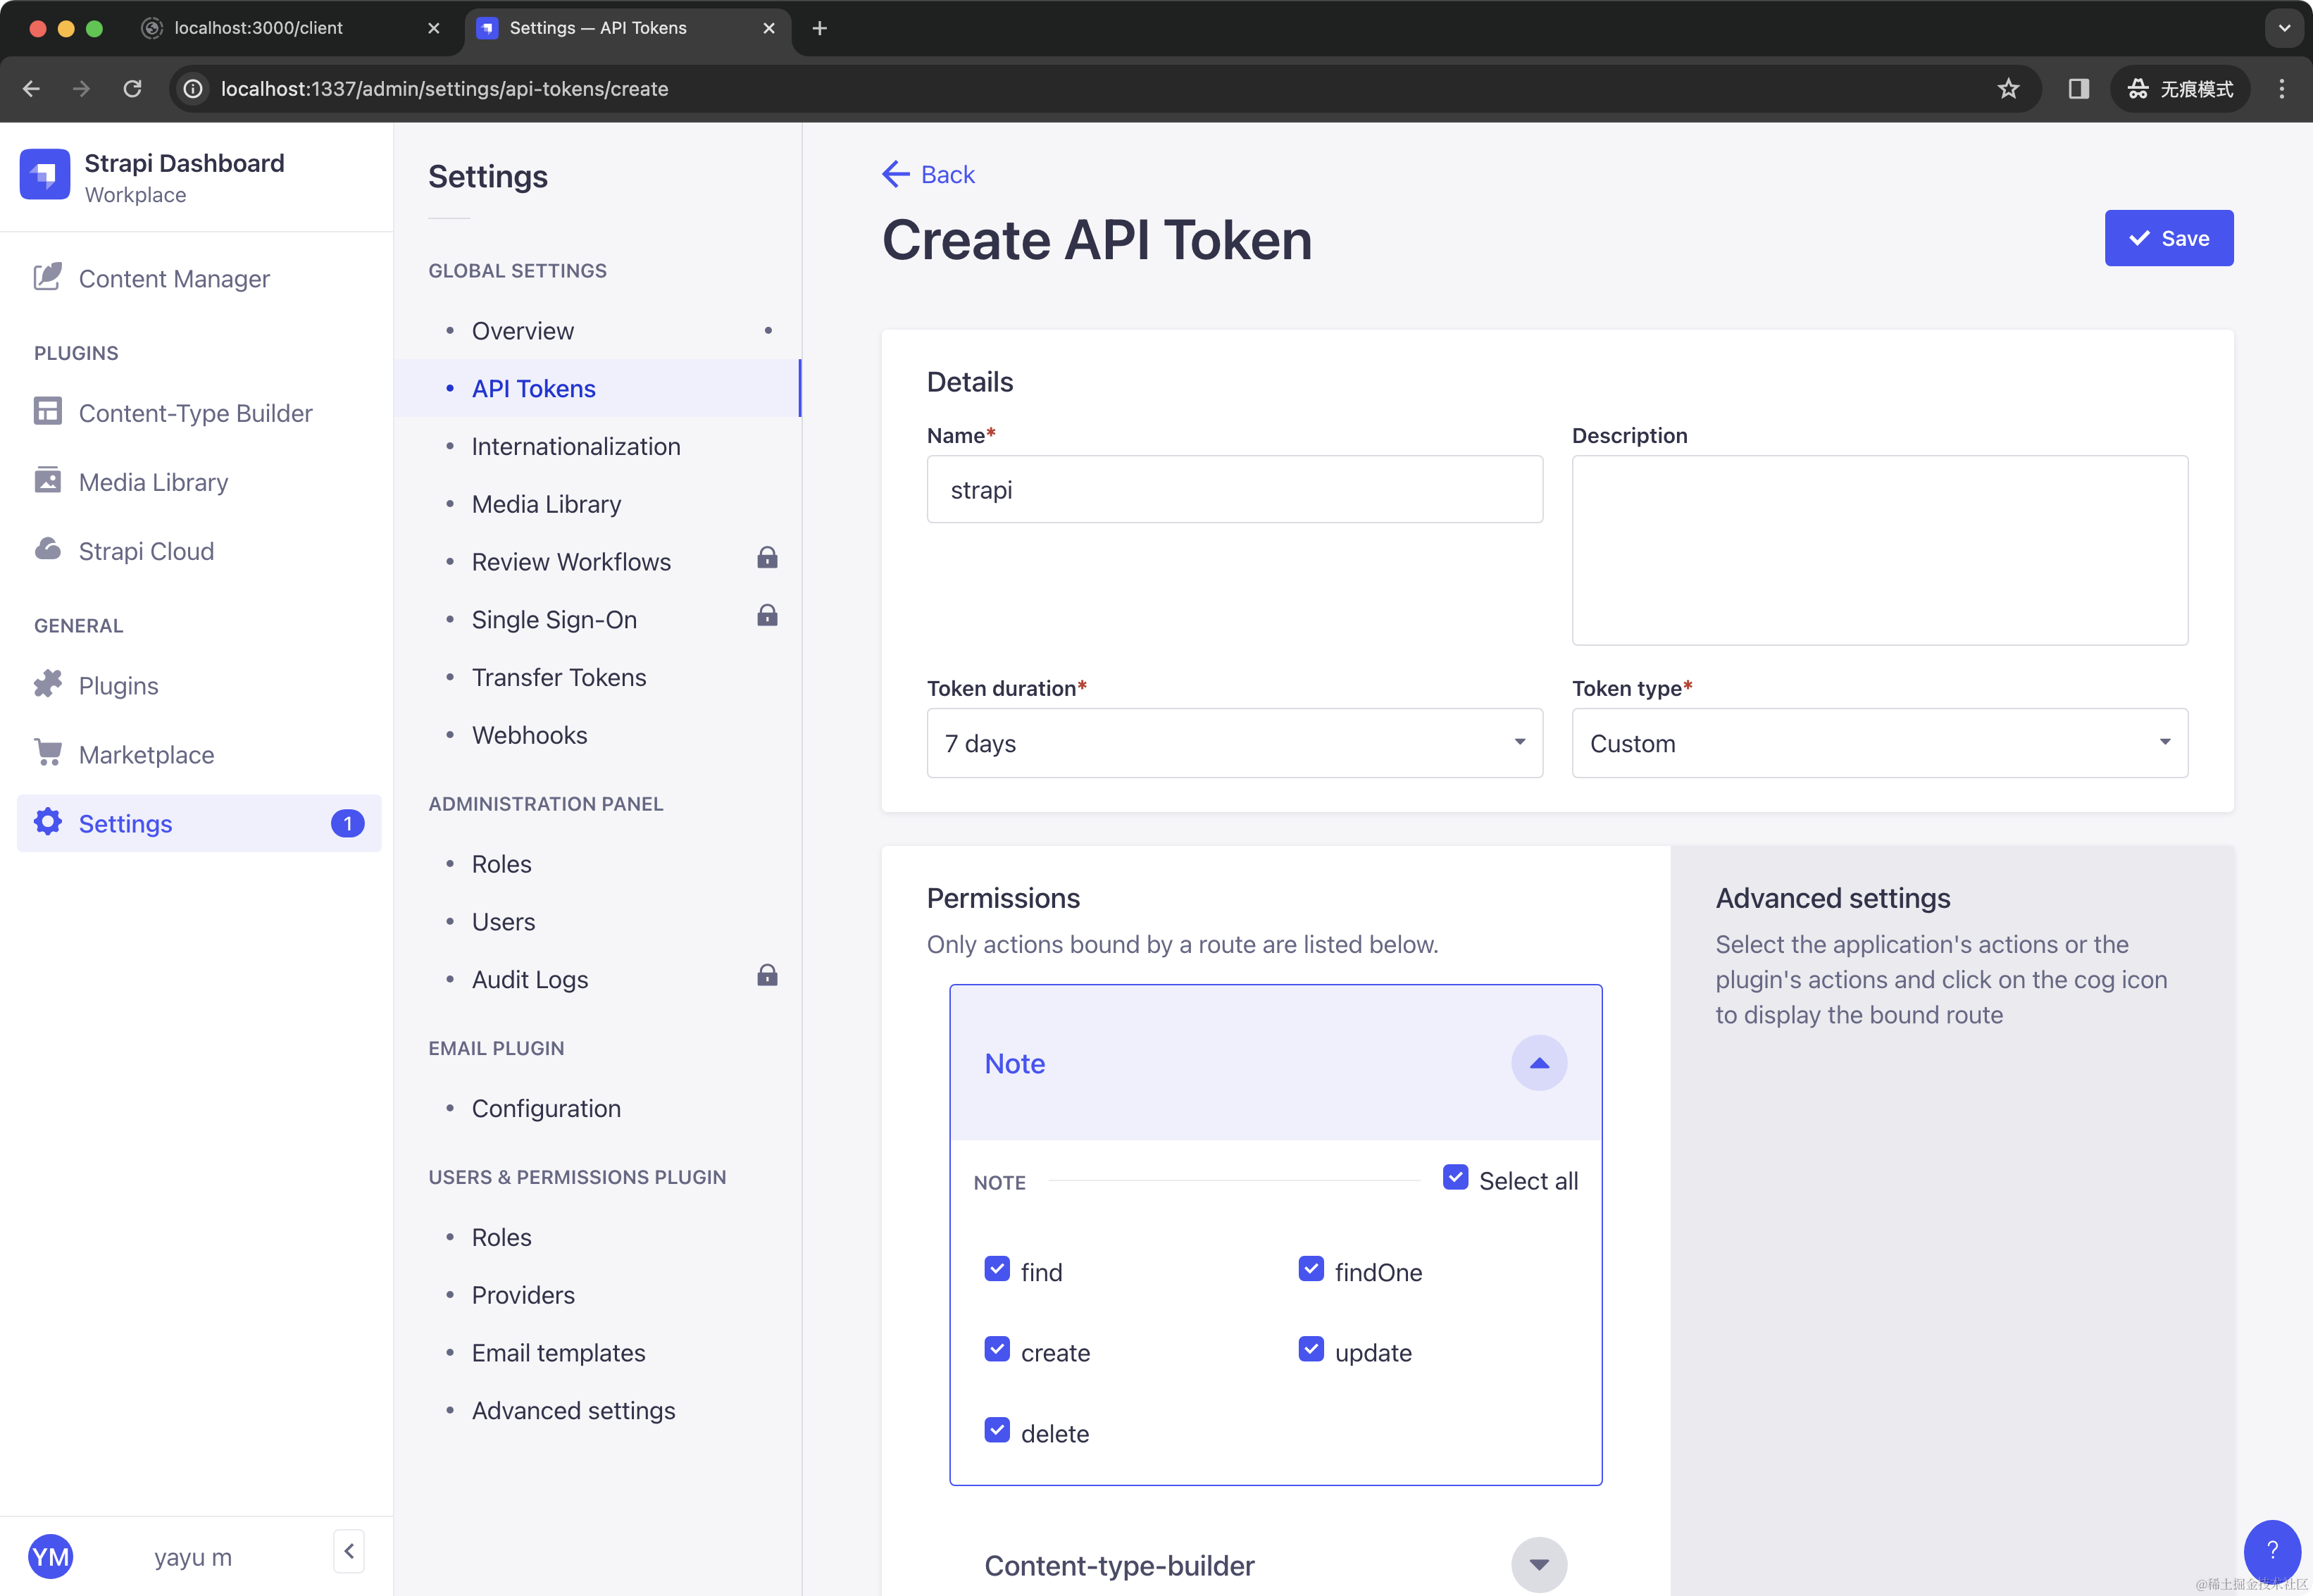
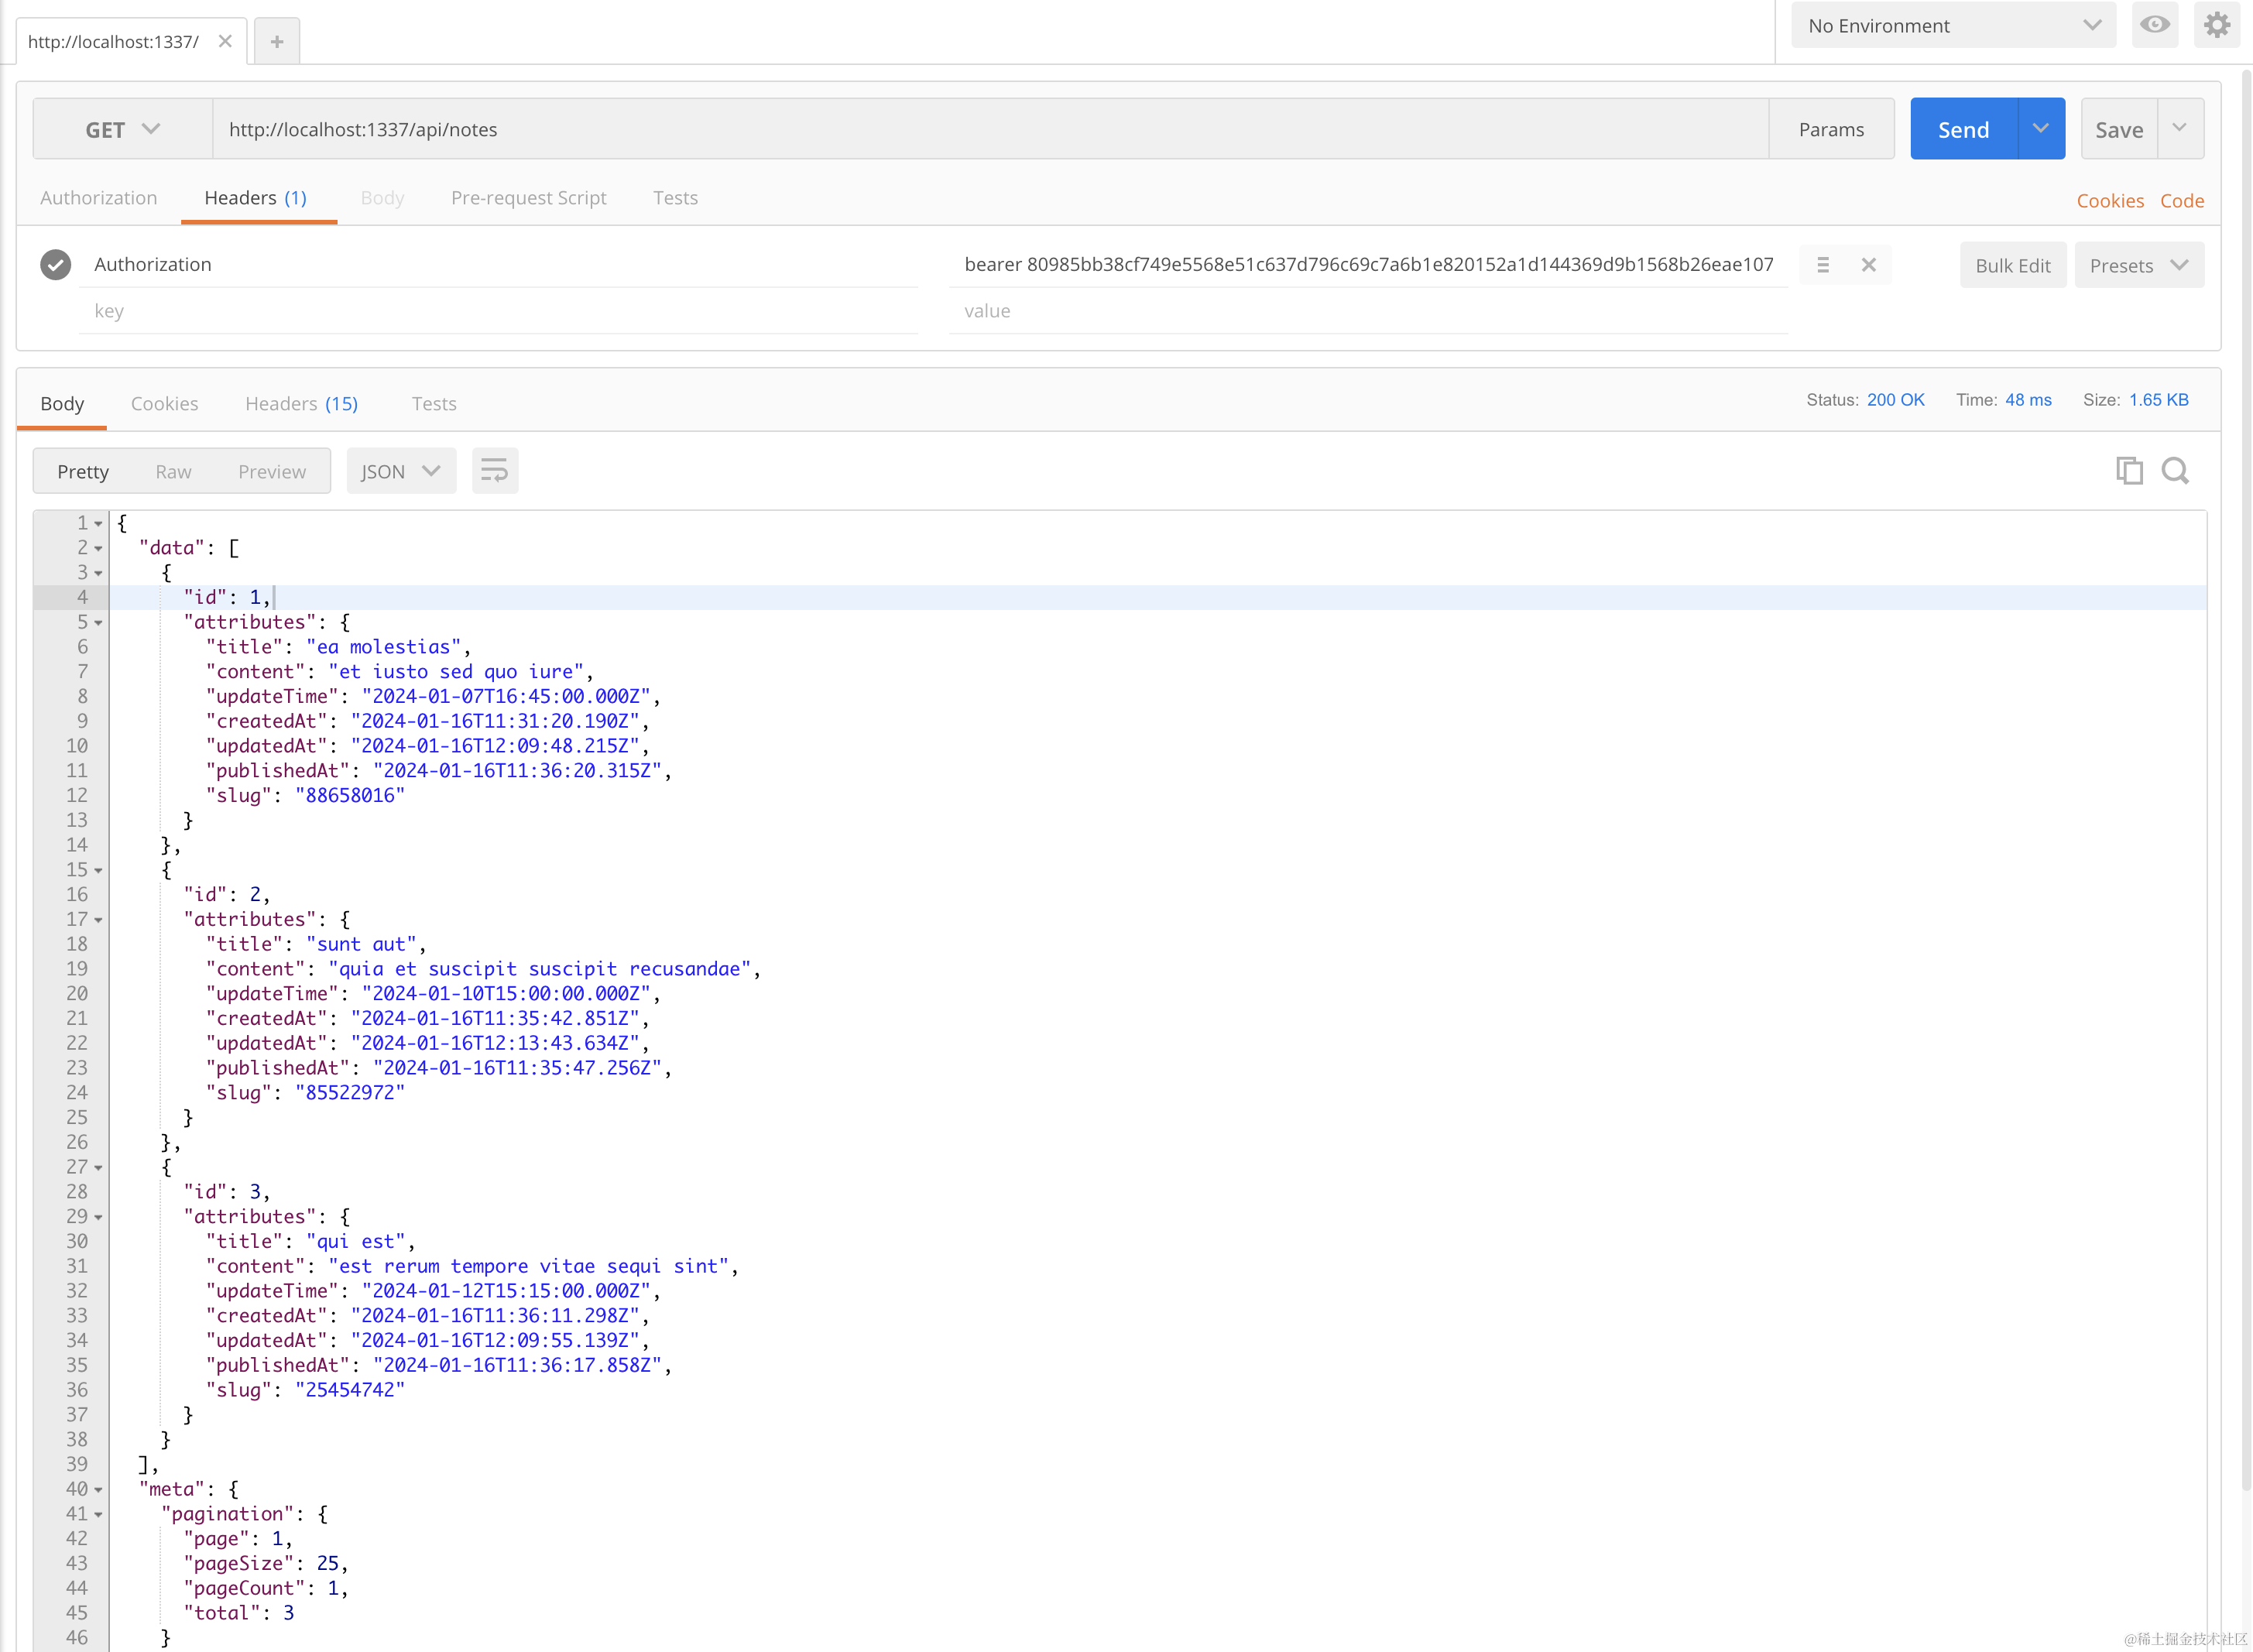
生成之后,获取接口数据的时候就需要带上这个 token:
**2.4. REST 接口**
现在接口就已经生成了,对于一个 COLLECTION TYPE,Strapi 对应会生成这些接口,我们以这里的 Note COLLECTION TYPE 为例:
| 方法 | URL | 示例 | 作用 |
| ------ | ----------------------------- | ------------ | ------ |
| GET | /api/:pluralApiIds | /api/notes | 获取条目列表 |
| POST | /api/:pluralApiId | /api/notes | 创建条目 |
| GET | /api/:pluralApiId/:documentId | /api/notes/1 | 获取单个条目 |
| PUT | /api/:pluralApiId/:documentId | /api/notes/1 | 更新单个条目 |
| DELETE | /api/:pluralApiId/:documentId | /api/notes/1 | 删除单个条目 |
注意这里用到的都是复数 ID。如果是 SINGLE TYPES,生成的接口会用到单数 ID:
| 方法 | URL | 作用 |
| ------ | ------------------- | ------- |
| GET | /api/:singularApiId | 获取条目 |
| PUT | /api/:singularApiId | 更新/创建条目 |
| DELETE | /api/:singularApiId | 删除一个条目 |
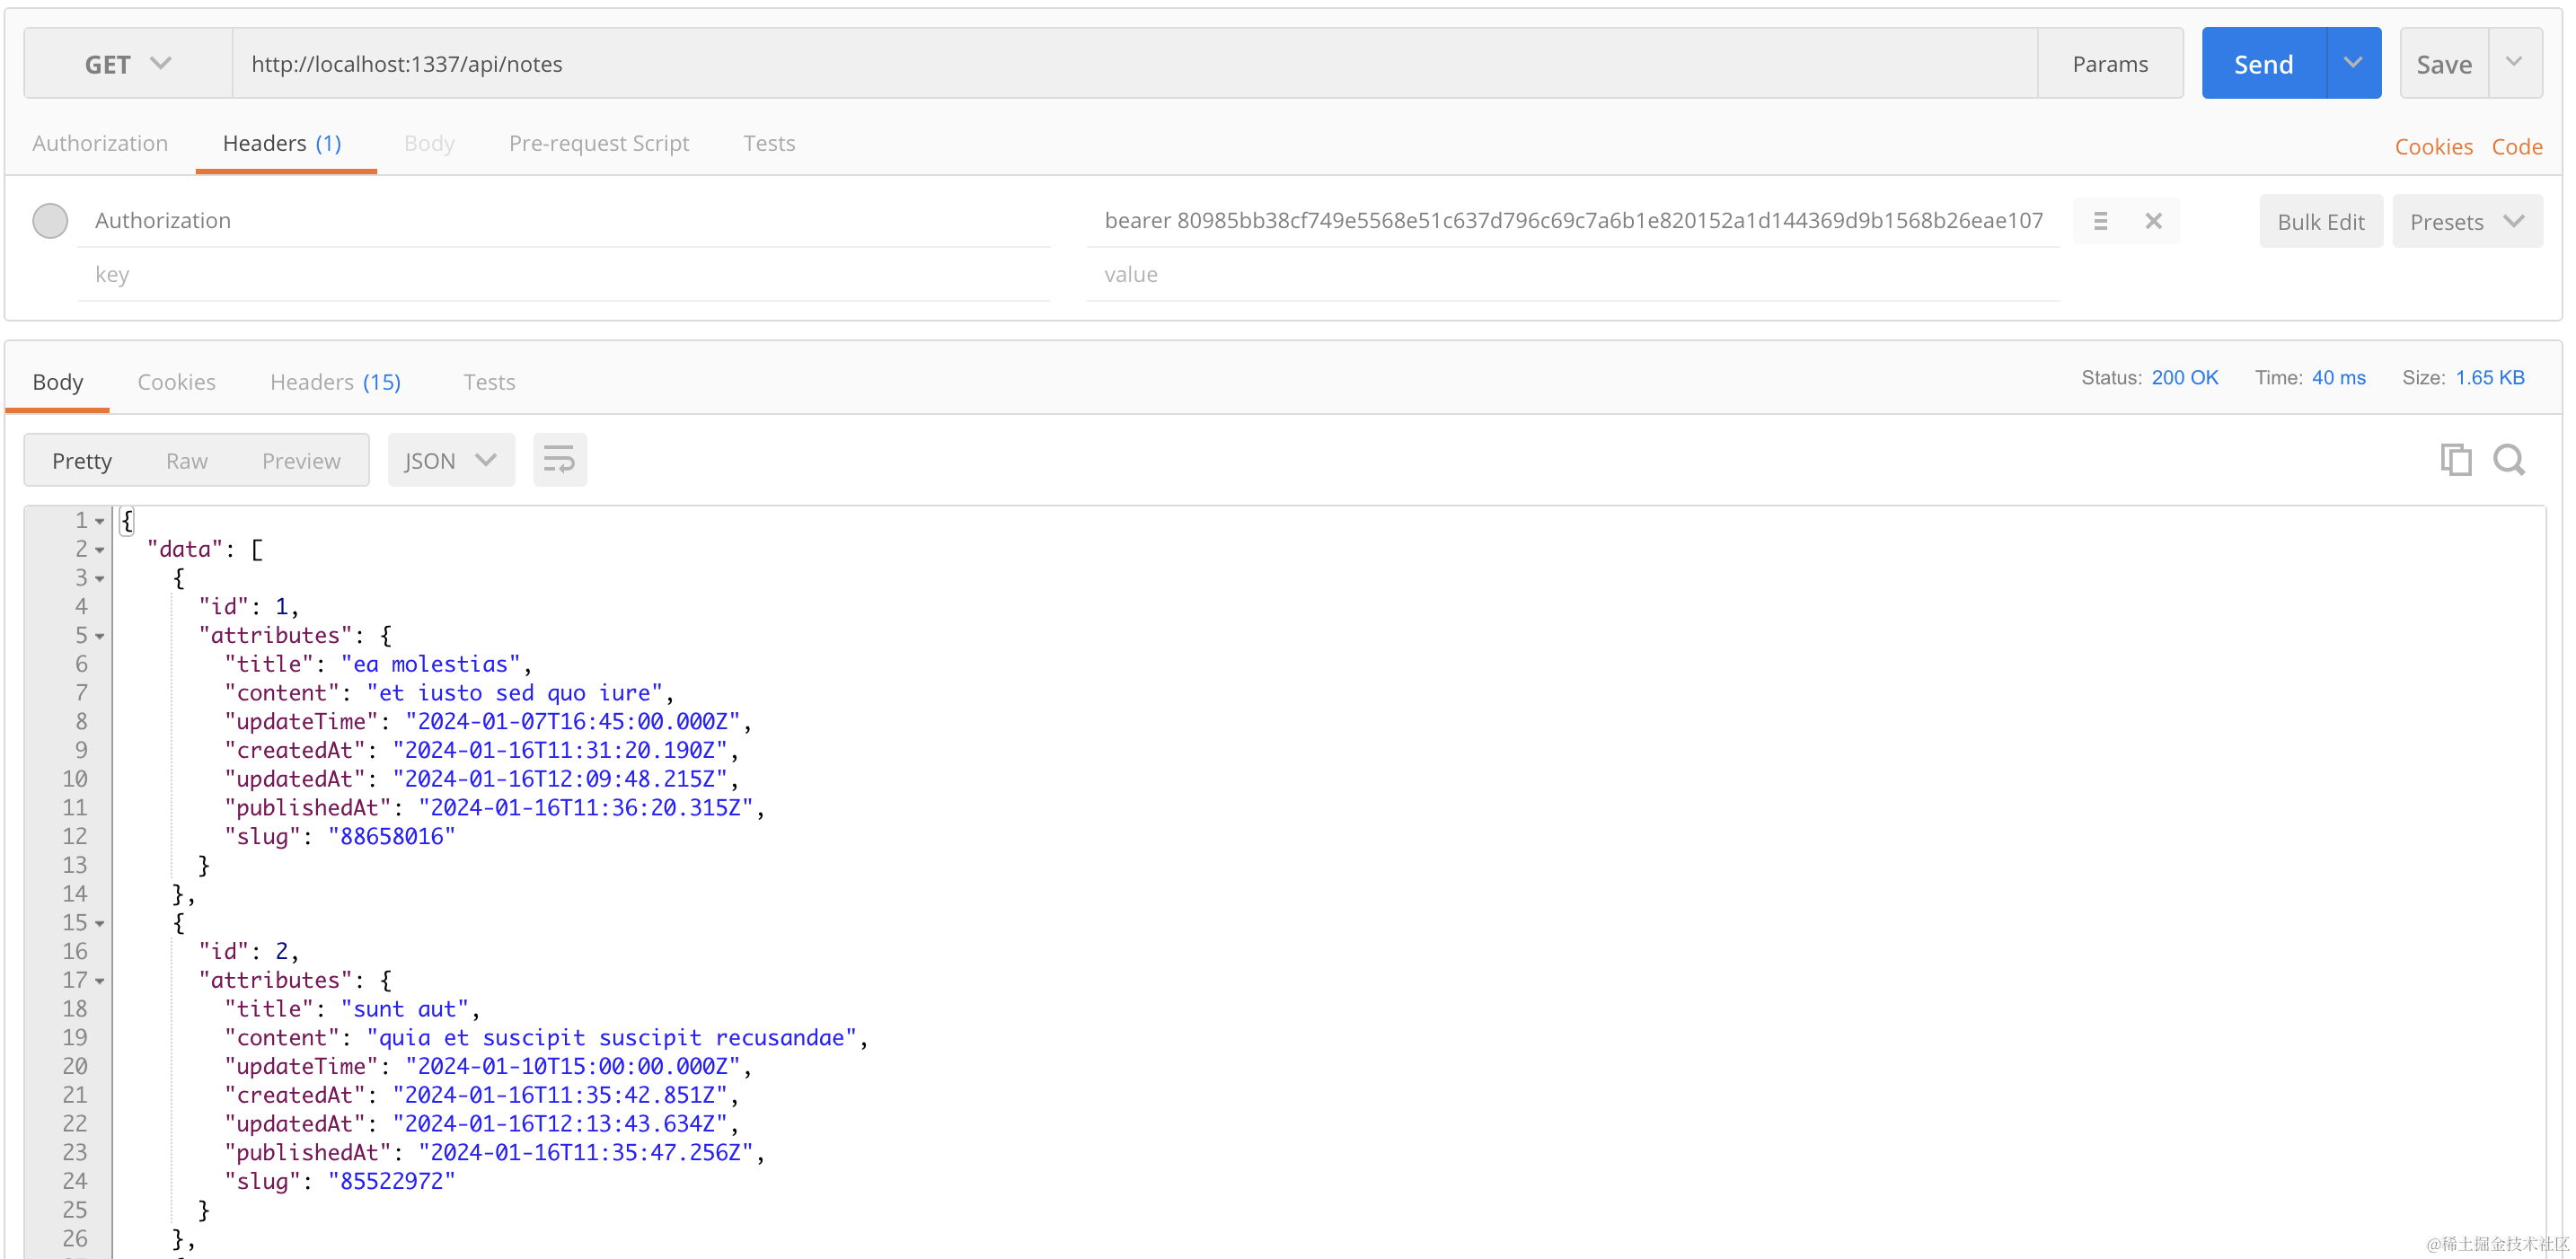
现在你可以用 POSTMAN + Token 试试获取 notes 的数据:
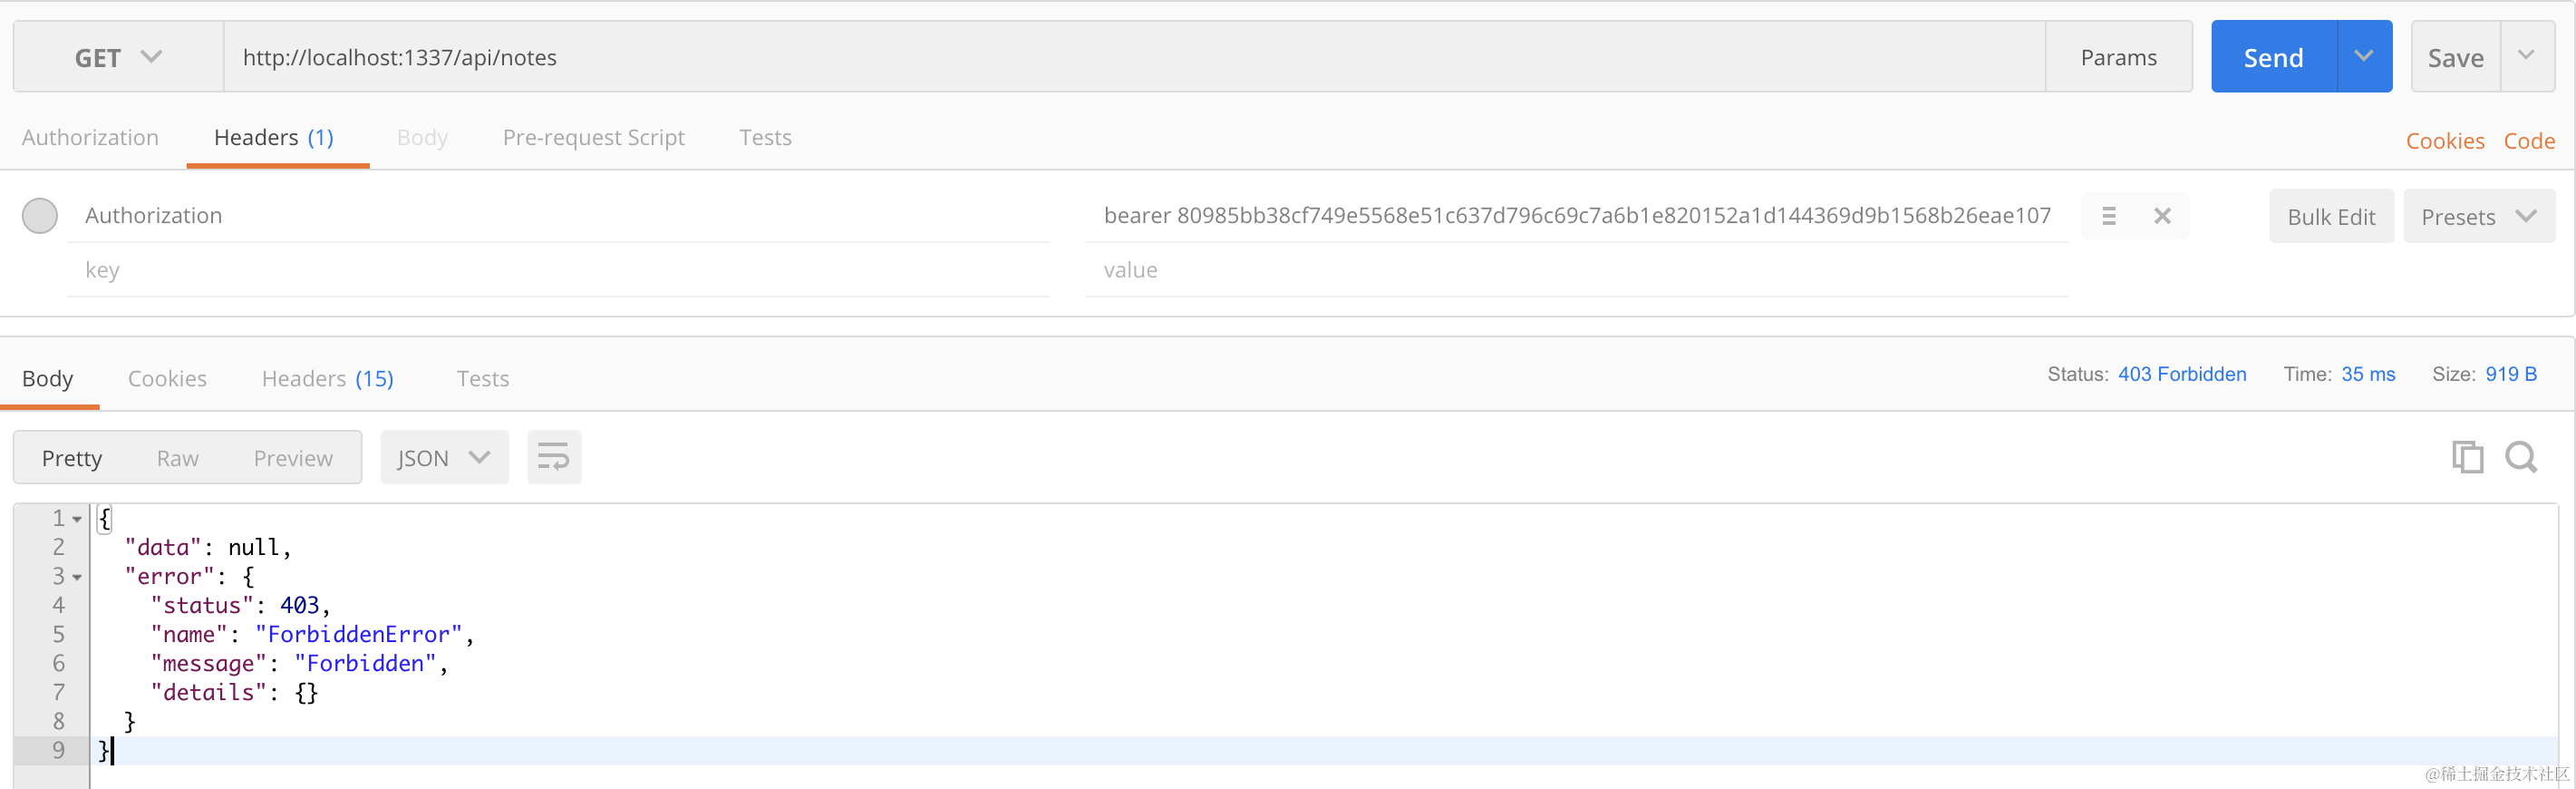
如果你不带 token 获取就会出现 403 错误:
**2.5. 取消授权**
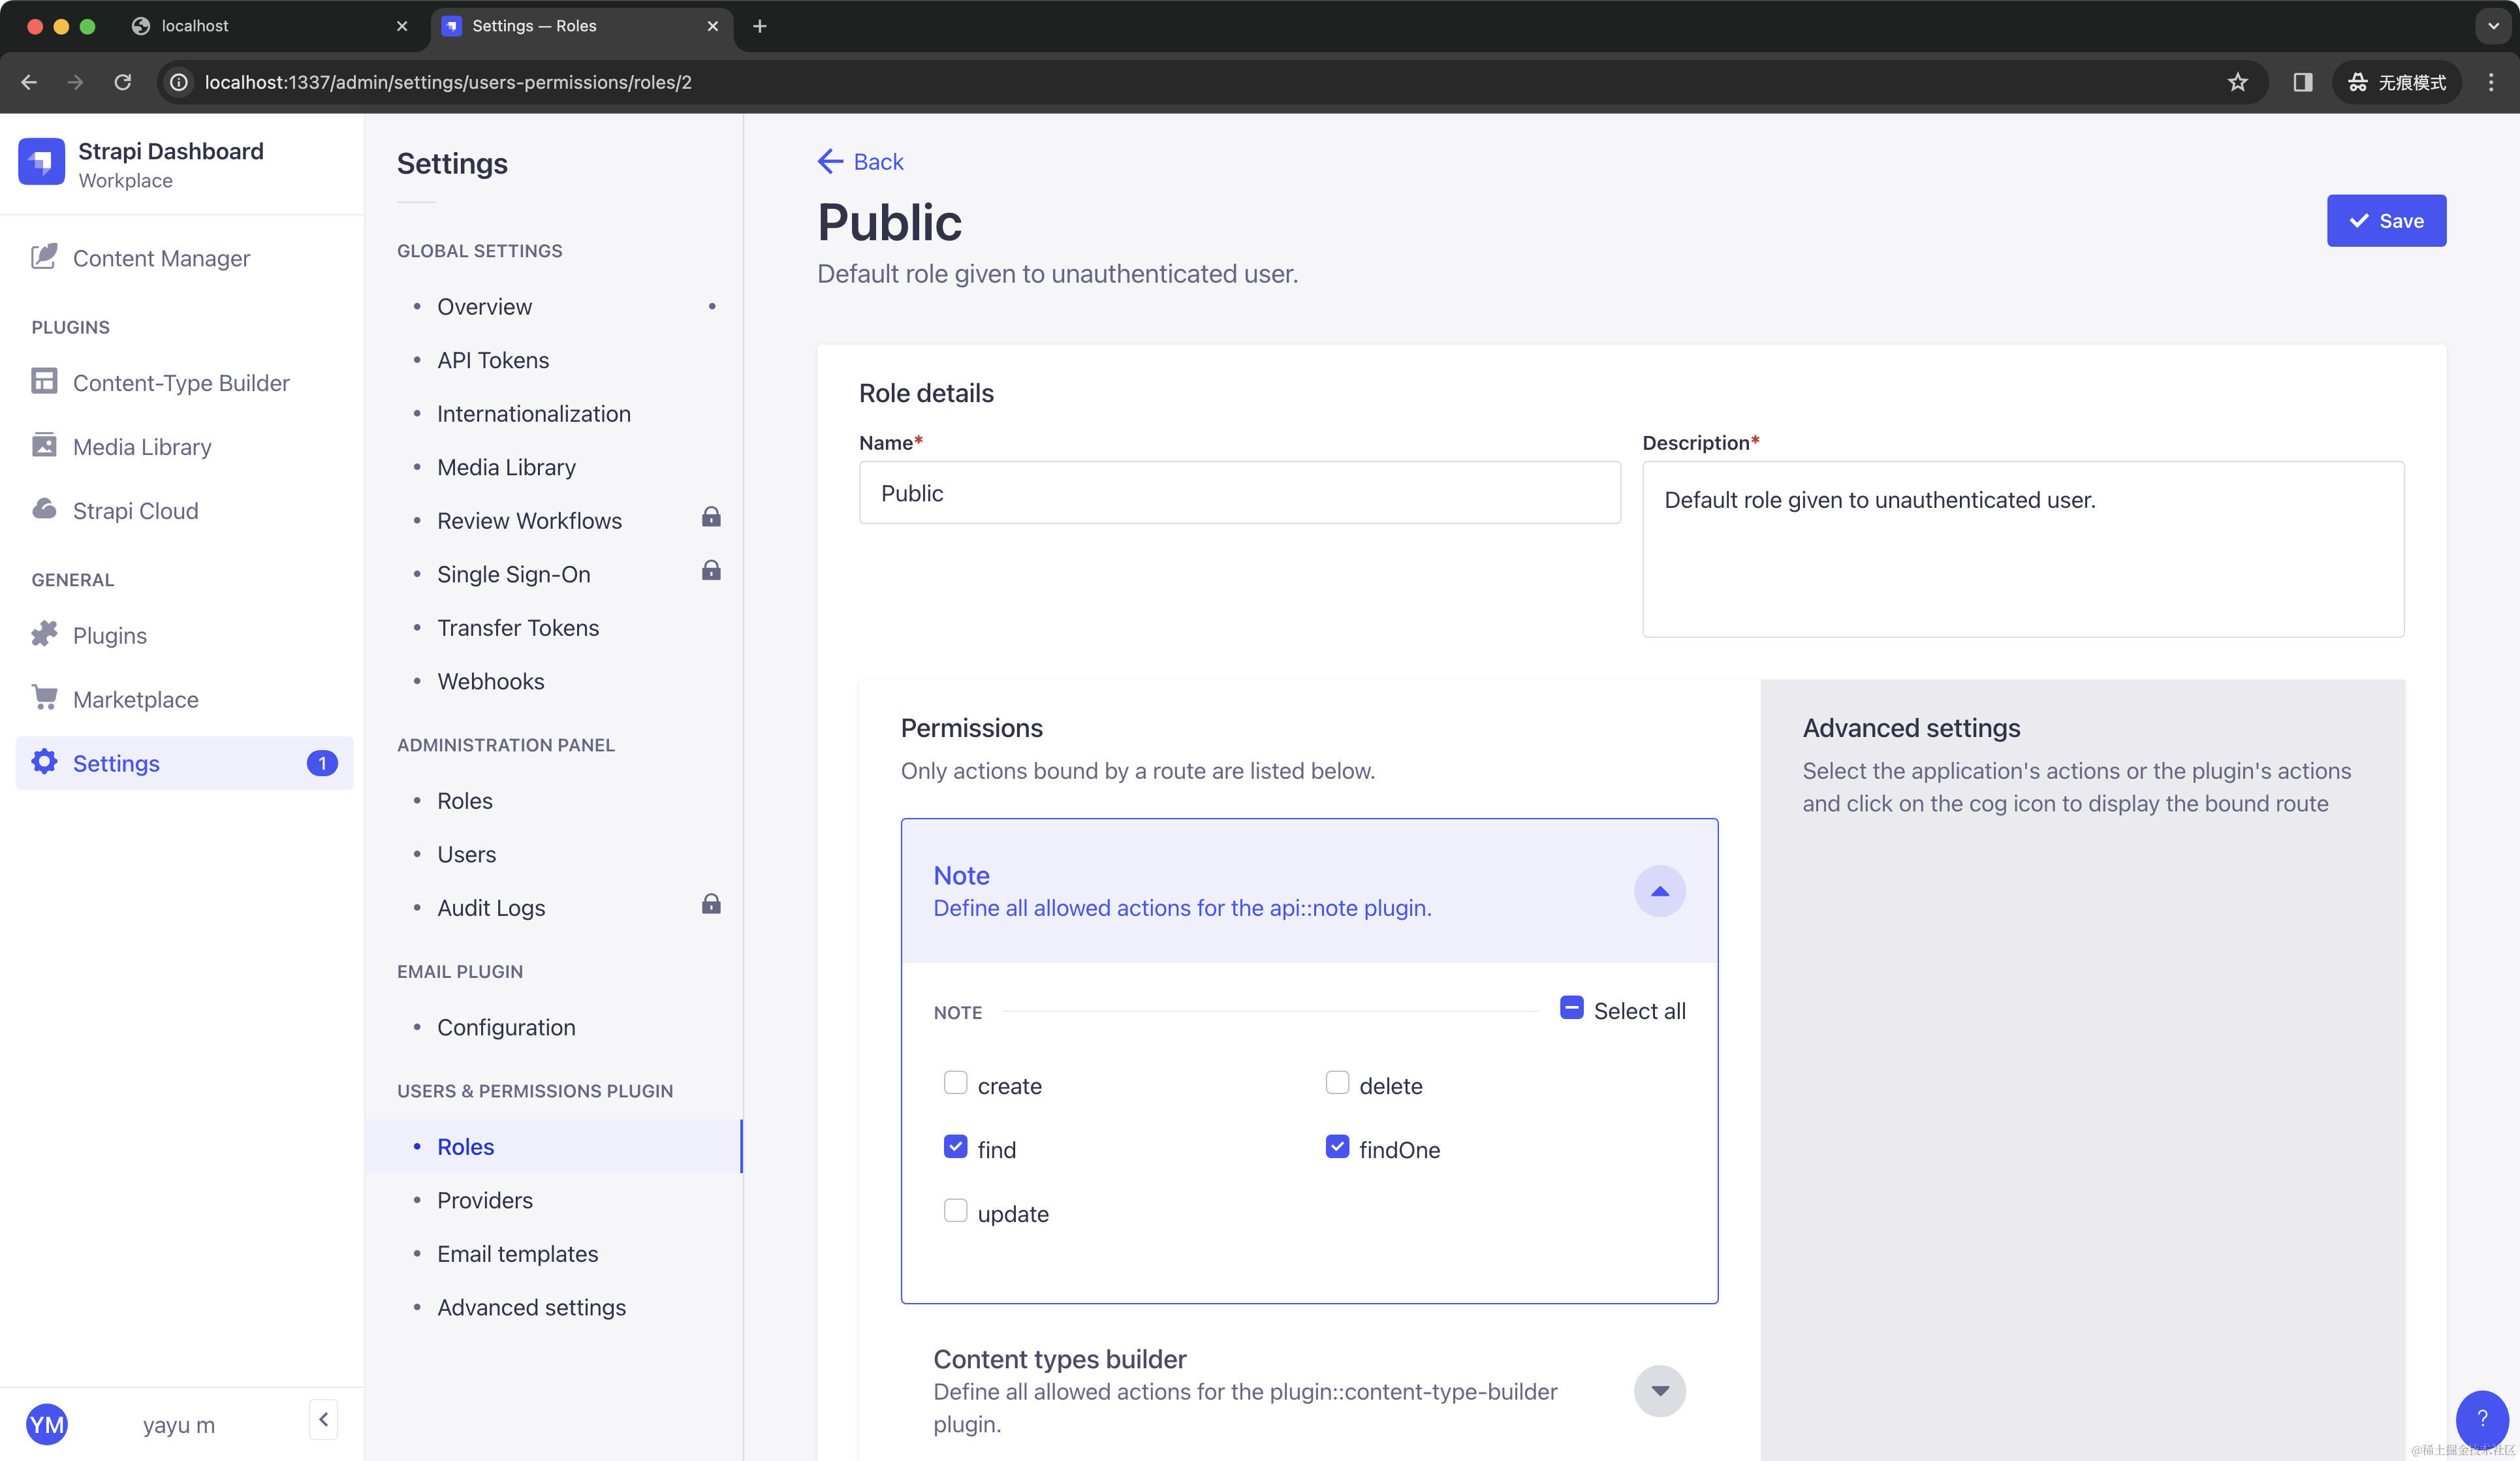
那你可能会想:“好麻烦,我调用个接口,还要用 token,能不能不用 token,至少获取列表和获取条目不需要?”。当然也是可以的,我们点击 `Settings`-> `Roles`,选择 `Public`角色进行编辑:
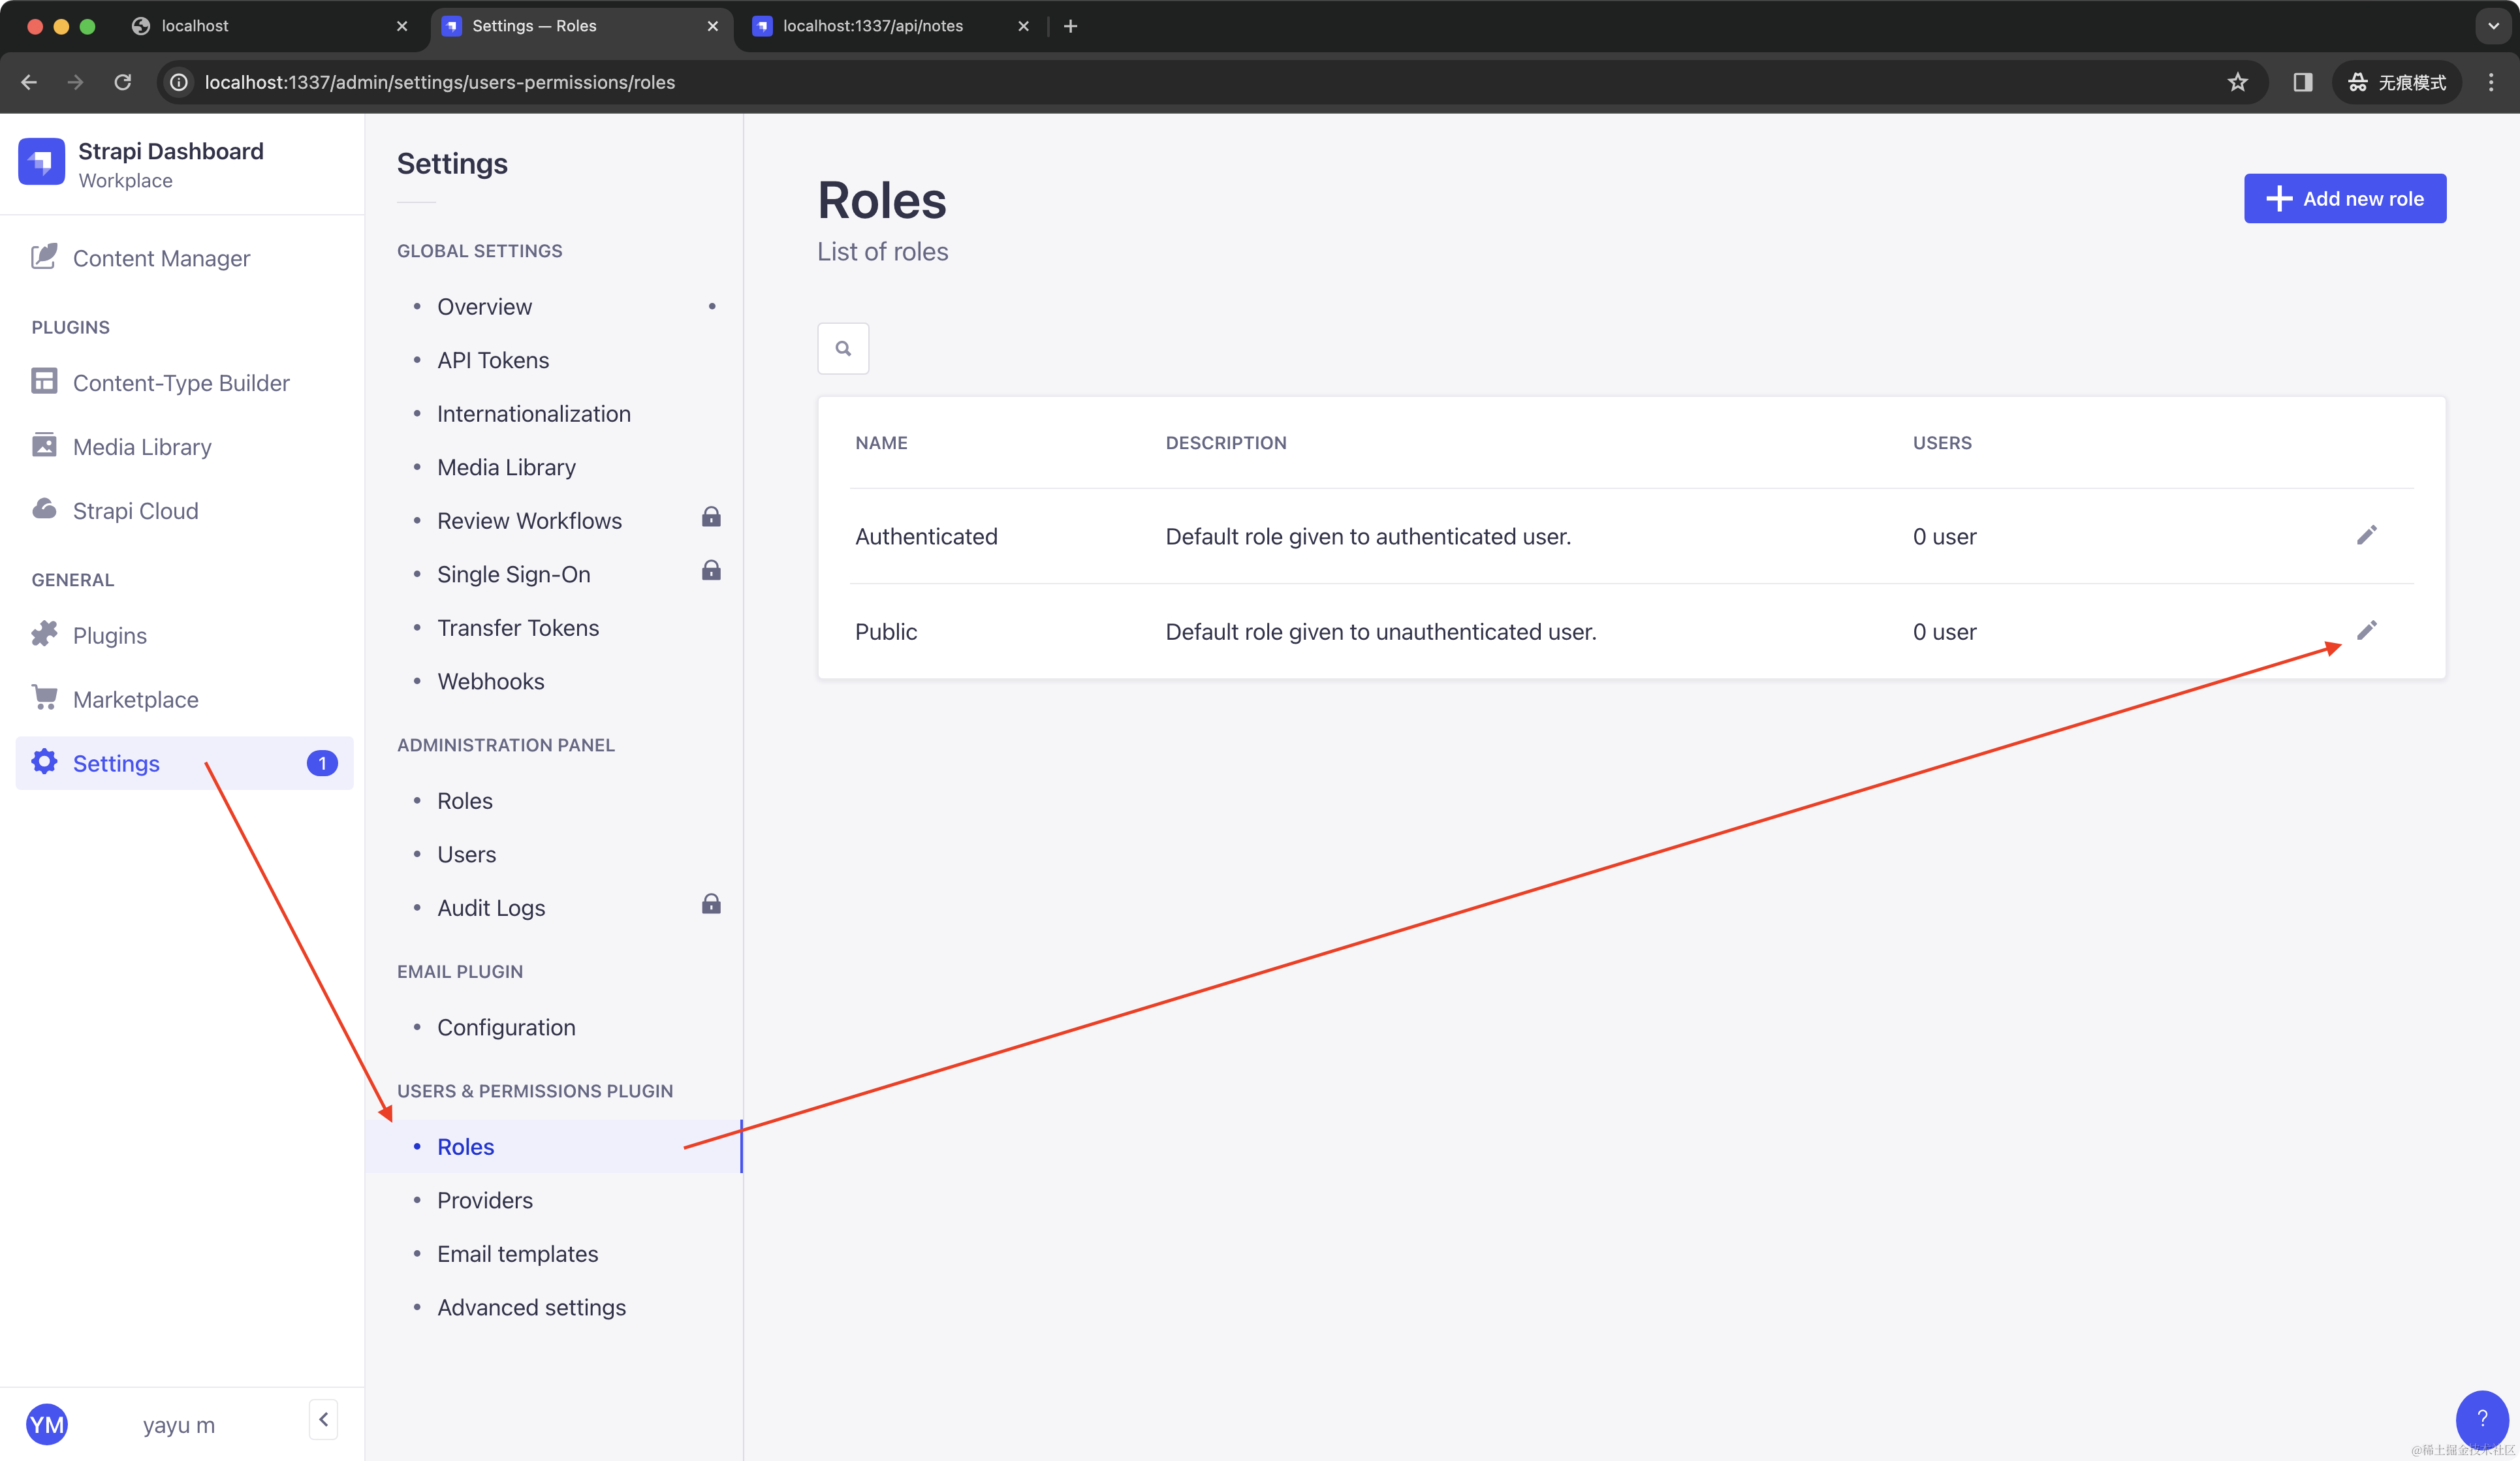
勾选 Note 这个集合类型中的 `find` 和 `findOne`,表示 `/api/notes`和 `/api/note/1`不再需要鉴权。
现在我们已经可以直接获取数据:
**2.6. Marketplace**
现在 Note 我们已经创建了 `title` 和 `content` 这两个字段,创建和修改时间,Strapi 会自动返回,就不需要单独建立字段了。我们还需要一个 uid 用作文章的 slug,跳转到具体文章的时候,用 slug 作为其地址的一部分。
虽然文档自身也会返回 id,但这个 id 是递增的,不太适合作为 slug。Strapi 也有默认的 UID 字段:
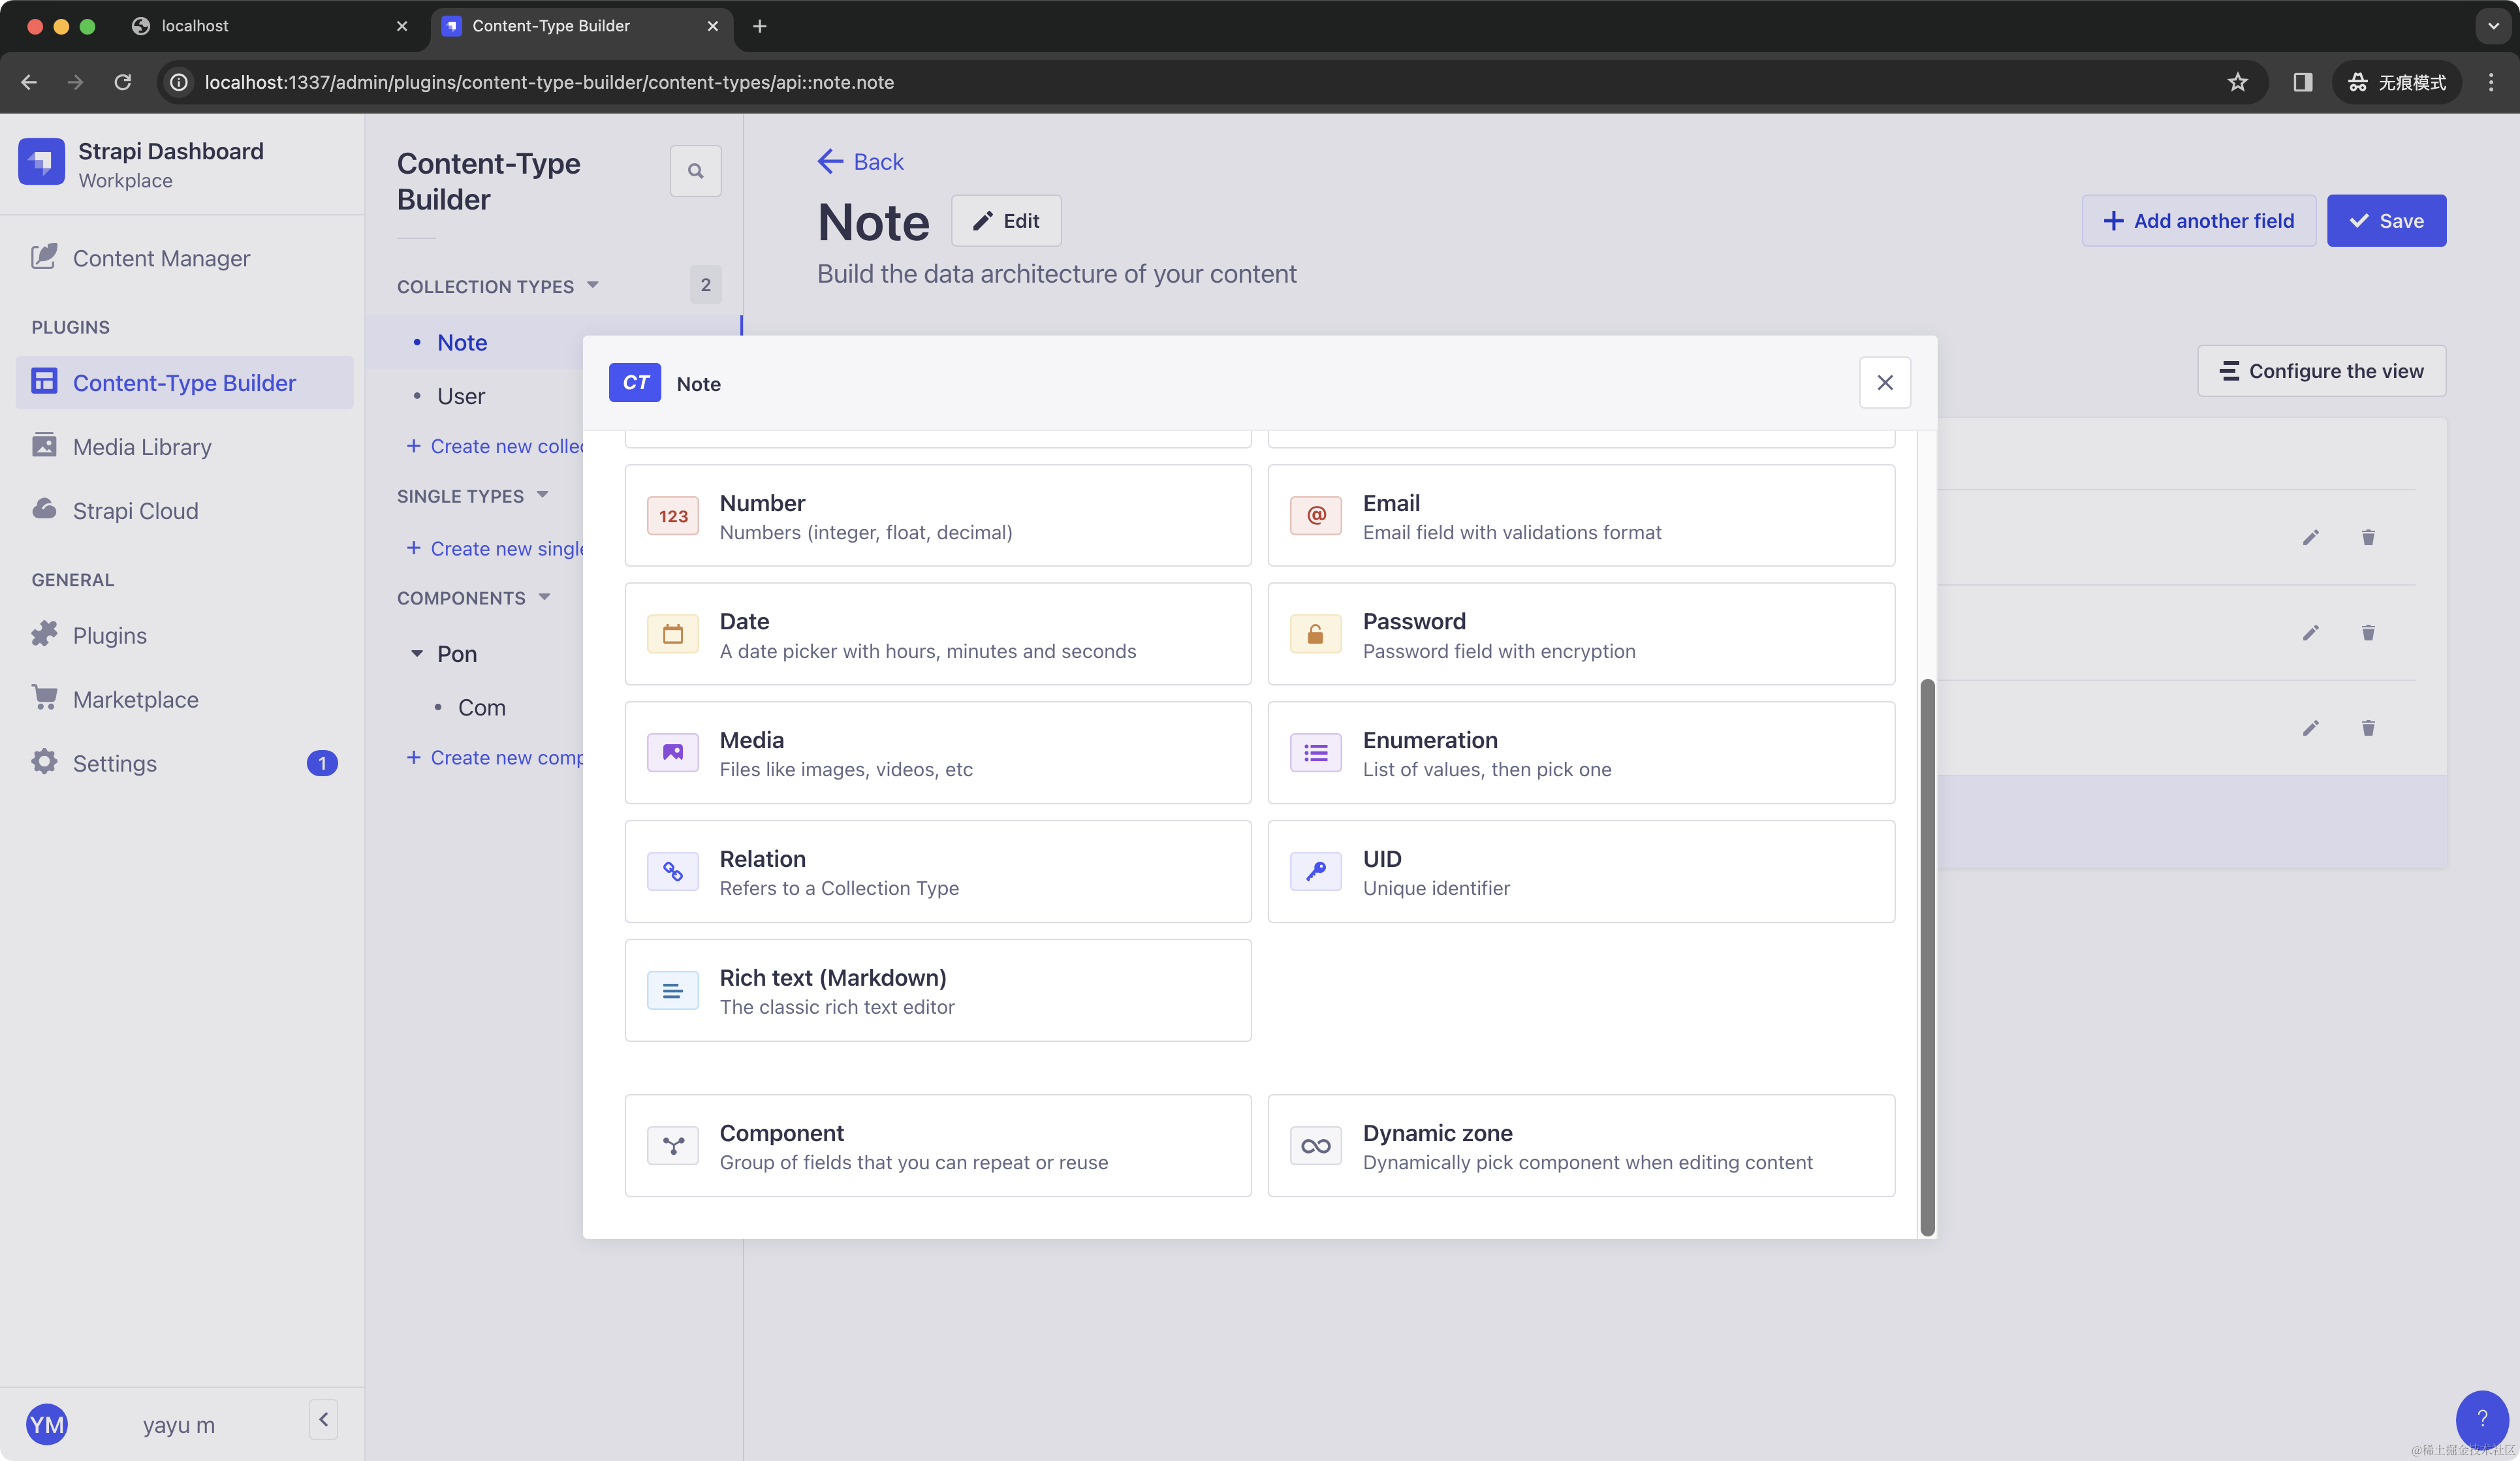
但这个 UID 生成的字符串是 `note`、`note-1`、`note-2`这种。我们希望是一个多位的随机数字字符串。该如何实现呢?
这就要说到 Strapi 强大的插件功能了,我们打开 Marketplace,搜索 `uuid`:
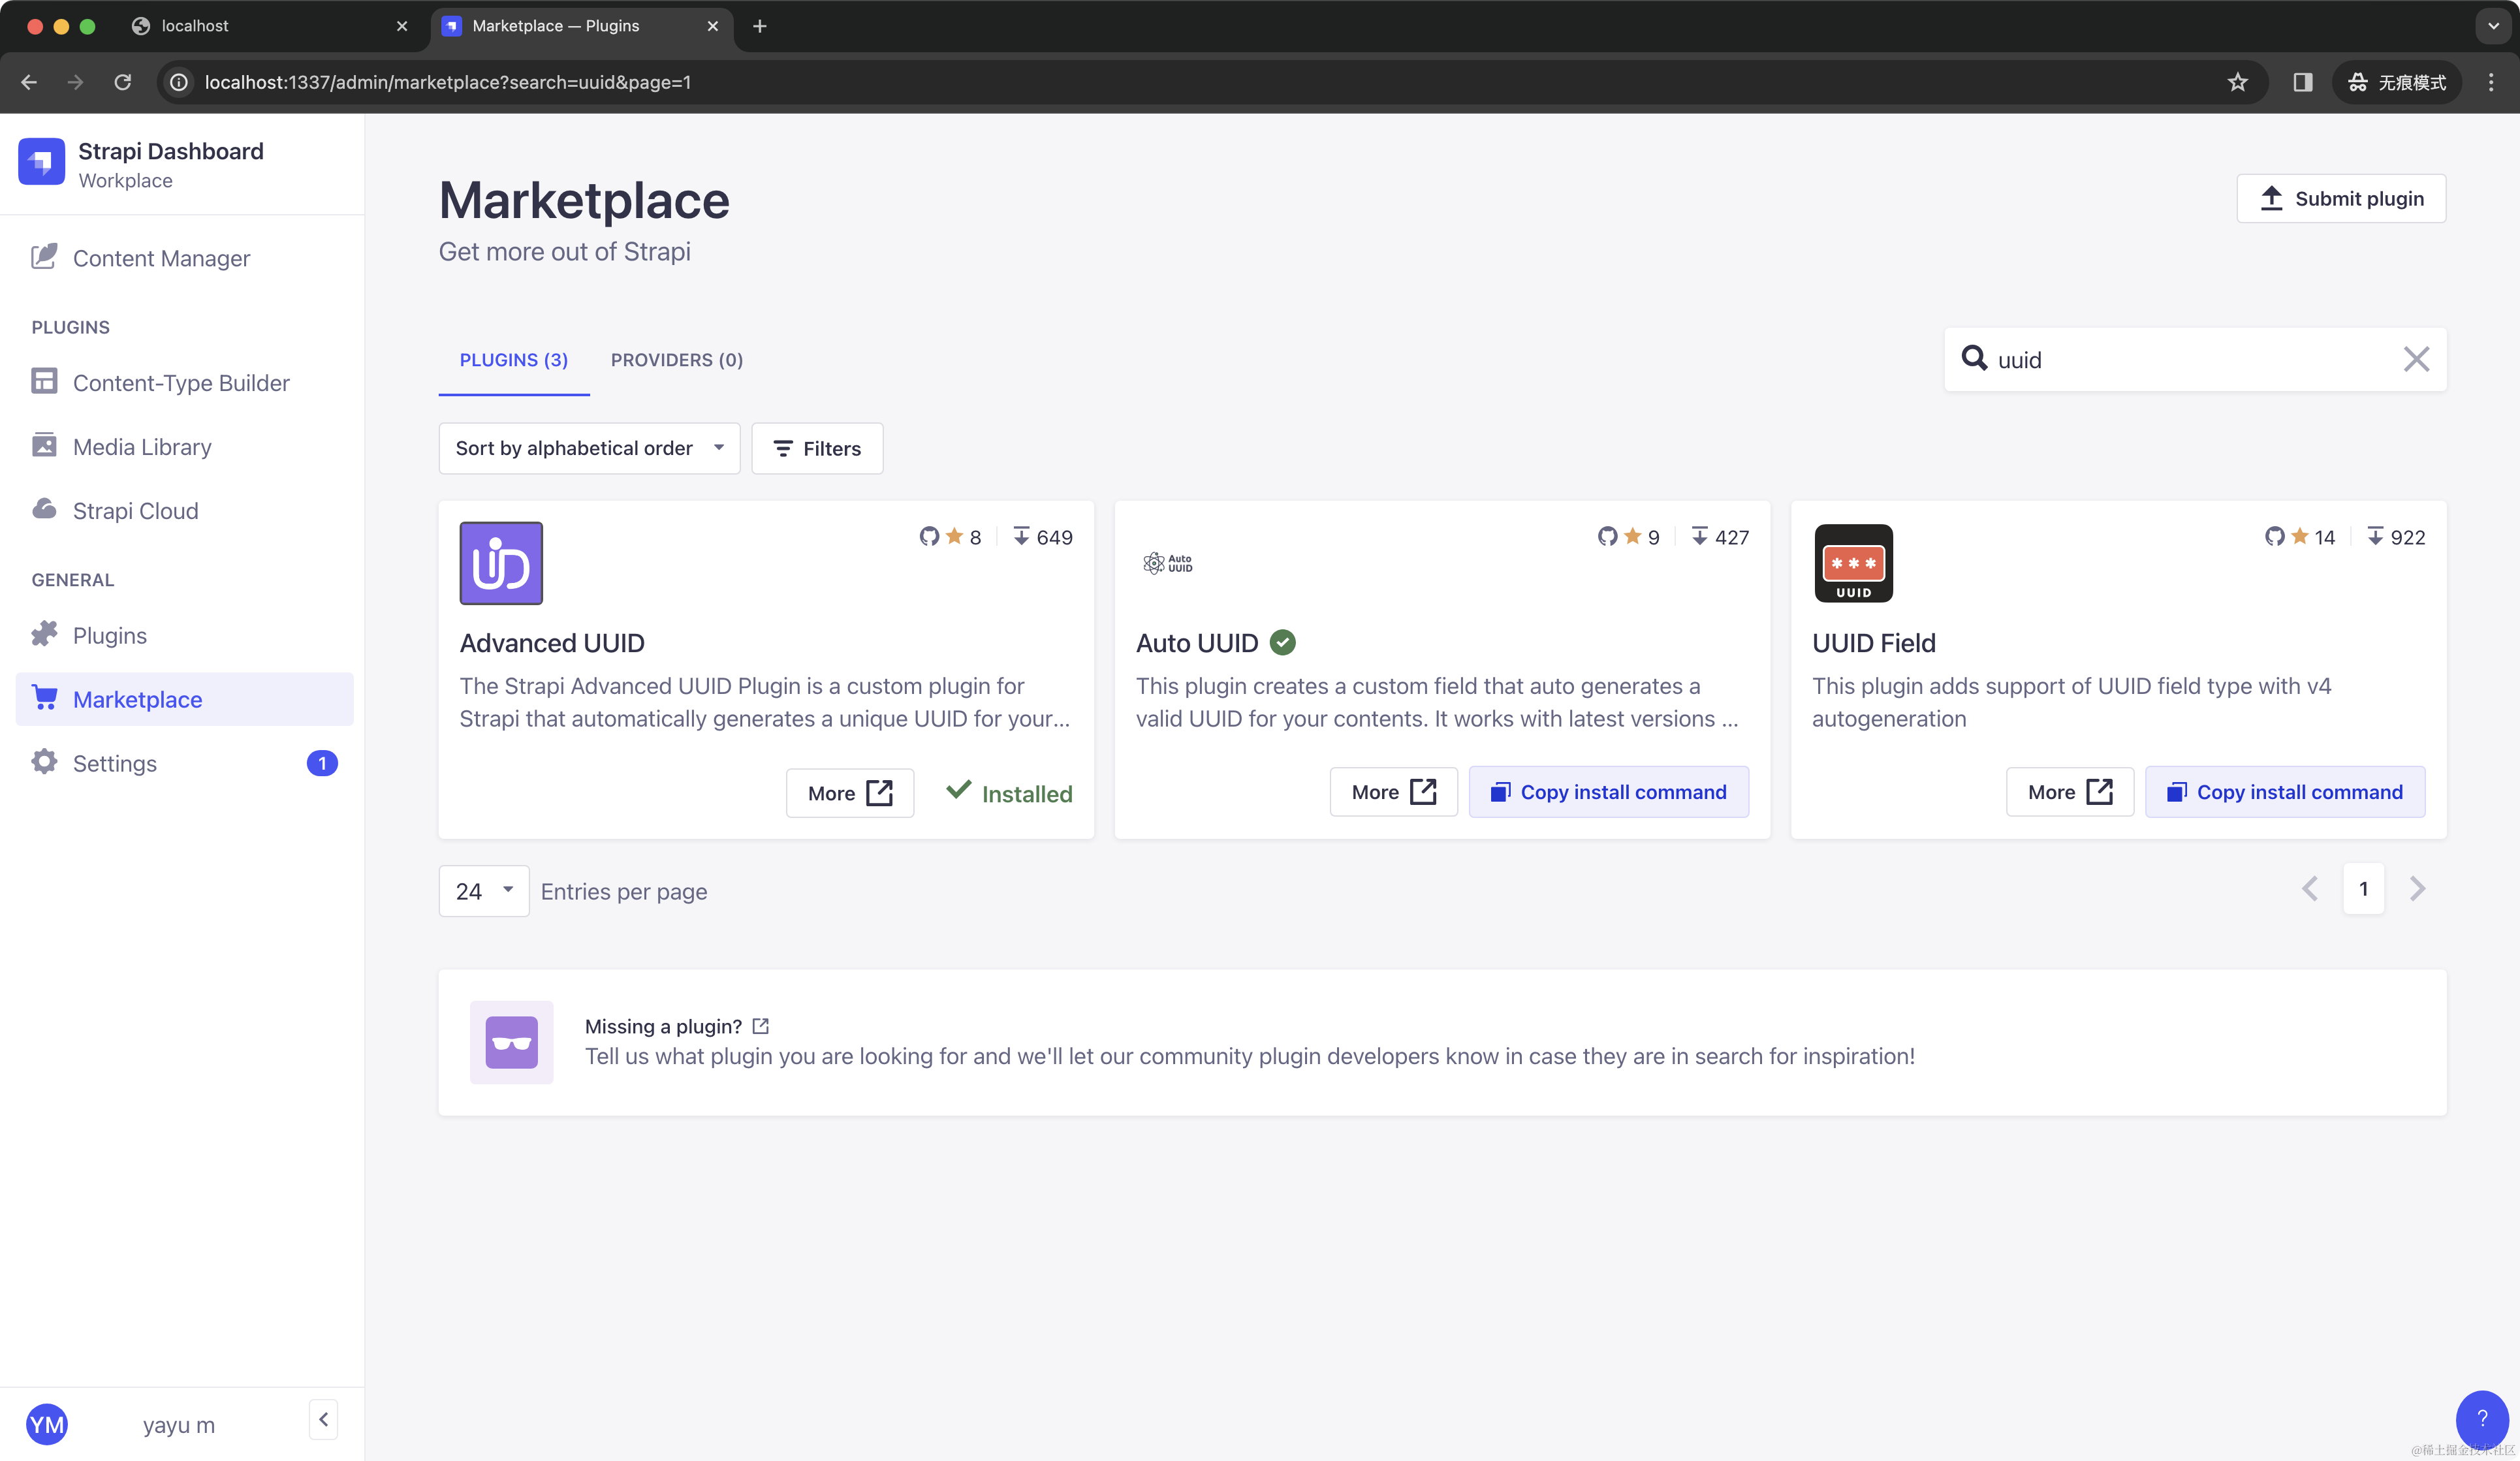
我们选择 Advanced UUId 这个插件,查看用法后,在项目里运行:
```javascript
npm install strapi-advanced-uuid
```
安装后重启项目,即可在添加字段中的 CUSTOM 选项中查看到:

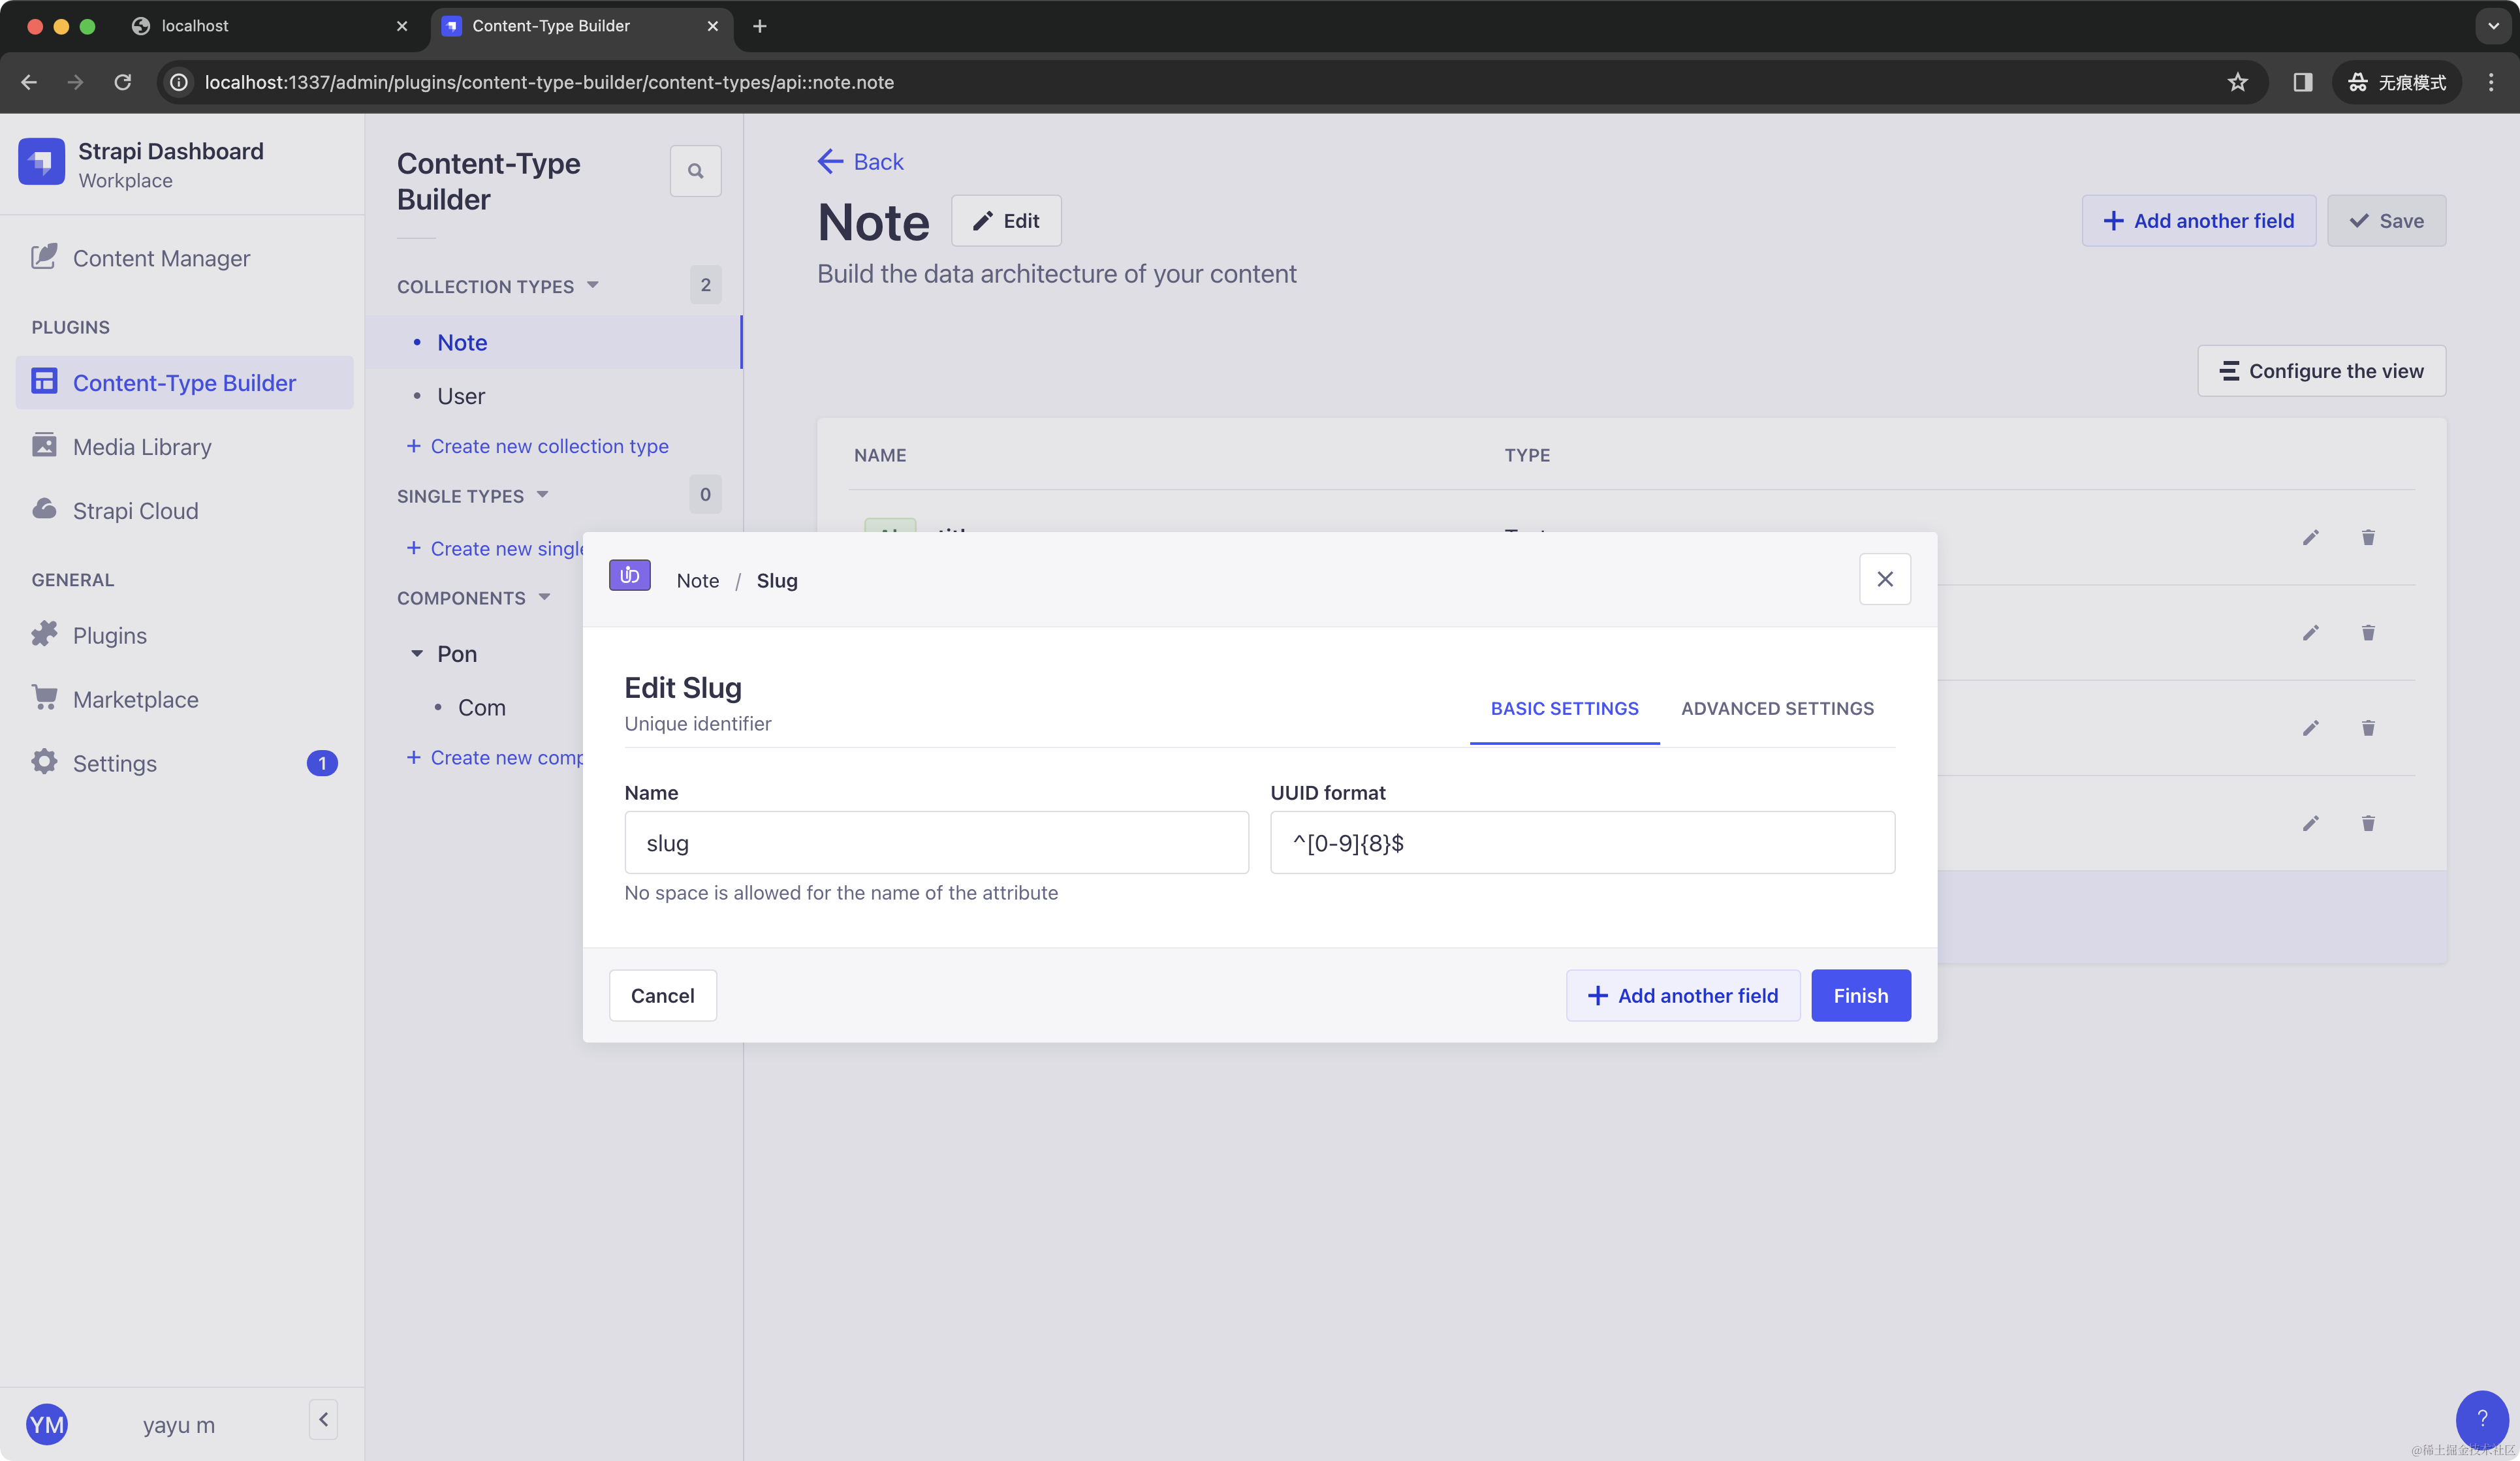
我们建立一个名为 slug 的 UUID 类型,UUID format 表示这个 uuid 的格式,我们填写 `^[0-9]{8}$`表示随机的 8 位数字字符串。
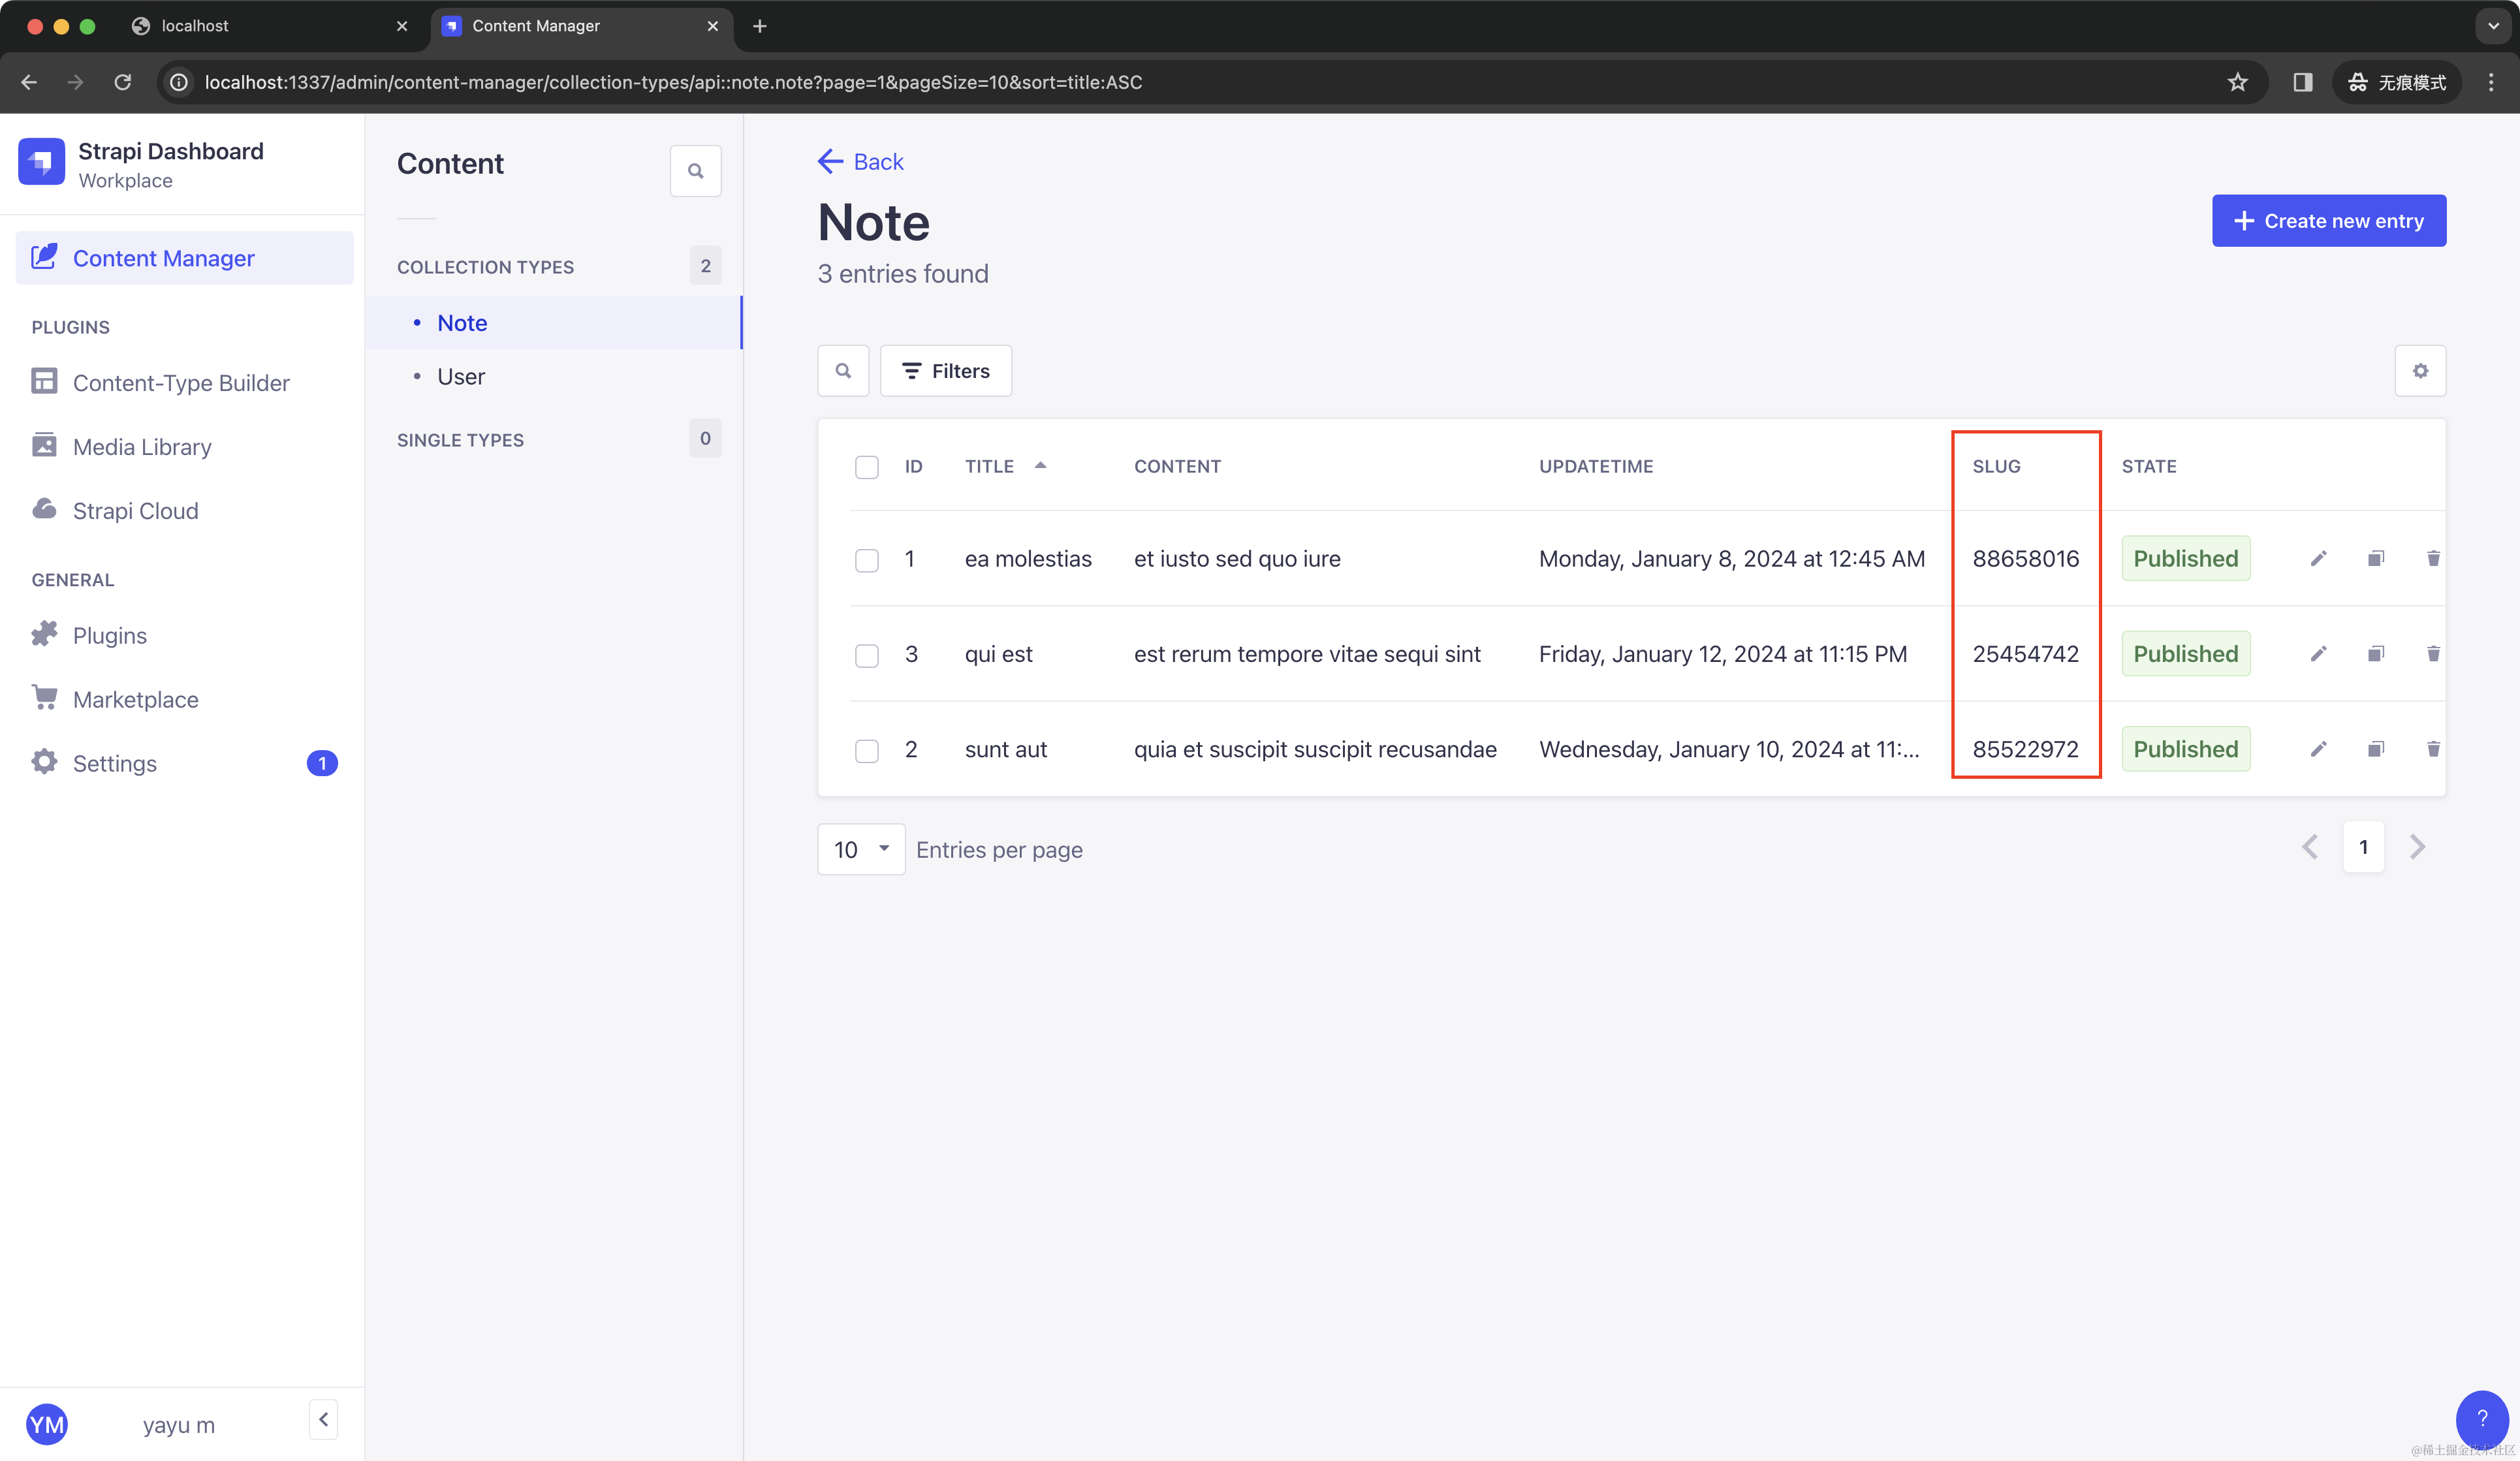
我们就可以通过该字段添加随机的 uid 数据:
### Next.js 项目替换 redis
目前我们的 Next.js 项目使用的是 redis 作为临时数据库,现在改为调用接口来获取数据吧。
新建 `lib/strapi.js`,代码如下:
```javascript
export async function getAllNotes() {
const response = await fetch(`http://localhost:1337/api/notes`)
const data = await response.json();
const res = {};
data.data.forEach(({id, attributes: {title, content, slug, updatedAt}}) => {
res[slug] = JSON.stringify({
title,
content,
updateTime: updatedAt
})
})
return res
}
export async function addNote(data) {
const response = await fetch(`http://localhost:1337/api/notes`, {
method: 'POST',
headers: {
Authorization: 'bearer 80985bb38cf749e5568e51c637d796c69c7a6b1e820152a1d144369d9b1568b26eae1070a42f06f691febb07a5134b0a5a00e24e69c298b50414f28c3299ead4b05b9f876883020868c5769a726ae5ca02ef31b2a5786efbccfe041b7131e609eb56680a60e38a973dae25d26d1e4ac56e7651d4d1c6a4e1fe7f68999dbb4eed',
"Content-Type": "application/json"
},
body: JSON.stringify({
data: JSON.parse(data)
})
})
const res = await response.json();
return res.data.attributes.slug
}
export async function updateNote(uuid, data) {
const {id} = await getNote(uuid);
const response = await fetch(`http://localhost:1337/api/notes/${id}`, {
method: 'PUT',
headers: {
Authorization: 'bearer 80985bb38cf749e5568e51c637d796c69c7a6b1e820152a1d144369d9b1568b26eae1070a42f06f691febb07a5134b0a5a00e24e69c298b50414f28c3299ead4b05b9f876883020868c5769a726ae5ca02ef31b2a5786efbccfe041b7131e609eb56680a60e38a973dae25d26d1e4ac56e7651d4d1c6a4e1fe7f68999dbb4eed',
"Content-Type": "application/json"
},
body: JSON.stringify({
data: JSON.parse(data)
})
})
const res = await response.json()
}
export async function getNote(uuid) {
const response = await fetch(`http://localhost:1337/api/notes?filters[slug][$eq]=${uuid}`)
const data = await response.json();
return {
title: data.data[0].attributes.title,
content: data.data[0].attributes.content,
updateTime: data.data[0].attributes.updatedAt,
id: data.data[0].id
}
}
export async function delNote(uuid) {
const {id} = await getNote(uuid);
const response = await fetch(`http://localhost:1337/api/notes/${id}`, {
method: 'DELETE',
headers: {
Authorization: 'bearer 80985bb38cf749e5568e51c637d796c69c7a6b1e820152a1d144369d9b1568b26eae1070a42f06f691febb07a5134b0a5a00e24e69c298b50414f28c3299ead4b05b9f876883020868c5769a726ae5ca02ef31b2a5786efbccfe041b7131e609eb56680a60e38a973dae25d26d1e4ac56e7651d4d1c6a4e1fe7f68999dbb4eed',
"Content-Type": "application/json"
}
})
const res = await response.json()
}
```
在这段代码中,为了减少代码改动的范围,我们按照了之前使用 redis 的数据结构返回了数据。这样你只需将以前的导入代码 `@/lib/redis`改为 `@/lib/strapi`即可直接使用。这里为了演示,代码写的健壮性不够,比如没有错误捕获,没有空值判断,真实的项目开发中请勿这样写。
在这段代码中,`getNote` 函数中,我们使用了 `http://localhost:1337/api/notes?filters[slug][$eq]=${uuid}`来获取具体的笔记,因为我们没有使用 strapi 自带的 documentId,而是 slug 作为唯一 id。Strapi 也是支持 Filtering 的功能的,这段代码就演示了其用法。当然 Strapi 的强大功能不止这些,具体使用的时候,参考 [Strapi REST 文档](https://docs.strapi.io/dev-docs/api/rest)。
将 `@/lib/redis`都改为 `@/lib/strapi`后,项目正常运行:
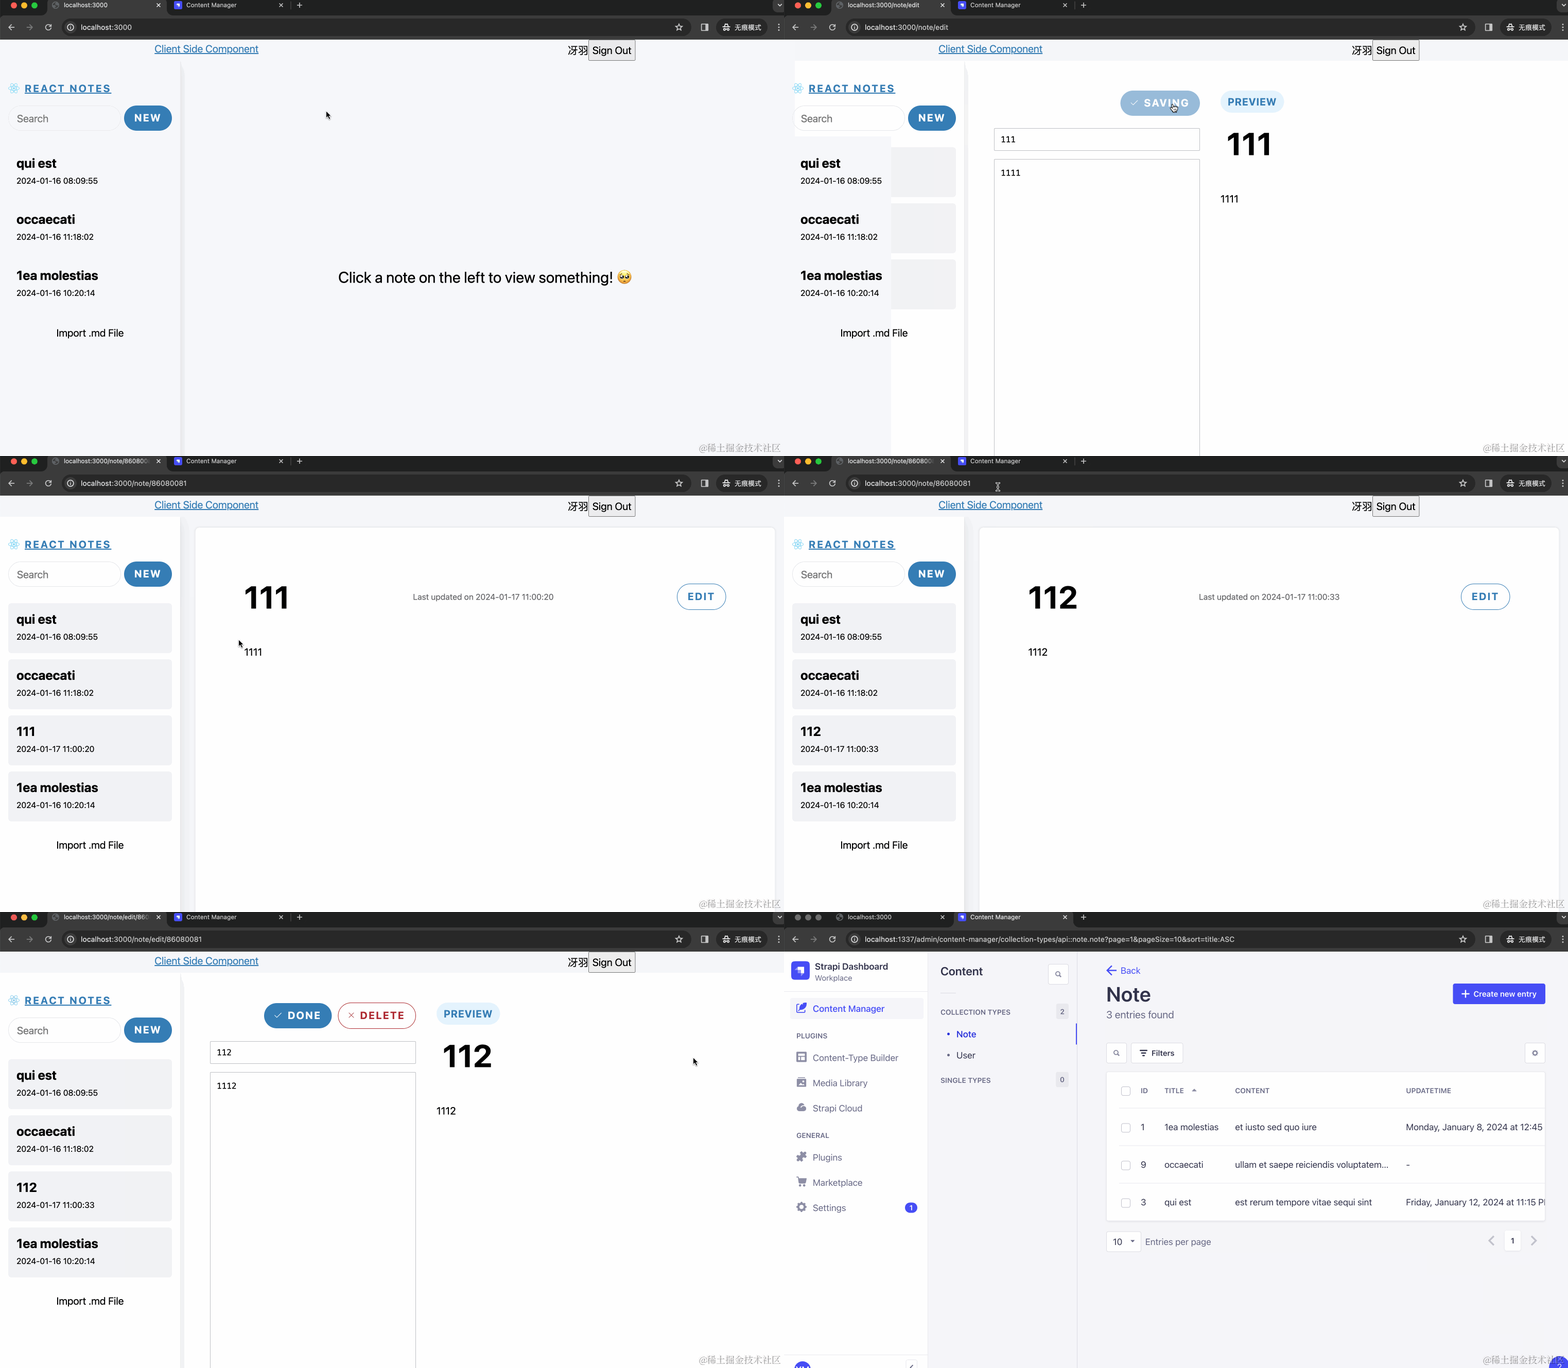
但数据库已经从 redis 替换为了 mysql,而且我们可以通过 Strapi 快捷的查看到数据库中的数据。
### 总结
那么今天的内容就结束了,本篇主要是为大家介绍 Strapi 以及如何连接 MySQL 数据库,借助 Strapi 的可视化界面,可以快速创建 REST 接口,非常适合在一些接口并不用复杂的项目中使用。
本篇的代码我已经上传到[代码仓库](https://github.com/mqyqingfeng/next-react-notes-demo/tree/main)的 [Day 9](https://github.com/mqyqingfeng/next-react-notes-demo/tree/day9) 分支。直接使用的时候不要忘记在本地开启 Redis。
### 参考
1. [Welcome to the Strapi Developer Docs! | Strapi Documentation](https://docs.strapi.io/dev-docs/intro)
2. [Configuring MySQL on your Strapi project](https://strapi.io/blog/configuring-strapi-mysql-database)
3.